


Looking forward to exploring and capturing the sights of your next travel destination? A compact, portable mirrorless camera will be your best friend, especially with the right choice of lenses. Here’s how I managed to capture five different types of scenes with the EOS RP, a standard zoom lens (RF24-105mm f/4L IS USM) and a macro prime lens (RF35mm f/1.8 Macro IS STM). (Reported by Teppei Kohno)

1. Take advantage of the beautiful morning light to photograph streets in fine detail

EOS RP/ RF24-105mm f/4L IS USM/ FL: 105mm/ Aperture-priority AE (f/11, 1/250 sec)/ ISO 200/ WB: Auto
The direction of light from the morning sun is perfect for bringing out dimensionality
For a good start to the morning, why not find somewhere high with an amazing view of the city?
If you shoot in the morning after the sun has risen, the light is ideal for photographing buildings as the sun is not too low. This results in a diagonal lighting angle that casts the just the right amount of shadow in the right places, bringing out a sense of dimensionality in buildings and streets.
Pro lens tip: Use a long focal length to get a tighter composition
Many people will be tempted to use a wide angle to shoot such scenes, but this tends to capture unnecessary space, which could make the shot look scattered.
Instead, use a telephoto focal length to capture one interesting part of the scene. For example, you could aim to get a closer shot of an iconic building. This will result in a tighter composition and have greater impact.
105mm: Clear subject of interest

40mm: Captures everything

The examples above show how different focal lengths have drastically different effects. Using a wider angle (40mm) gives a vast, open feel, whereas a longer focal length (105mm) draws attention to the closely-clustered buildings, resulting in a powerful image.
Also see: Professional Composition Techniques (3): Making Good Use of Lenses
2. Macro lenses: Perfect for café shots

EOS RP/ RF35mm f/1.8 Macro IS STM/ FL: 35mm/ Aperture-priority AE (f/2.2, 1/250 sec, EV+0.3)/ ISO 400/ WB: Auto
To capture the details on food, use a macro lens. To also capture environmental details, try a wide-angle macro lens.
Stopping by a cafe or restaurant for a break? Chances are that the shutterbug in you will want to take pictures of the food. What better lens to capture a sharp shot of each dish in close-up, tantalising detail than a macro lens?
A wide-angle macro lens like the RF35mm f/1.8 Macro IS STM allows you to capture not just the details of the food, but also the background ambience. Great for preserving memories of where you had that delicious buttercream sponge sandwich cake.
Tips:
- Find a seat next to the window. Side lighting is great for not just for photographing food, but also portraits.
- If you want to create background bokeh, shoot as close to the subject as you can. It can be harder to focus with a shallower depth-of-field, but using the Touch Shutter should help.
Pro lens tip: Don’t forget that macro lenses are good for pull-back shots too!
At closest focusing distance

A little further away from the subject

A 35mm macro lens is great for various kinds of shots. When you shoot at closest focusing distance, you get a tight shot that showcases the texture of the food. If you shoot from further away, the angle-of-view is wide enough to capture environmental details. This lens also has a wide aperture, which lets you shoot indoors easily.
Also see: Mouth-watering Macro: The Art of Close-up Food Photography
3. See an interesting vehicle? Freeze it for posterity

EOS RP/ RF24-105mm f/4L IS USM/ FL: 24mm/ Aperture-priority AE (f/11, 1/1,000 sec, EV+0.3)/ ISO 800/ WB: Auto
Increase the ISO speed to achieve a sharp image of moving subjects
Iconic vehicles, a flock of birds flying in formation…chances are that many of the shooting opportunities you come across on your trip will involve some kind of moving subject.
For large subjects (e.g: vehicles) and subjects that tend to appear in a group (e.g: birds), you will usually want to use a narrow aperture and shoot at a wide angle to ensure a sharp image. But as the rules of exposure goes, a narrower aperture requires a slower shutter speed to ensure sufficient exposure, which in turn increases the chance of subject blur.
To get around that, increase your ISO speed to bump up the shutter speed.
Tip: Set the customisable control ring on your RF lens/EF-EOS R mount adapter to control ISO speed, and just a turn of the ring is all you need to change the ISO setting. Perfect for capturing fleeting moments!
Pro lens tip: To get shots that look sharper, use a narrower aperture
Sharp at f/11, 1/1,000 sec, ISO 800

Too soft at f/4, 1/250 sec, ISO 100

These two images of a bus were shot from around the same angle. The one shot at the maximum aperture (f/4) at focal length 65mm has a depth-of-field that is so shallow, the shot looks soft. Deep focusing the shot with a narrow aperture helped to make the shot look sharper.
Camera setting hack: How to be prepared for sudden shutter opportunities
Keep your default aperture setting narrow enough to ensure a large depth-of-field. That way, when an unexpected photo opportunity arises, you can quickly get a relatively sharp shot without worrying too much about where to place the focus.
Also see: Camera Settings for Capturing Decisive Moments: An Airplane Flying Past a Rainbow
4. Chase the shadows, especially at dusk

EOS RP/ RF24-105mm f/4L IS USM/ FL: 28mm/ Aperture-priority AE (f/11, 1/500 sec, EV-0.3)/ ISO 100/ WB: Auto
Evening: The perfect time for shooting in backlight
You get especially beautiful sunlight at dusk when the sun is just beginning to set. If you shoot in backlight, incorporating the shadows of passers-by and buildings into your image can give you a very dramatic shot. This is because the bright sun contrasts beautifully with the elements in front of it and the shadows that are cast.
Tip: The lower the sun is on the horizon, the longer the shadows.
Pro lens tip: When taking a low-angle shot, secure your camera by holding your lens
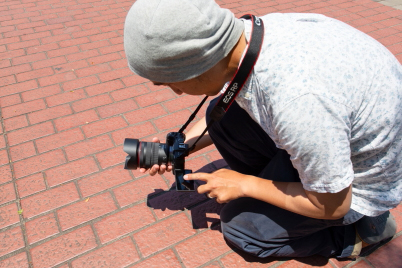
I took the shot above while kneeling on the ground. When you have to shoot from a low position and low angle like this, secure the camera by holding your lens firmly from the bottom with one hand. That leaves your other hand free to operate the camera.
The image was shot in Live View, using the Vari-angle monitor and Touch Shutter.
Know this: RF lenses are designed to reduce flaring and ghosting
When it comes to backlit shots, flaring and ghosting is usually a huge concern as these can cause image quality to deteriorate. RF lenses are designed to minimise their occurrence, so you should be able to shoot in backlight without much issue.
Also see: How I Nailed the Shot: Golden Hour On the Road
5. Take a slow shutter shot—by hand!

EOS RP/ RF24-105mm f/4L IS USM/ FL: 43mm/ Shutter-priority AE (f/5.6, 1/4 sec, EV+0.6)/ ISO 800/ WB: Auto
With up to 5 stops’ image stabilisation, camera shake is greatly reduced
As night falls, cities take on a different, dazzling charm. Capturing this should be easy with the optical image stabilisation (IS) system on the RF24-105mm f/4L IS USM and RF35mm f/1.8 Macro IS STM. This, in combination with the Dual Sensing IS system in the camera, which uses information from the image sensor as well as gyro sensors in the lens to counteract camera shake, ensures an image stabilisation effect of up to 5 shutter speed stops.
I took full advantage of the IS system in the handheld shot above, where I used a slow shutter to create motion blur from the taillights of a passing car. The full-frame image sensor has ensured an excellent rendering of details even with the rather high ISO speed of 800.
When you want to travel light, sometimes, there’s nothing more delightful than being able to take low light shots without a tripod.
Pro lens tip: Find a shutter speed that gives just the right amount of motion blur
1/4 sec

1/10 sec

Motion blur can add an interesting accent to a shot of night scenery, but be mindful of how much blur you create. In the above examples, you can see how a shutter speed of 1/4 of a second resulted in more motion blur in the car, creating a greater sense of dynamism.
Caution: Too much motion blur can make it hard to see what’s in your image, so don’t go overboard!
Also see: Camera Settings to Use for Awesome Slow Shutter Shots!
Equipment used

Find out more about RF lenses in:
6 Significant Features of RF Lenses
Receive the latest update on photography news, tips and tricks.
Be part of the SNAPSHOT Community.
Sign Up Now!About the Author
Born in Tokyo in 1976, Kohno graduated with a Social Work degree from the Department of Sociology of Meiji Gakuin University, and apprenticed with photographer Masato Terauchi. He contributed to the first issue of photography magazine PHaT PHOTO and became an independent photographer after that, in 2003. The author of many books, Kohno not only shoots all sorts of commercial photographs, but also writes prolifically for camera and other magazines.

.jpg "trending tips")


