


Capturing sunrises (and sunsets) are always a challenge. Changing light conditions mean you only have the briefest of moments before the colours start to fade. How do you win this race against time? Here are some of the techniques used by professional photographers to capture the vivid colours of sunrise. (Reported by: Yoshio Shinkai)
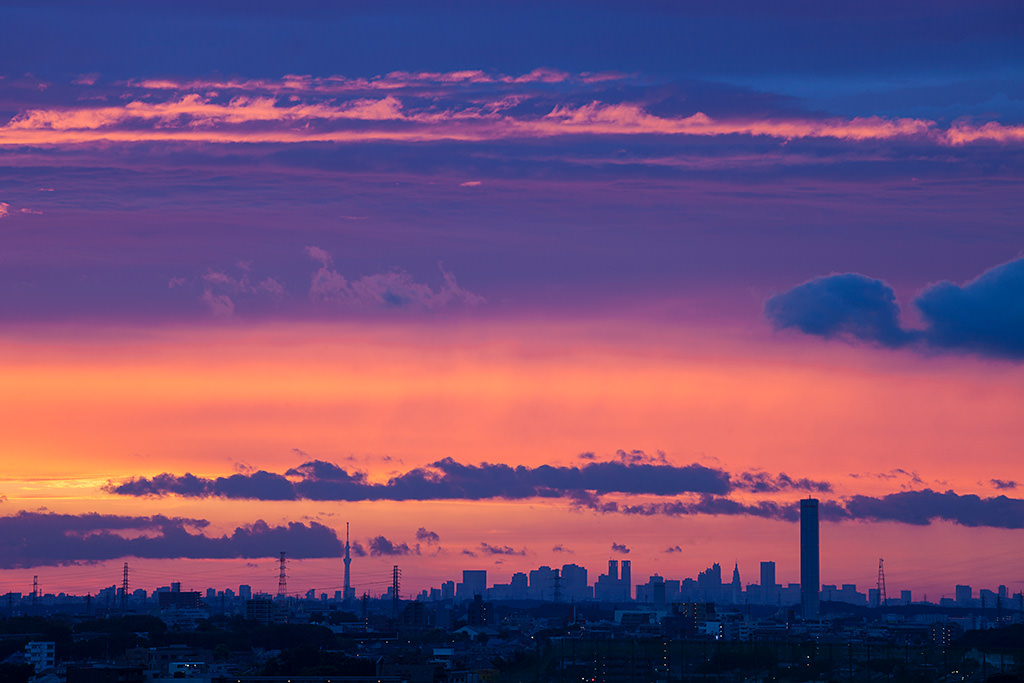
EOS 5D Mark II/ EF70-200mm f/4L IS USM/ FL: 176mm/ Aperture-Priority AE (f/11, 1/6 sec, EV±0)/ ISO 100/ WB: 3,800K
If you don’t act quickly, the vibrant colours of sunrise will fade away. It’s good to have clear idea of how you want your finished product to look before you start shooting. Planning beforehand enables you to set up and get into position right away. This was how I managed to take several shots of the sunrise at its most vivid!
The most dramatic colours appear 30 minutes before sunrise
The photo in the main picture was taken on a summer day in Tokyo, from a location that provided a view of a cluster of high-rise buildings in Shinjuku as well as the Tokyo Skytree. I made sure I finished setting up some time before the sun was forecast to rise, and waited.
As colour tones of the sky change rapidly from the moment the sun starts to rise, it’s a race against time if you want to capture a precise moment, such as when the colours are at their most vivid. It’s therefore essential to plan ahead and use the right settings. For this shot, I paid particular attention to 3 settings: focal length, f-number, and white balance.
(Check out this article for another take on how to capture breath-taking landscapes in the early morning)

Point 1: Draw in the city scape with a focal length of 176mm
I wanted to be able to show the colour gradations in the tones of the sunrise, while at the same time, express the cityscape as a silhouette. In order to do that, I used a 176mm telephoto lens which gave a perspective compression effect that “drew in” the cityscape. Having the buildings appear as a small cluster brings out the dynamic appearance of the sky.
Point 2: Depict fine details with f/11
If you use an aperture that is too narrow, a phenomenon known as diffraction occurs and degrades image quality. This scene does not require great depth of field as it depicts a distant view, so even f/8 would have been fine. However, because there was a clear contrast between light and shade, I chose the even narrower aperture of f/11 so that details would not become blurred.
Point 3: Set WB to 3,800K to make the clouds appear bluer
The reason I set the WB to 3,800K was that the clouds had a slightly bluish appearance, which I felt was a very attractive colour. Of course, I also aimed to emphasize the red tones of sunrise. Take care if using Auto WB, as the details in the clouds bathed in blue tend to get lost with this setting.
Tip: The colours are usually at their most vivid 30 mins before sunrise
Timing is key when to comes to sunrise photography. Colours are usually at their most vivid about 30 min before the forecast sunrise time, so set up and be ready and waiting way before that. (In the meantime, you may enjoy the pre-dawn blue hour, but it would probably be better to leave the blue hour shots to another day because they require very different camera settings).
Also, weather can influence how your shots turn out. The sunrise looks even more beautiful when there are clouds around, so it is good to aim for a day when a spell of fine weather is about to end. If you are shooting in a country with 4 seasons, summer is also a good time.
Now that you know the key to capturing fiery sunrises, how about capturing some dramatic evening shots ?
About the Author
A monthly magazine that believes that enjoyment of photography will increase the more one learns about camera functions. It delivers news on the latest cameras and features and regularly introduces various photography techniques.
Published by Impress Corporation
Born in Nagano in 1953, Shinkai started travelling throughout Japan with a large-format camera to shoot landscape photography in 1979. Currently, he shoots for a wide range of media, ranging from posters and calendars to travel brochures and photography magazines.


