


In Lesson 6, I will explain ways to adjust the brightness of your images. If you intend to start using a mirrorless camera, or have just purchased a new camera, this series of articles provide easy-to-understand lessons on techniques for capturing charming photos using the EOS M, which boasts high image quality and simple operability even by beginners. By learning the basics of cameras and photography, you will soon be able to produce the shots you desire with ease! (Photos by: Takeshi Akaogi, Written & Organized by: Camera Biyori Editorial Department)
Q: I can't produce images in the desired "brightness"
A: Depending on the subject and surrounding conditions, you might not be able to produce photos in the intended brightness. In this case, try adjusting the brightness using the "Ambience-based shots" feature. By further controlling the brightness, you can add variation to the image for more enjoyable effects.
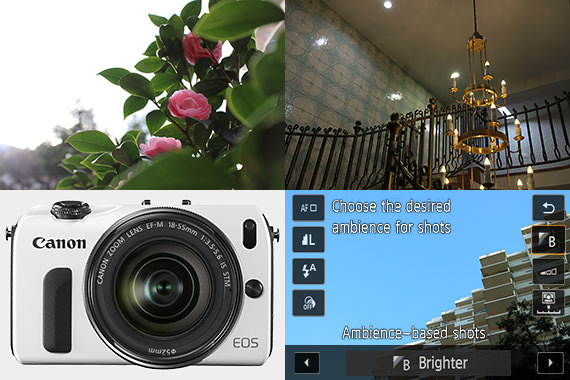
Operating "Creative Auto" to adjust the "brightness"
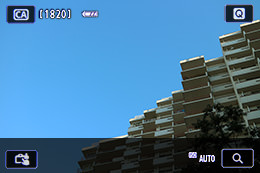
1: Tap the "Q" icon at the top right corner of the screen
Tap the "Q" icon, which is the shortcut for the Quick Control menu.
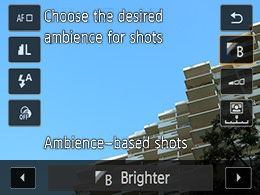

2: Select "Brighter" or "Darker"
Tap the second icon from the top at the right side of the screen. From the "Ambience-based shots" menu, select an ambience according to your preference by using the Left/Right (triangular) buttons to darken or brighten the image.
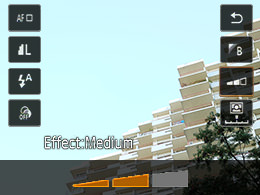
3: Adjust brightness to one of the three levels
Tap the third icon from the top at the right side of the screen to display the "Effect" option. Select the extent to which you want to brighten (or darken) the image.
Let's Try! "Bright" & "Dark" Photos
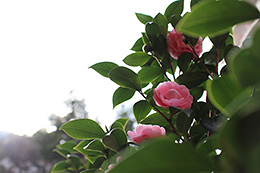
Brighter

Before
When a shot is taken in a backlit condition, the subject would turn out dark in the "Standard setting."
After
By selecting "Brighter" for the image, which would otherwise turn out too dark in the "Standard setting," you can obtain the desired brightness.
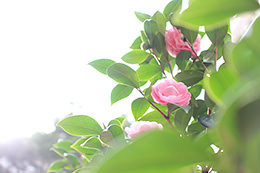
Variation
By setting the ambience effect to "High," you can produce a shot with a refreshing and pleasant feel.
Darker
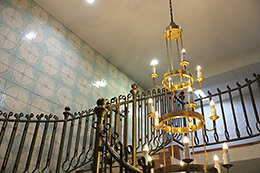
Before
When shooting in a dimly-lit indoor scene, using the "Standard setting" would result in an image that is brighter than what you see.
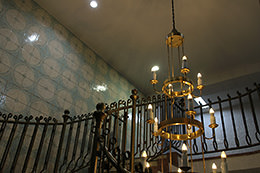
After
By selecting "Darker" for the image, which would otherwise turn out too bright in the "Standard setting," you can obtain a brightness level close to what you see.
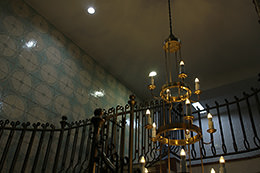
Variation
By setting the ambience effect to "High," you can produce a shot with a mild and calm atmosphere.
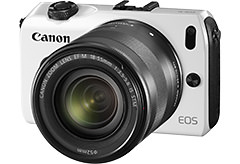
Canon's first mirrorless camera, the EOS M, comes in four color variations (black, red, white, and silver) so you can pick one according to your preference.

As a photographer, Akaogi works mainly for magazines and writes books introducing photography and practical tips. He also teaches at photography workshops.
http://www.flipphoto.org

Camera Biyori is a Japanese photography magazine introducing charming photos and daily joy with cameras. Suggesting fun activities relating to cameras and photography, Camera Biyori editorial department also offer the "Camera Biyori Photography School" to recommend its readers to engage in photography and have fun.
Published by Daiichi Progress Inc.

