


EOS 5D Mark IV Tips: 3 Handy New DPP Features for Correcting DPRAW Images
Dual Pixel RAW (DPRAW) is a new recording format available on the EOS 5D Mark IV. With it, you can process your images in various ways using the Dual Pixel RAW Optimizer, which comes with the Digital Photo Professional 4.5.0. Read on to find out more about the three corrective effects you can use. (Reported by: Ryosuke Takahashi)

DPRAW is a new RAW recording format that makes the most of the unique property of the Dual Pixel CMOS AF, where one image pixel on the CMOS sensor is constructed from two photodiodes. Each photodiode captures image information from a different point of view, which is then appended to a RAW file to provide parallax information that can be used during post-processing.
DPRAW can be used in both Live View and viewfinder photography, allowing you to perform post-processing using features such as Image Microadjustment, Bokeh Shift, and Ghosting Reduction.
Image Microadjustment lets you compensate for a lack of resolving power resulting from the slight misalignment of the focus point, whereas Bokeh Shift allows you to finely correct the positioning of the bokeh effect in the foreground or background. Ghosting Reduction provides a certain level of compensation for ghosting and flaring that is caused by backlight. However, the effect of the various corrections available using DPRAW will vary depending on different factors such as the f-value used, the shooting distance as well as the focal length.
Let's take a closer look at the three corrective effects.
Image Microadjustment
With Image Microadjustment, tiny off-focus areas are corrected to provide a high level of resolution.
EOS 5D Mark IV/ EF100mm f/2.8L Macro IS USM/ FL: 100mm/ Aperture-priority AE (f/2.8, 1/250 sec., EV+0.3)/ ISO 400/ WB: Auto
Before
The focus point ends up slightly behind the stamen due to the flower swaying in the wind.

After
The focus point is shifted slightly ("microadjusted") to achieve the intended sharpness.


Before

After
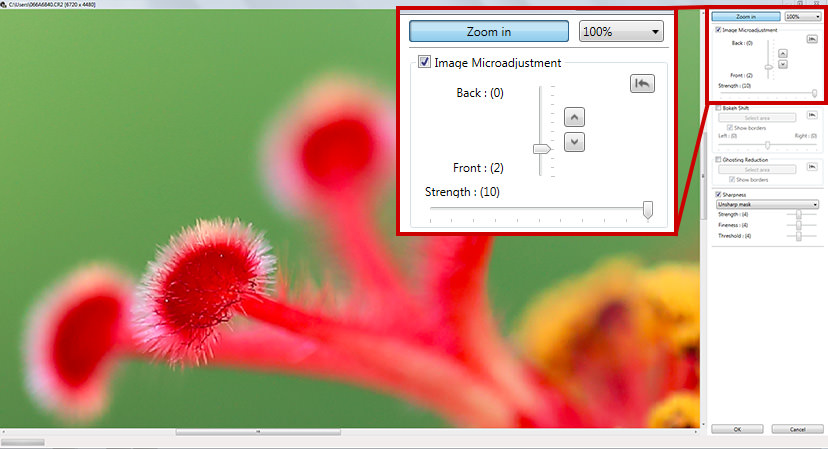
How to use Image Microadjustment
This feature is effective for scenes with a shallow depth of field, such as for macro photography as well as portraits. By recording in DPRAW beforehand either through the viewfinder or in Live View, you can then adjust the focus point during post-processing. Although this method does have its limitations, it allows you to obtain the best shot in situations when other means are ineffective in correcting areas that are fractionally off-focus due to the impact of the wind or for other reasons. With this feature, you can adjust the sharpest point forward or backward, and the intensity of that effect.
Bokeh Shift
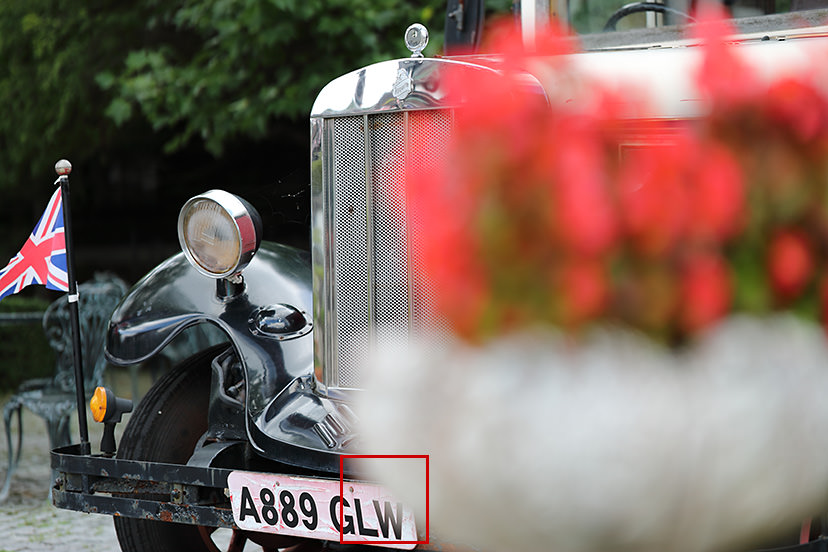
This feature is used to fine-tune the bokeh for a more pleasing result.
EOS 5D Mark IV/ EF100mm f/2.8L Macro IS USM/ FL: 100mm/ Aperture-priority AE (f/2.8, 1/320 sec., EV+0.3)/ ISO 100/ WB: Auto
Before
The foreground bokeh covered a wider area than expected. The blur over the car plate is a bit distracting.

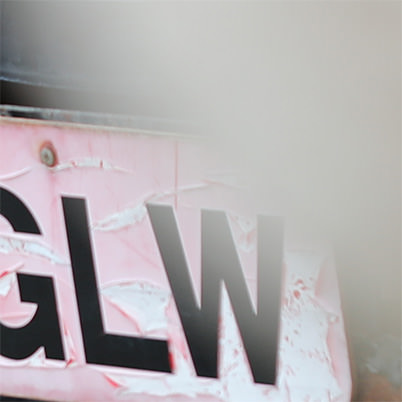
After
The bokeh effect was shifted to the right resulting in a more visually pleasing image.
Before

After

How to use Bokeh Shift
This feature is handy for situations where you are using foreground or background bokeh to achieve a specific effect, such as when shooting portraits and static objects. Here, I was able to make the image more pleasing by shifting the bokeh effect in the foreground to the right.
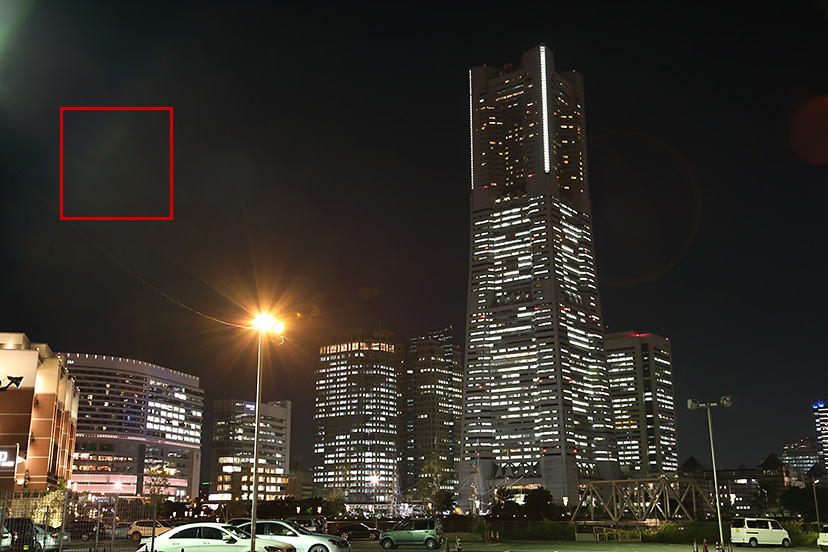
Ghosting Reduction
This feature is used to correct ghosting and flaring, which tend to be overlooked.
EOS 5D Mark IV/ EF24-105mm f/4L IS USM/ FL: 45mm/ Aperture-priority AE (f/5.6, 1 sec., EV-0.3)/ ISO 400/ WB: Auto
Before
The light source caused faint ghosting to appear in the image.

After
Reducing ghosting improved the quality of the image.

Before
After

How to use Ghosting Reduction
This feature is handy for nightscape photography as well as photography in backlight. Ghosting Reduction has a limited effect against pronounced ghosting. However, it can provide a certain degree of effectiveness for faint ghosting that tends to be overlooked. This feature can be used for scenes such as those in the photo above where there is no room for error.
Receive the latest updates on photography news, tips and tricks by signing up with us!
About the Author
A monthly magazine that believes that enjoyment of photography will increase the more one learns about camera functions. It delivers news on the latest cameras and features and regularly introduces various photography techniques.
Published by Impress Corporation
Born in Aichi in 1960, Takahashi started his freelance career in 1987 after working with an advertising photo studio and a publishing house. Besides photographing for advertisements and magazines in and out of Japan, he has also been a reviewer for “Digital Camera Magazine” since the launch of the publication as well as published a number of works. In his product and lens reviews, Takahashi particularly advocates photography techniques that bring out the lens performance through his unique point of view and tests. Takahashi is a member of the Japan Professional Photographers Society (JPS).


