


From glistening cuts of meat to delicate desserts, a properly shot and styled food photo can make even the most disciplined dieter cave. Check out these tips and tricks by award-winning photographer Bene Tan that are bound to induce cravings.
What are your top 5 food photography & styling tips when you’re shooting?
During a photo shoot, it is a collaborative team effort where the food stylist and prop stylist take care of the food presentation and set design. Nonetheless, I do conceptualise on the food layout, dabble with food and props on some occasions. Below is some of the food photography and basic styling tips that I would like to share.
Before - It is always good to plan ahead before the actual shoot. We always use dummies as our stand-in so that we know how the composition looks like in camera and it will save on preparation time.
After - This is the final selected shot after making refinements on placement and arrangement of the main subject and props.
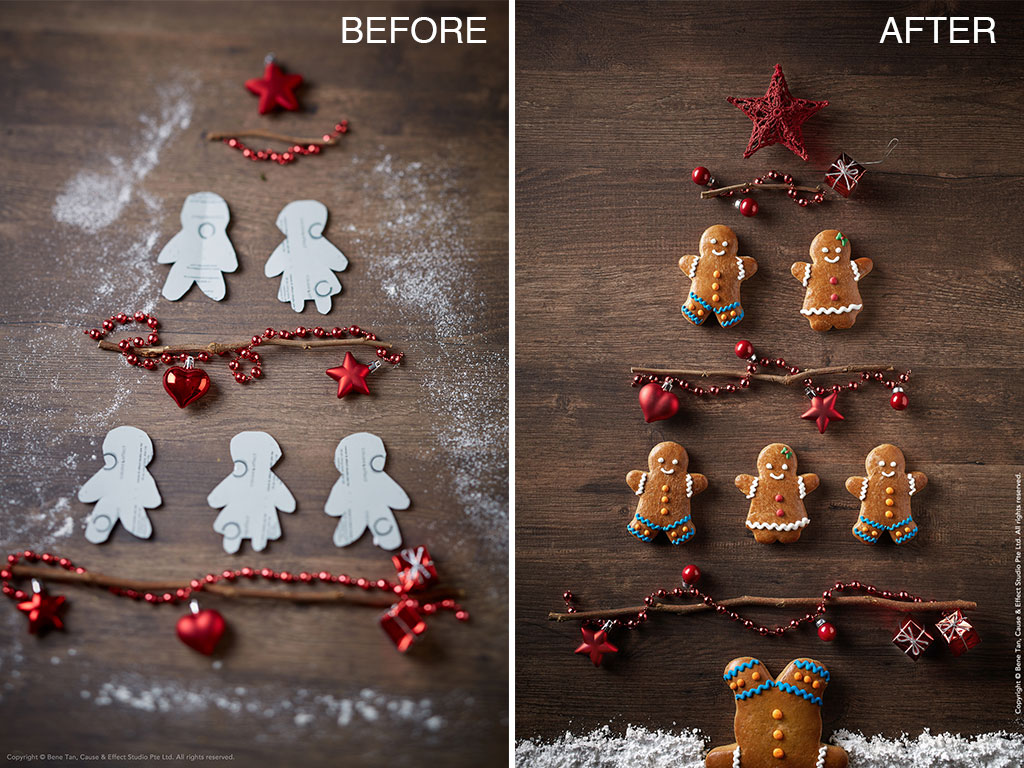
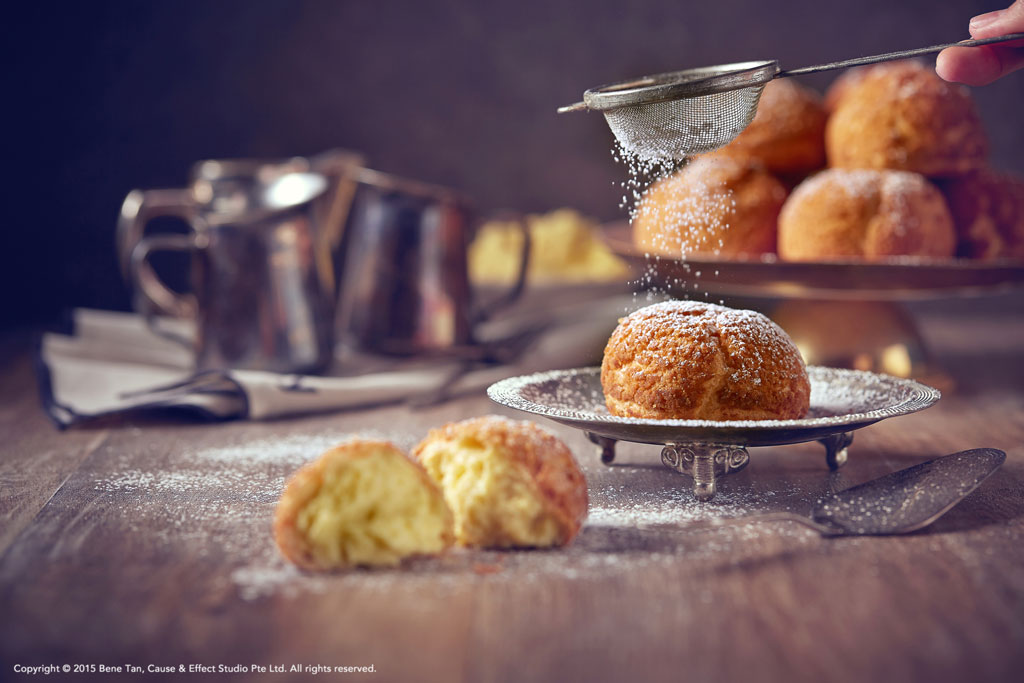
EOS 5D Mark III, EF50mm f/2.5 Compact Macro lens, f/8, 50mm, 1/125, ISO100
Client: Joe & Dough
Tip 1- Have a Plan
Before each photo shoot, sit down and brainstorm. I would kick start my thought process by setting the mood and the techniques to achieve it. Moving on next to evaluate my approaches on how to create visual impact and mouth-watering images.
EOS 5D Mark III, TS-E90mm f/2.8 lens, f/8, 90mm, 1/0.2, ISO200
Client: DW Workshop
Art Director: Sebastian Tay
Tip 2- Create a story
Sketch out the ideas for each shot. Besides focusing on the main subject, consider the props needed to tell the story. For an example, let’s say we wish to create a rustic Christmas evening, picking up items such as worn-out wooden table, vintage crockery and festive lightings will add on to rustic ambience. Although props are essential, they must never overpower the main subject.
Learn more about food styling with these tips: Achieving The Perfect Style
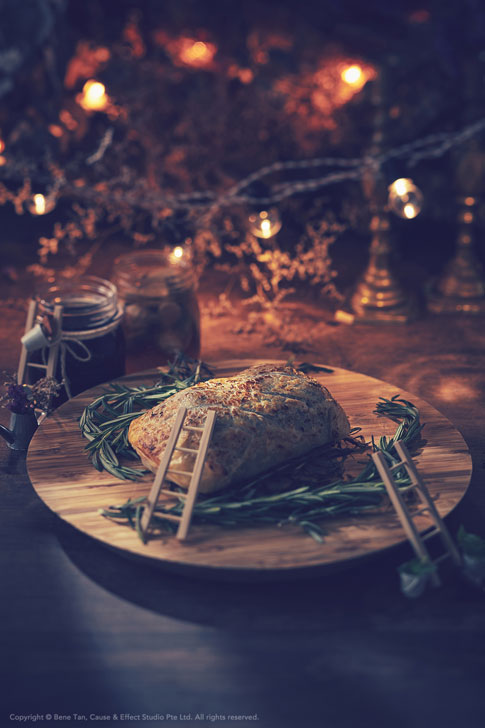
EOS 5D Mark III, TS-E90mm f/2.8 lens, f/5.6, 90mm, 1/1, ISO100
Client: DW Workshop
Art Director: Sebastian Tay
Tip 3 - Be picky with your “Hero”
The main food subject is often referred as the “hero”. Since being the hero, therefore it should look at its very best. Take your time to select, style and create the best of the best. Be strict and picky.
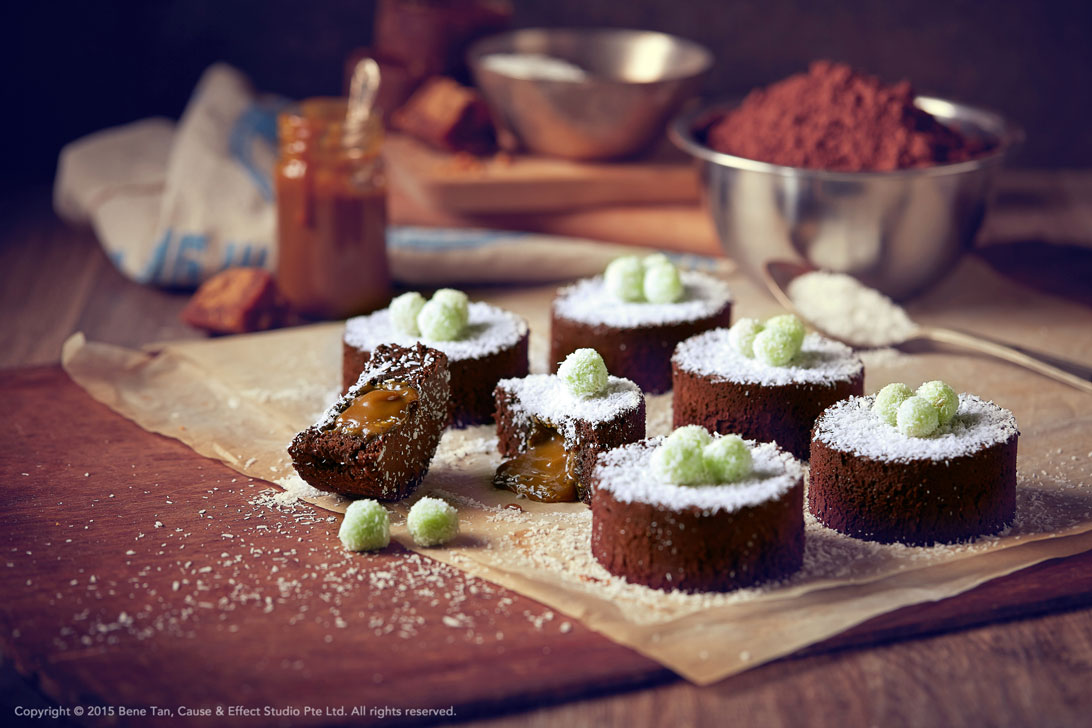
EOS 5D Mark III, EF100mm f/2.8L Macro IS USM lens, f/4, 100mm, 1/125, ISO100
Client: Joe & Dough
Tip 4- Prepare in advance
Fresh quality produce and ingredients not only taste better, but also look better for the camera. Source or pre-order ahead of time if necessary. Start to build a good rapport with your supplier or grocer. Ensure that the food ingredients are stored at appropriate temperature and environment so that they stay fresh throughout the shoot day.
A quick tip for refreshing tired-looking greens is give them an ice bath for one to two minutes. This method works well for lettuce and herbs. It is always good to prepare more ingredients than required. For example, leafy greens could rapidly look wilted under the lightings’ heat, therefore be prepared to make replacements.
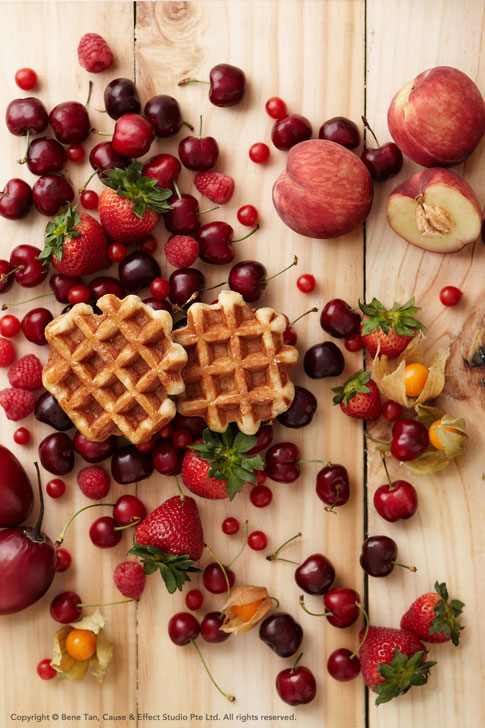
EOS-1D Mark IV, EF24-70mm f/2.8L USM lens, f/4, 68mm, 1/125, ISO100
Client: Mamie Waffles
What are some tricks food photographers can employ when shooting food?
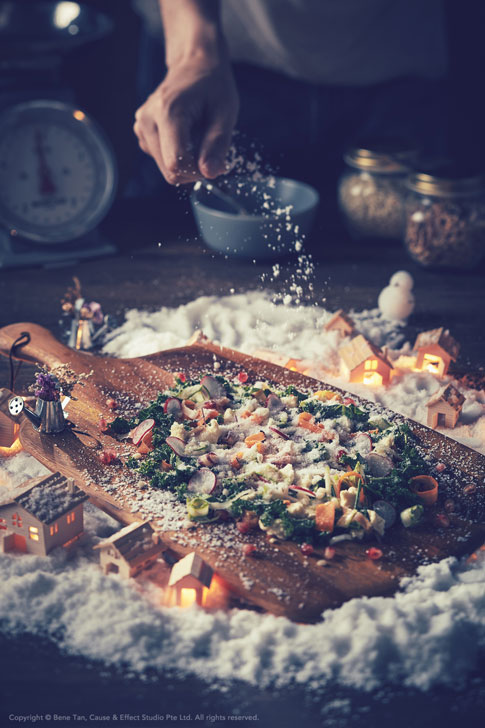
To create a snow-like effect, icing sugar or sea salt are possible alternatives to real snow.
Get inspired and be creative with these tricks: Repurpose Your Christmas Objects for Photoshoot
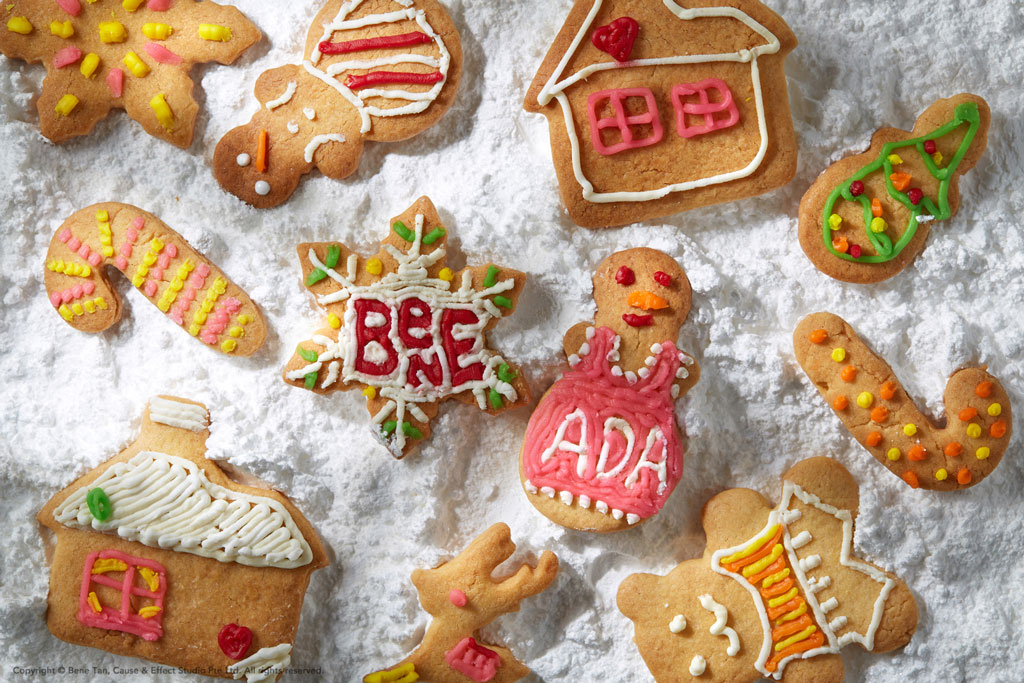
EOS 5D Mark III, EF100mm f/2.8L Macro IS USM lens, f/8, 100mm, 1/125, ISO100
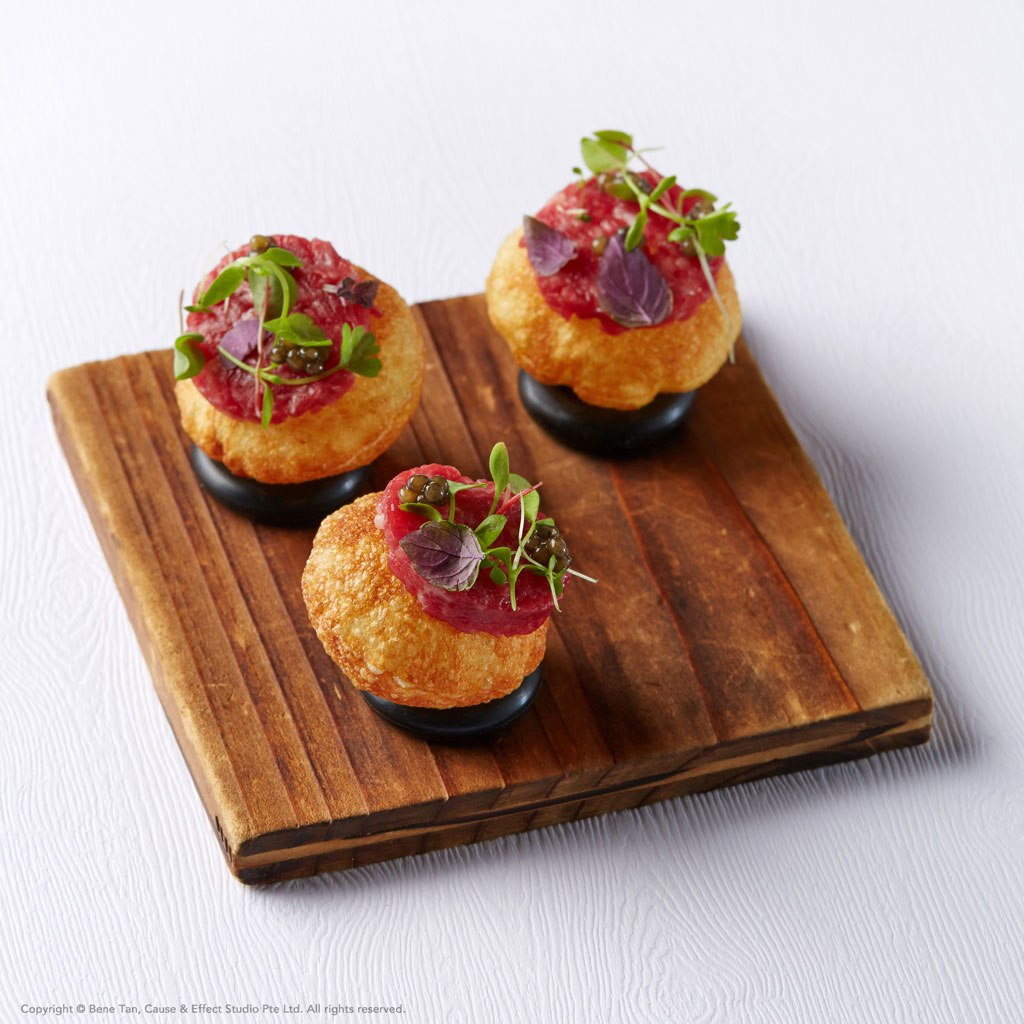
Do you have a preferred lens for food photography?
I personally prefer to use EF100mm f/2.8L Macro IS USM lens for most of my shoot as a macro lens allows me to go very near to the hero especially when photographing smaller subjects. I want to be able to capture the texture and details.
EOS 5D Mark III, EF100mm f/2.8L Macro IS USM lens, f/8, 100mm, 1/125, ISO100
Client: Old Chang Kee
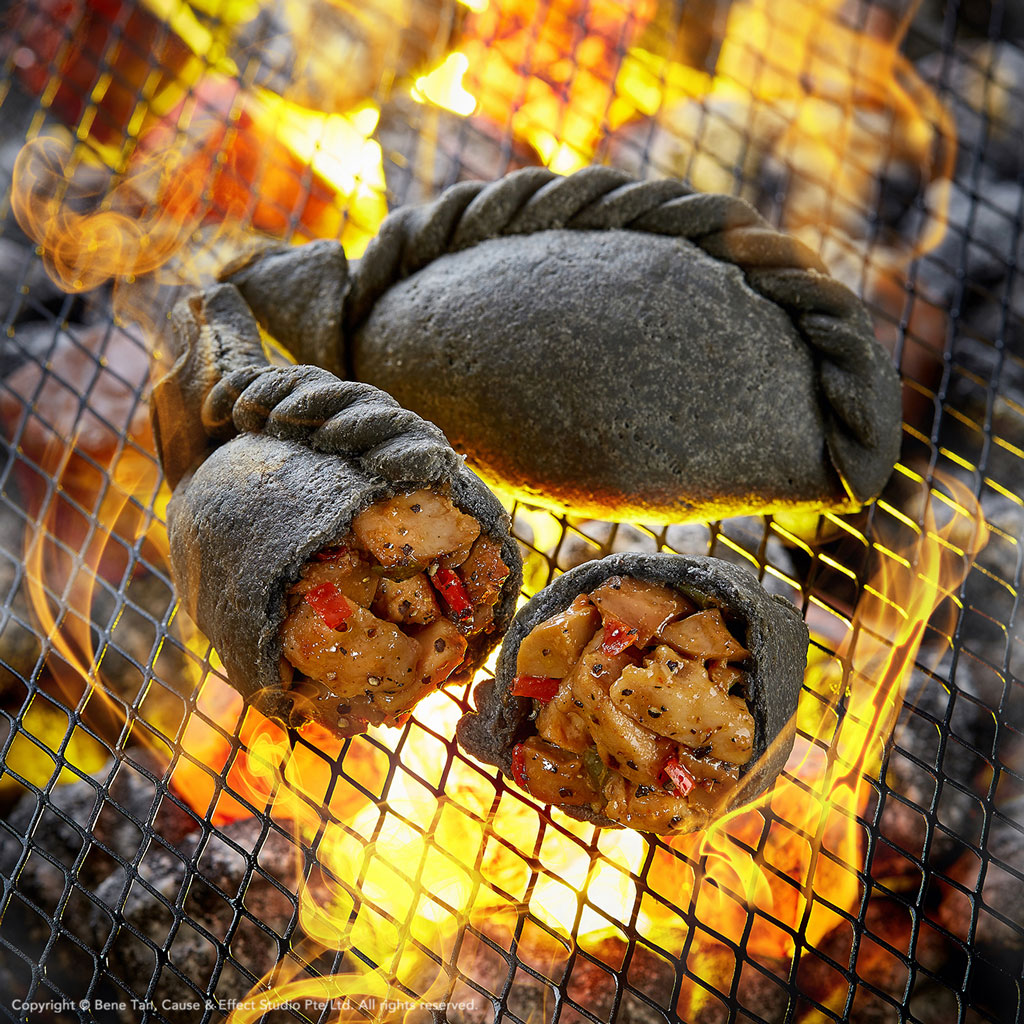
Is there any dedicated equipment specially for food photography?
Having a macro lens or any lens that has macro capability is a must for food photography. As mentioned earlier, most food subjects are far smaller. For food, you need to have the ability to get close to your subject and fill in the entire frame. The longer the focal length of the lens, the shallower depth of field. This also helps to “crop off” unwanted background. The reason is due to lens compression, which creates a sort of “flattening” effect. The background objects will appear larger and it also appears closer to the subject.
EOS 5D Mark III, EF100mm f/2.8L Macro IS USM lens, f/11, 100mm, 1/125, ISO100
Client: Restaurant André
What are the essentials you bring along for a shoot?
Beside the macro lens, a colour checker for every shoot is crucial. It allows me to do my custom white balancing and get closer to the actual colour. Another must-have is a solid tripod. With a tripod, it helps to prevent image blur due to camera shake and you can take your time to style the set without holding your camera. Lastly, bring along a black coloured jacket if you are wearing white or colourful shirt. The reason is to prevent from light bouncing off from what you are wearing if you are shooting very near to the subject. The light will cast some unwanted colourcast onto the subject.
EOS 5D Mark III, EF100mm f/2.8L Macro IS USM lens, f/4, 100mm, 1/125, ISO100
Client: Joe & Dough

Colour Checker for custom white balancing

EF100mm f/2.8L Macro IS USM
Look out for more inspiring stories when you sign up for SNAPSHOT!
Photographer Profile
Bene Tan
His affair with photography was not love at first sight. Trained formally in Graphic Design, Bene had a brief brush with photography in art school. It was only ten-odd years later that he picked up the camera again. The hobby quickly took root and becoming a professional food photographer was a natural transition. Work has led him to explore across the world of photography— from commercial, editorial, interior, event, portraiture, fashion, still life to food. He has won Honorable Mentions for his work in the International Photography Awards (IPA) Competition 2016, 2014 and 2013 across Food, Advertising, Still Life, Portraits and Wedding categories He also received a Merit Award in the Master Photography Competition 2013 for his "The Golden Ratio" series.

