


Pro Tips for Improving Your Street-level Architecture Shots
Very often, we find ourselves photographing buildings from street level. It can be quite a challenge to convey the grandeur of a building from such an angle, especially if the structure is large and majestic like the churches and historical buildings you often see in Europe. In this article, we share some tips and tricks from professional photographers to make such street-level shots work out well. (Reported by: Ryosuke Takahashi)

EOS 5D Mark IV/ EF11-24mm f/4L USM/ FL: 11mm/ Aperture-priority AE (f/5.6, 1/640 sec, EV±0)/ ISO 100/ WB: Auto
1. Use an ultra-wide-angle lens
The above shot of a majestic church in a historical district in Europe was taken with an ultra-wide-angle lens, the EF11-24mm f/4L USM. You will find the wide field-of-view of an ultra-wide-angle lens especially handy for photographing buildings in places where streets are narrow.
To make your shots look even more impressive, familiarize yourself with the unique optical characteristics of ultra-wide-angle lenses and learn how to make full use of them.
Learn more about the characteristics of wide-angle and ultra-wide-angle lenses here:
Exploring Wide Angle Lenses Part 1: Photo Effects of Wide Angle Lenses
Lens Basics #6: Wide-angle Lenses
2. Include people in the frame to provide a sense of scale
I decided to use an aperture that was not too narrow so that my shutter speed would be fast enough to freeze the passers-by in motion. Having people in the frame gives viewers a point of comparison—they get a better sense of scale, which makes the building look even more impressive.
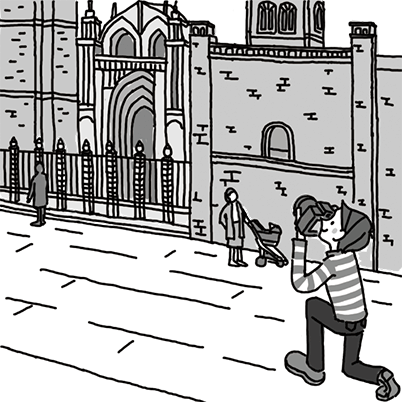
3. Squat or kneel down to shoot, and display the grid
It is easier to adjust how much sky is included in the frame if you squat or kneel to shoot. That will help make your composition more balanced.
For this shot, I used the 11mm end, kneeled on one knee and tilted the camera upward. This angle also gives the impression that the building was towering over everything. Displaying the grid helped me to adjust the degree of perspective effect and the proportion of sky in the frame. I then waited for the passers-by to move to strategic parts of my composition before releasing the shutter.
The finer points: Preventing and correcting aberrations
To make your architectural shots more impressive, the devil is in the details. I tend to pay a lot of attention to minimizing and correcting any aberrations or distortion that might occur. Although lens manufacturers do invest a lot in trying to reduce such aberrations through lens design and special coatings, no lens is perfect and not all aberrations can be completely fixed. Working with distortion and aberration is still part of being a photographer.
For ultra-wide-angle lenses, the most common aberrations you get are vignetting (peripheral light fall-off), chromatic aberrations, and distortion.
Axial (longitudinal) chromatic aberration (one of the causes of colour fringing) and vignetting can be easily prevented by shooting with a smaller aperture.
Distortion and lateral chromatic aberration (another cause of colour fringing) can be fixed only through post-processing or in-camera lens correction software such as the Lens Aberration Correction function.
It is always a good idea to try to fix any aberrations as soon as you can, so if your camera comes with the Lens Aberration Correction, make good use of it! Some cameras models let you preview the effects of distortion correction in real time, which helps you frame the shot more accurately.
Correction 1: Lateral chromatic aberration

The top-right section of the main image, enlarged.
In architectural photography, it is important for edges and straight lines to be sharply depicted and well-resolved. Ultra-wide-angle lenses are more prone to chromatic aberration than other types of lenses, which can cause chromatic aberration and purple fringing in the lines and images. This isn't obvious in this shot because I have used in-camera correction.
Correction 2: Blown highlights that occur with exposure compensation

A: Blown highlights
Ultra-wide-angle lenses are prone to vignetting, which can make the image look underexposed at first glance. Many photographers try to correct that by lifting the exposure with exposure compensation, but this could result in blown highlights. Instead, enable peripheral illumination correction ('Peripheral illum corr.").
Bonus tip: Use the image stabiliser
When shooting in low light conditions, your shutter speed could slow down, which increases the chance of blurring due to camera shake. Enable the optical image stabiliser (IS function) to ensure sharp and steady shots.
Read these articles to learn about Lens Aberration Correction on the EOS 5D Mark IV:
EOS 5D Mark IV: Lens Aberration Correction—A Close-up Look (Part 1)
EOS 5D Mark IV: Lens Aberration Correction—A Close-up Look (Part 2)
For more tips on photographing architecture, also check out the following articles:
Architectural Photography #1: 3 Basic Concepts
Architectural Photography #2: Using Wide-angle/Telephoto Focal Lengths
Architectural Photography #3: Effective Composition Techniques
Architectural Photography #4: Photographing Buildings at Night
Receive the latest update on photography news, tips and tricks.
Be part of the SNAPSHOT Community.
Sign Up Now!
About the Author
A monthly magazine that believes that enjoyment of photography will increase the more one learns about camera functions. It delivers news on the latest cameras and features and regularly introduces various photography techniques.
Published by Impress Corporation
Born in Aichi in 1960, Takahashi started his freelance career in 1987 after working with an advertising photo studio and a publishing house. Besides photographing for advertisements and magazines in and out of Japan, he has also been a reviewer for “Digital Camera Magazine” since the launch of the publication as well as published a number of works. In his product and lens reviews, Takahashi particularly advocates photography techniques that bring out the lens performance through his unique point of view and tests. Takahashi is a member of the Japan Professional Photographers Society (JPS).


