


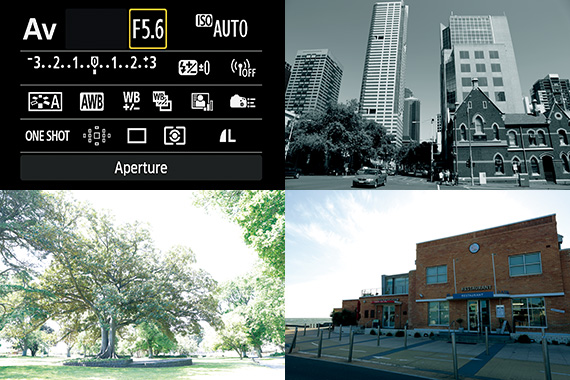
In order to make full use of the wide array of features on the EOS 6D, the key is to learn to utilize "Quick Control," which enables you to alter the settings quickly. In the following, I will explain the steps to make changes using Quick Control, and the main settings that can be adjusted. (Reported by: Ryosuke Takahashi)
Pages: 1 2
Picture Style
Select According to the Subject
Adding a touch of charm
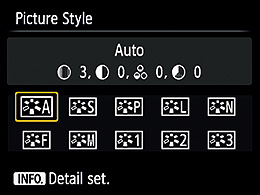
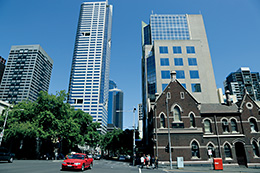
Picture Style is a feature for image production. In the context of a painting, selecting a Picture Style effect can be likened to selecting the color palette or thickness of the brush. A number of preset options that match different scenes are available in the Picture Style menu, so you simply need to make a selection to bring out the features of the subject. In addition, you can also select the [Auto] setting for the camera to analyze the scene and produce the most appropriate image automatically.
Auto

Standard

Portrait
Landscape
Neutral
Faithful
Monochrome
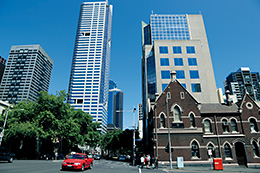
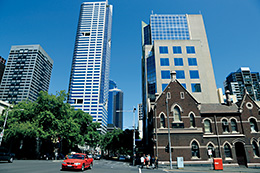
Each Picture Style comes with a different setting for color tone and sharpness. In the example here, you can tell that using a different Picture Style reproduces the color of the sky, greenery, and the red car in a different tone. By magnifying the image further, other differences such as sharpness and contrast also become discernible.
Exposure Comp.
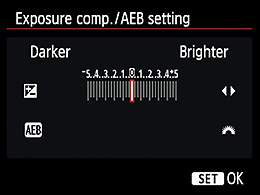
Adjustable up to ±5EV
Fine-tuning the brightness
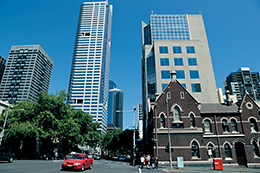
Exposure compensation works to adjust the brightness of a photo, so you can alter the impression of a shot by adjusting the level of compensation. The primary point to bear in mind with regard to the brightness of a photo is to ensure that it resembles the brightness as seen through our eyes. The Auto Exposure function of the camera has been incorporated based on this fundamental principle. Supporting a wide exposure compensation range, not only is the EOS 6D capable of reproducing the appropriate brightness, you can also vary the brightness freely to create a drastically different impression. High- and low-key shots, a technique in photographic expression, can also be produced by utilizing the exposure compensation feature. Mastering this feature therefore helps you to widen the scope of expression.
-3EV

-2EV
-1EV
±0EV
+1EV
+2EV
+3EV
The EOS 6D supports exposure compensation up to ±5EV stops. The examples here illustrate images with compensation in 1-stop increments, but the smallest possible increment is 1/3 stop. Performing exposure compensation alters the brightness of the entire image considerably, which in turn changes the color tone of the subject.
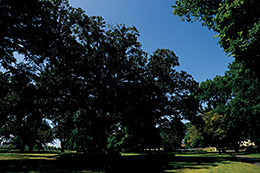
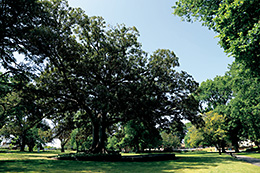
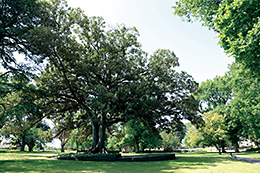
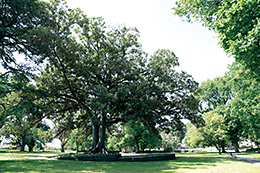
ALO(Auto Lighting Optimizer)
Balancing Highlights and Shadows
Controlling light and shadow
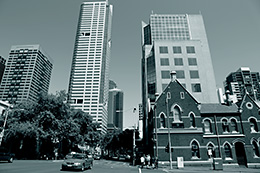
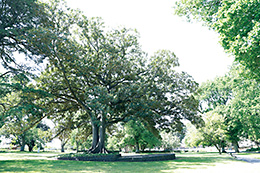
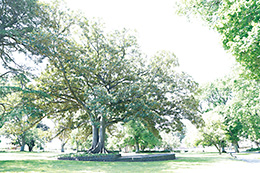
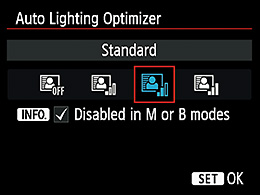
The Auto Lighting Optimizer (ALO) is a feature for correcting the difference in brightness caused by light. It is particularly effective for adjusting the brightness of shadows to create a natural impression. Generally, shooting under bright sunlight tends to result in highly-contrasted images with a large difference in brightness. By using the ALO, you can produce shots with a smoother gradation to soften the impression. The default setting is [Standard], but you can set it to [High] to stress the difference in brightness. To express the intense sunlight in a tropical country, for example, I would use [High] as the basic setting.

Disable
Low
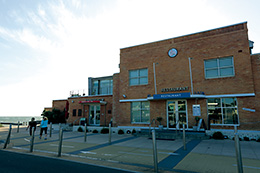
Standard

High
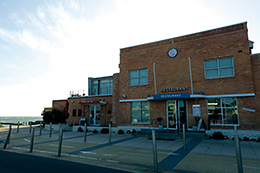
Using the Auto Lighting Optimizer alters the brightness of shadow areas in an image. You can fine-tune the brightness of the shadows while maintaining the tone of the highlights. In this example, the effect is most pronounced in the dark areas of the building, as can be discerned from the photos shot with the [Disable] and [High] settings.

Born in Aichi in 1960, Takahashi started his freelance career in 1987 after working with an advertising photo studio and a publishing house. Photographing for major magazines, he has travelled to many parts of the world from his bases in Japan and China. Takahashi is a member of the Japan Professional Photographers Society (JPS).

