


Once you have learned the name of the different parts of the camera, you are ready to proceed to "Lesson 3" to start preparing for the actual shoot using the camera. Check the name of the different bundled items, and load the battery and memory card into the camera at the same time. When you are using the camera for the first time, you also need to format the memory card, set the time and date, and adjust the diopter so you can enjoy using the viewfinder fully. (Reported by: Ryosuke Takahashi)
1: Check the package contents
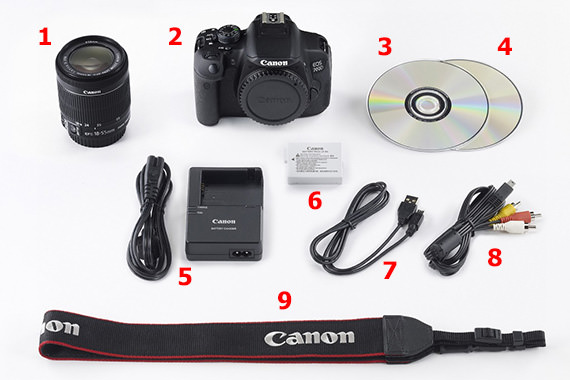
Check that all the items are inside the package and keep the warranty card in a safe place
While you probably wish to use the camera immediately upon purchase, begin by carefully checking and organizing all the items supplied. After checking, it will be advisable to keep those items that might be easily misplaced, such as the cables for connecting the camera to external devices and the warranty cards for the camera and lens, in the empty box. Also, store the CD-ROM together with the warranty cards and other items after installation to the PC is complete. As there is only one warranty card each for the camera and the lens, please handle with due care.
1: Kit lens
2: Camera body
3: EOS DIGITAL Solution Disk
4: Software instruction manual
5: Battery charger (including power cord)
6: Lithium battery
7: Interface cable
8: Stereo AV cable
9: Camera strap
* In addition, please also store the instruction manual, warranty card, and the box carefully. The availability of a kit lens and the lens type provided differ with the product you have purchased.
2: Preparing the battery
1: Set the battery to the charger
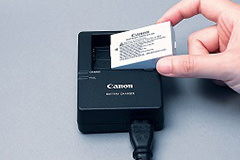
Set the battery to the charger in the correct direction. Insert fully to ensure full and proper contact.
2: Plug the charger into a power outlet
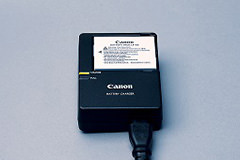
Plug the charger into a power outlet. The charge lamp lights up in orange when the battery is charging, and switches to green once charging is complete. It takes about two hours to fully charge a completely exhausted battery.
3: Set the battery into the camera
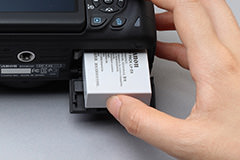
Open the cover of the camera battery compartment and insert a fully charged battery. Hold the battery with the contacts facing the camera. Check the orientation, then insert the battery.
Trivia
Some useful information about the battery
Without a battery, it would be impossible to operate a DSLR camera, let alone taking photos with it. Before charging, check if there is any damage on the battery, and whether the terminals are dirty. Also, the battery life changes with the temperature and humidity. It is recommended that you carry a spare battery when shooting in cold regions, in particular.
Trivia
Prepare a memory card separately
Memory cards are not included in the camera kit, so they have to be purchased separately. Get ready a memory card that has the capacity you need. For example, to perform shooting with the highest JPEG image quality using an 18-megapixel camera, the size of a single photograph is about 5 to 10MB. With an 8GB memory card, it is possible to store more than 1,000 photos. This can be used as an indicative measure of the capacity. In addition, the types of memory card that are compatible vary with the camera. Please read through the instruction manuals carefully and purchase the correct type.
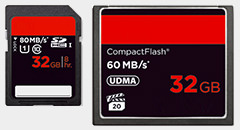
Left: SD Card
Right: CF Card
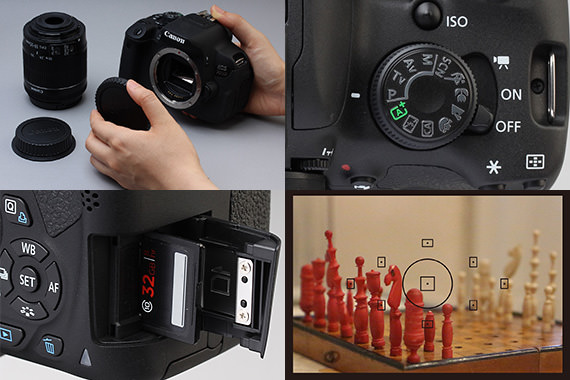
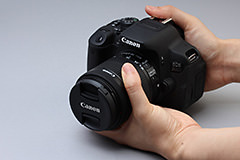
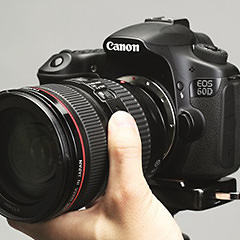
3: Attaching the lens
1: Remove the rear lens cap and the body cap
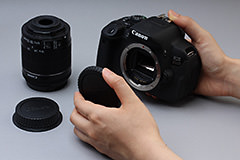
Remove the body cap and rear cap of the lens to attach the lens. Take care to prevent dust or dirt from entering the camera body.
2: Align the indices and mount the lens
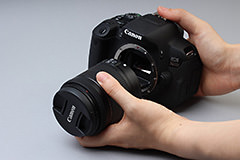
Align the white mount index on the lens with that on the camera, and steadily mount the lens to the camera body. Ensure that the lens is not slanted during mounting.
3: Lock by turning the lens
After firmly attaching the lens to the camera body, lock it by turning the lens in the clockwise direction until a click sound is heard.
4: Initializing the camera
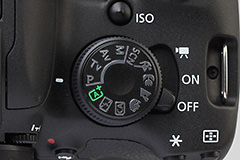
1: Turn on the power
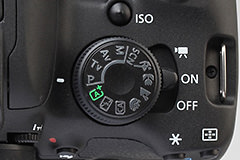
Once the battery is loaded and the lens attached, you can switch on the camera. The position and shape of the switch vary according to the model.
2: Setting the date/time
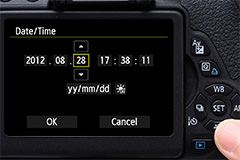
When you turn on the power for the first time, initial setting will be necessary. Set the date and time by pressing the cross keys. Depending on the model, the Time Zone setting screen is displayed instead of the Date/Time settings screen.
3: Confirm date/time setting
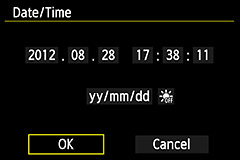
Images that you have taken can be organized more easily if the date and time are correctly input. After the date/time setting is complete, select OK and go back to the menu.
5: Inserting the memory card
1: Turn off the power
Before inserting the recording media (memory card), turn off the power of the camera. The position and shape of the power switch vary with the model.
2: Insert the memory card
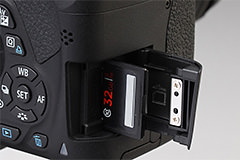
Insert, in the correct orientation, a recording media (memory card) of a format that is compatible with the camera. Insert the card correctly according to the direction indicated on the memory card slot cover.
3: Close the slot cover and turn on the power

After fully inserting the memory card, close the memory card slot cover and make sure that it is securely locked.
Trivia
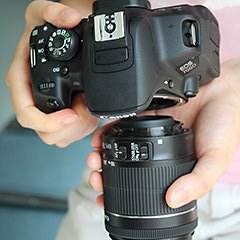
When changing the lens outdoors, the camera body mount should face downwards
Lens interchangeability is a characteristic of DSLR cameras. During lens exchange outdoors, however, dust is likely to enter as the inside of the camera is exposed. Even for models with a dust deletion feature, make sure to point the body mount downwards and change the lens as quickly as possible.
Trivia
White index mark for EF-S lenses, and red for EF lenses
The structure of the EF lenses and EF-S lenses is slightly different. To avoid installation of EF-S lenses by mistake to a camera body that does not support them, a white index is used separately. Align the white index on the lens with that on the camera body, and mount the lens securely. Also, note that the EF-S lens cannot be used on the Canon EOS Digital series with the exception of the APS-C format cameras.
To attach an EF lens, align the red index
To attach an EF-S lens, align the white square index
6: Formatting the memory card
1: Display the [Format card] screen
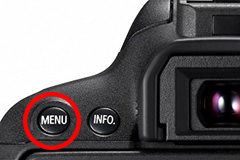
Press the MENU button at the back of the camera body, and use the cross keys to select and display the Set-up 1 menu, which includes the [Format card] option.
2: Select [Format card] from the menu
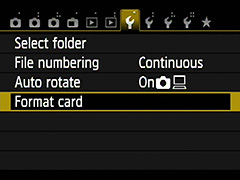
Use the cross keys to select [Format card] from the menu. The cross keys are also used to move down the menu to select other options.
3: Format the card
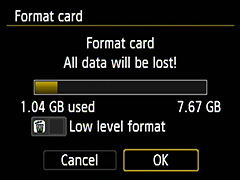
After moving the cursor to [Format card], start formatting by pressing the SET button at the center of the cross keys. Do not remove the card when formatting is in progress.
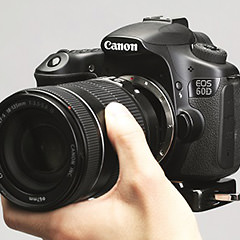
7: Adjusting the viewfinder diopter
1: Look through the viewfinder
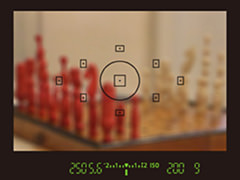
The viewfinder diopter is not adjusted at the time of purchase. Depending on the user's eyesight, it may appear very blurry. Adjust accordingly to suit your eyesight.
2: Turn the Dioptric adjustment knob
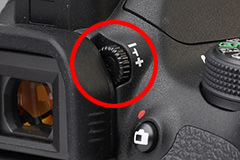
Adjust the viewfinder diopter by turning the Dioptric adjustment knob while looking through the viewfinder to locate the position with the clearest image.
3: Display is clear
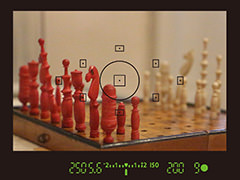
Adjust the diopter such that the information display at the bottom of the viewfinder could be seen clearly. Remember the method and adjust when necessary, as the diopter changes with the condition of the eyes, such as fatigue.

