


The Difference Between Shooting with Program and Manual Modes
If you own a mirrorless camera or a DSLR, you would have noticed the mode dial on top of the camera body, which consists of several shooting modes such as Full Auto, Program, Shutter Priority, Aperture Priority, and Manual. Full Auto mode is great for beginners who are still new to using a mirrorless or DSLR camera. Once you are ready for the camera’s more advanced modes, the first upgrade we recommend would be the Program mode. With more practice, one can move on to Shutter Priority, Aperture Priority, and finally the Manual mode. What are the differences between Program – your first step away from being a complete beginner – to Manual, which gives you complete creative control over your shot?

EOS M6, EF-M15-45mm f/3.5-6.3 IS STM lens, f/3.5, 17mm, 1/40sec, ISO100
A plate of shrimp pasta taken in Program mode
Program Mode, Your First Step to Controlling Your Shot
To understand the Program mode, you will first have to understand one of the three pillars of photography – ISO. ISO is your camera’s level of sensitivity to light, and is adjusted to let a specific amount of light onto your sensor. The brighter the light, the lower the ISO you will need; when the surroundings get darker, the ISO numbers go up. Controlling the ISO is crucial because using a low ISO (e.g. ISO100, 200, or 400) when you have sufficient light will give your photo a sharp, clear, and crisp look, while a higher ISO (e.g. ISO800, 1600 or higher) is necessary to prevent your shot from blurring when light is limited. Keep in mind that a higher ISO level also means more visible grains on your photos (in photography terms, we call it noise), which is why knowing what ISO to adjust to is essential.
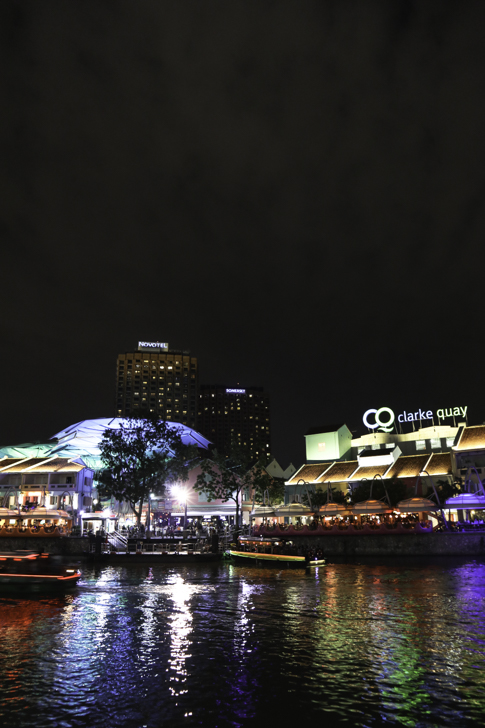
EOS M6, EF-M15-45mm f/3.5-6.3 IS STM lens, f/4.5, 15mm, 1/6sec, ISO800
Shooting a night scene in Program mode with a higher ISO
After grasping the concept of ISO, you can then switch to Program mode, which may also be called ISO Priority. Program mode lets you adjust your ISO freely, while the camera automatically fixes the aperture and shutter speed for you. This is great if you are still unfamiliar with aperture and shutter speed (the other two pillars of photography). By assessing your setting, you can determine the amount of available light you want, and adjust your ISO accordingly. Thoughtful adjustments of your ISO can help achieve sharp photos without noise even in low light conditions.
Learn more about ISO in Camera Basics #5: ISO Speed
Manual Mode, Where You Control Everything
Once you have grasped the concept of Program, Aperture Priority and Shutter Priority modes, switching to Manual mode is not as daunting as it first looked. Learning how to use the Manual mode is wonderful because you gain complete creative control over your shot, adjusting everything from ISO, aperture to shutter speed.
With Manual mode, you can adjust your aperture freely to achieve the amount of depth of field (background blur) you want in your photo. Turning to a larger aperture gives you a blurrier background, while a smaller one keeps everything – your subject and its background – in focus.
Learn more about Aperture Priority mode in Camera Basics #16: Aperture-priority AE
Discover the beauty of Shutter Priority mode in Camera Basics #17: Shutter-priority AE

EOS M6, EF-M15-45mm f/3.5-6.3 IS STM lens, f/6.3, 45mm, 1/320sec, ISO100
Control the depth of field when using the camera’s Manual mode
When it comes to speed, you can make use of the Manual mode to accurately adjust your shutter speed and determine the style of your photo. For example, if you want to freeze something in action (such as racing cars, athletes, or energetic pets), you can select a fast shutter speed; on the other hand, a nice motion blur can be achieved with a slower shutter speed (think star trail, light trail, or a silky waterfall).
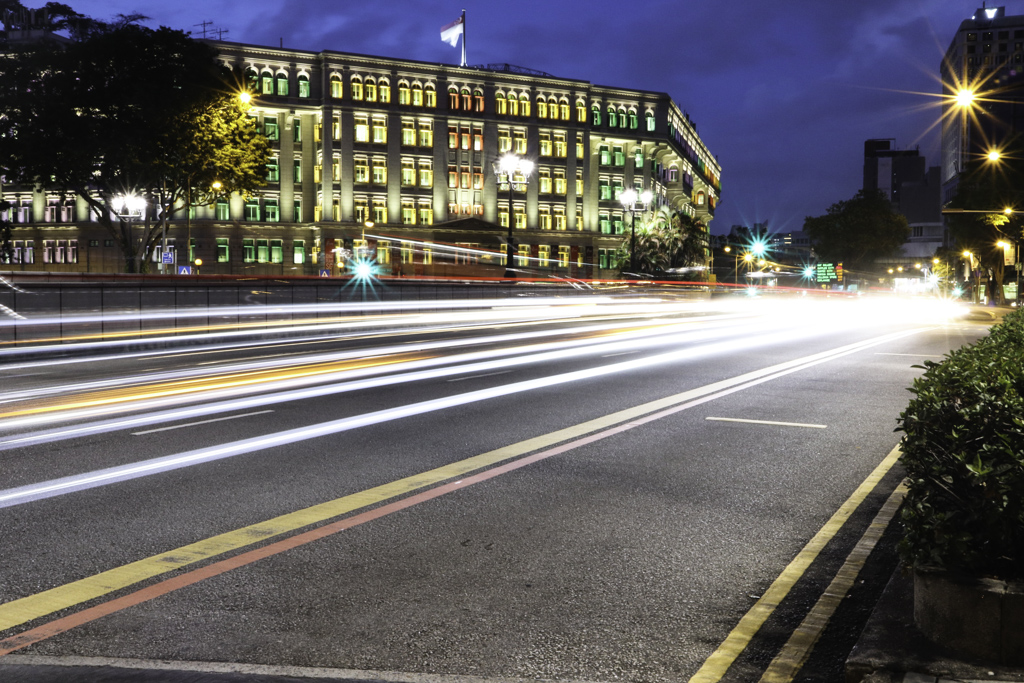
EOS M6, EF-M15-45mm f/3.5-6.3 IS STM lens, f/29, 23mm, 4secs, ISO800
Shooting passing cars with a long exposure in Manual mode
Find out what happens when you set the right shutter speed when capturing a fireworks display in Shutter Speed Tips: How to Capture an Entire Series of Fireworks in the Same Frame
Upgrade One Mode at a Time
When you are comfortable enough to step out of the Full Auto mode, begin with the Program mode. With enough practise, you will get the hang of this mode, which will lead you to Aperture Priority and Shutter Priority (in no particular order) modes. Armed with the essential camera skills and knowledge, the Manual mode is your final stage, where you will gain full control of your every shot, and that is where the fun begins.
Get a better understanding of the Manual mode in Camera Basics #18: Manual Exposure
Receive the latest update on photography news, tips and tricks.
Be part of the SNAPSHOT Community.
Sign Up Now!


