


The EOS M5 is the first EOS M series camera to support RAW image post-processing. With social media, being able to perform RAW image post-processing right after shooting on a camera is a function that comes in very handy. In this article, we will introduce the in-camera RAW image post-processing feature, and with the help of actual processing examples, explain how it can be used. (Reported by: Maiko Fukui)

Correct your image after shooting by using in-camera RAW image post-processing
Everyone has probably experienced looking at the preview screen after shooting, and thought that was not how they envisioned it. At the times when you think, ‘It should have been brighter’, or ‘it might look better with less saturation’, in-camera RAW image post-processing enables you to respond to them on the spot and improve your pictures. Even with mistakes, such as in exposure, you can take comfort knowing that they can be corrected to a certain extent. The advantage of RAW image post-processing is that you can use it to tweak the way a photo looks, by making the colours more vivid for social media, or changing it to monochrome for postcard use.
What you can do with in-camera RAW image post-processing on the EOS M5

1. Brightness adjustment: EV-1, EV-2/3, EV-1/3, EV±0, EV+1/3, EV+2/3, EV+1
2. White balance: WB: Shot settings, Auto, Day Light, Shade, Cloudy, Tungsten light, White fluorescent light, Flash, Colour temperature
3. Picture Style: Picture Style: Shot settings, Auto, Standard, Portrait, Landscape, Fine Detail, Neutral, Faithful, Monochrome, User Def. 1, User Def. 2, User Def. 3
4. Auto Lighting Optimizer: Disable, Low, Standard, High
5. High ISO speed Noise Reduction: Disable, Low, Standard, High
6. Image quality:

7. Peripheral illumination correction: Enable/Disable
8. Chromatic aberration: Enable/Disable
9. Diffraction correction: Enable/Disable
10. Save
11. Back
*Default settings indicated in red
How to carry out in-camera RAW image post-processing
1. Press the [Playback] button and select a RAW image for post-processing.

2. Press the [Set] button, select [RAW JPEG], then [Customize RAW processing], and press the [Set] button.

3. Select the effects to adjust each one of them.

4. Select [Save].

5. Select [OK] to save.

4 techniques for improving your photos using in-camera RAW image post-processing
In the following, we will introduce techniques you can use to improve your photos with RAW image post-processing.
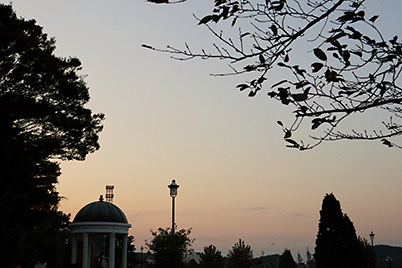
Technique 1: Add a warm sunset glow to the image → Adjust white balance settings to emphasize the colour
Before - WB (Cloudy)
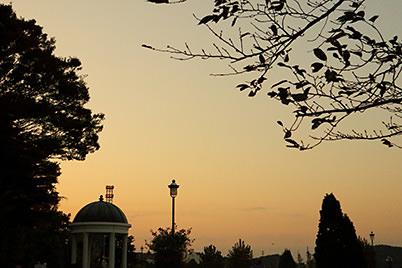
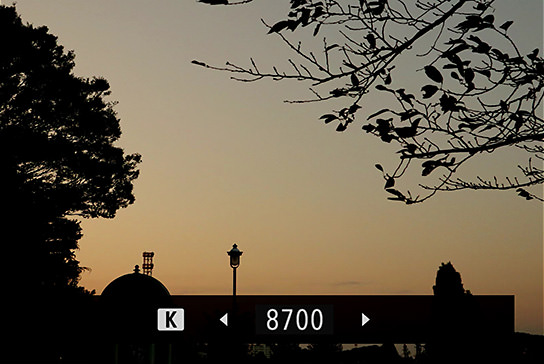
After - WB (Colour temperature: 8700K)
Both images: EOS M5/ EF-M15-45mm f/3.5-6.3 IS STM/ FL: 35mm (56mm equivalent)/ Aperture-priority AE (f/8, 1/4,000 sec, EV-0.7)/ ISO 5000
Before: WB (Cloudy) / After: WB (colour temperature: 8700K)
To give more of a yellow tone to the picture, I shot with the white balance set to ‘Cloudy’. However, this was not enough as the image still retained cool tones overall, so I turned up the colour temperature using the White Balance settings. I got the warmth I envisioned at 8700K.
What I tweaked: White balance, Auto Lighting Optimizer
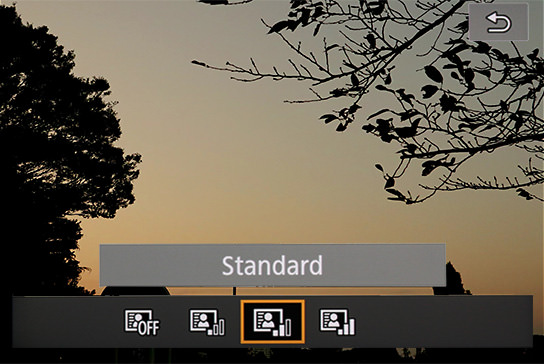
Besides changing the white balance settings, I also set the Auto Lighting Optimizer to ‘Standard’ to adjust the level of brightness and contrast.
Technique 2: Correct the white blowout that occurs with backlight → Use Brightness Adjustment
Before - EV+2.3

After - EV-0.7
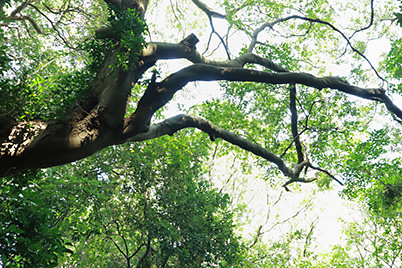
Both images: EOS M5/ EF-M15-45mm f/3.5-6.3 IS STM/ FL: 22mm (35mm equivalent)/ Aperture-priority AE (f/6.3, 1/30 sec)/ ISO 2000/ WB: Daylight
Before: EV+2.3 / After: EV-0.7
Due to overexposure, the green tone in my first picture (Before) seemed washed out. I wanted to emphasise the beauty of the green leaves.
What I tweaked: Brightness Adjustment, Picture Style effect, Picture Style parameters
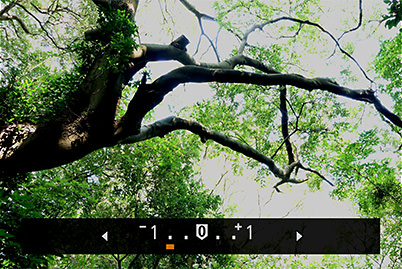
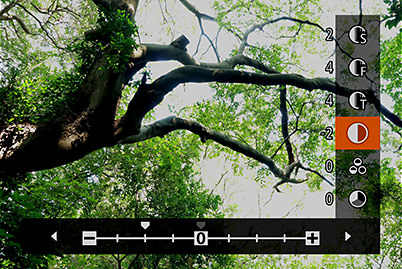
I set the Brightness Adjustment to ‘-2/3’, and changed the Picture Style effect from ‘Landscape’ to ‘Portrait’. In the detailed settings under ‘Info’ which allows you to customize Picture Syle parameters, I also set the Contrast to ‘-2’ and Color tone to ‘+3’.
Technique 3: Create a sombre impression with monochrome → Use Picture Style (Monochrome)
Before - Picture Style (Standard)
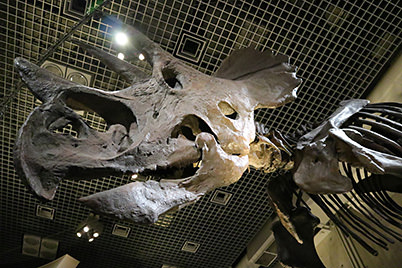
After - Picture Style (Monochrome)

Both images: EOS M5/ EF-M15-45mm f/3.5-6.3 IS STM/ FL: 17mm (27mm equivalent)/ Manual exposure (f/3.5, 1/100 sec, EV±0)/ ISO 6400/ WB: Auto
Before: Picture Style (Standard) / After: Picture Style (Monochrome)
I wanted to give the picture of the dinosaur fossil a rugged, unusual look so that I could use it with a postcard, and therefore decided to give it a stark monochrome finish.
What I tweaked: Picture Style effect, Picture Style parameters, High ISO Speed Noise Reduction

I set the Picture Style to ‘Monochrome’, then changed the Strength, Fineness, and Threshold settings for sharpness to ‘4’. Also, I raised the Contrast to ‘4’, and chose ‘Ye:Yellow’ under Filter effect. To create a grainy,raw effect, I set the High ISO speed Noise Reduction to ‘Disable’.
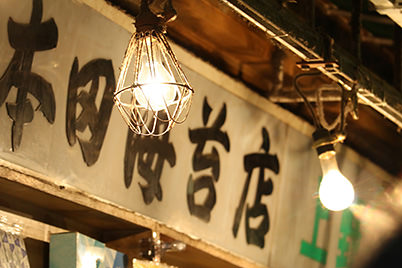
Technique 4: Create a retro feel using white balance → Contrast is key in changing the look of the image
Before - WB (Auto)
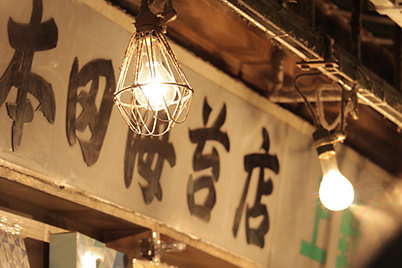
After - WB (Cloudy)
Both images: EOS M5/ EF-M55-200mm f/4.5-6.3 IS STM/ FL: 142mm (227mm equivalent)/ Manual exposure (f/6.3, 1/100 sec, EV±0)/ ISO 800
Before: WB (Auto) / After: WB (Cloudy)
This was an image where I wished I had captured the old-style store front with a more retro ambience. I wanted to use a lower saturation to make it look as if it was a frame from a movie.
What I tweaked: White balance, Picture Style parameters

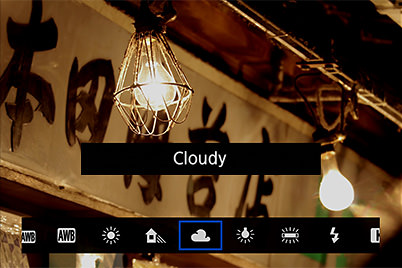
The Picture Style was ‘Auto’. In the Picture Style detailed settings menu, I changed the Saturation to ‘-2’, and then lowered the Contrast to ‘-4’. Setting the white balance to ‘Cloudy’ adds a yellow tinge to the image and gives a nostalgic feel.
Receive the latest updates on photography news, tips and tricks by signing up with us!
About the Author
A monthly magazine that believes that enjoyment of photography will increase the more one learns about camera functions. It delivers news on the latest cameras and features and regularly introduces various photography techniques.
Published by Impress Corporation
Born in 1983 in Osaka. Photographer. Actively involved in magazine and advertising photography, book writing, photography workshops and so on.


