


3 Camera Features for Fine-tuning Your Landscape Shots to Perfection
Took a shot of a beautiful landscape, but feel that something about it is off? A slight change to colour temperature, focus and exposure might be just what you need. Use these camera features to help you make those adjustments right on the spot. (Reported by Shirou Hagihara, Digital Camera Magazine)

Useful feature #1: White Balance - Colour temperature
Fine control over hues and colours on the spot
Auto White Balance (AWB) corrects colour casts, which is helpful for getting accurate colours when you shoot landscapes in the daytime. However, it will also “correct” the strong, vivid red and orange tones of sunrise and sunset, resulting in less-than-brilliant colours.
Using another white balance preset like "Cloudy, twilight, sunset" or "Shade" would help enhance warm tones, but if you want even more control, select the “Colour Temperature” mode. This lets you make fine adjustments to colour temperature in increments of 100 Kelvins (100K), so that you can capture delicate hues the way that you envision.

EOS 80D/ EF-S18-135mm f/3.5-5.6 IS USM/ FL: 35mm (56mm equivalent)/ Aperture-Priority AE (f/11, 1/60 sec, EV ±0)/ ISO 200/ WB: 7,000K
Bathed in the light from the setting sun, these interestingly-shaped rocks took on a warm, amber glow. I set the colour temperature to "7000K" to enhance the red tones.

When you set a colour temperature here, you are telling the camera, “Please assume that this is the colour temperature of the scene and compensate accordingly”. 7000K suggests a cooler colour temperature, so the camera made the scene warmer to balance out. Turn the main dial to adjust the value in 100K increments.
Here’s another function for adjusting the colours in your shot:
How to Render Colours with the White Balance Correction Function
Useful feature #2: The magnify function
Achieve precise focusing on tiny details
Focus is an extremely important element in landscape photography, so it's a good idea to pay more attention to it.
There might be situations or subjects that require you to carry out manual focusing to achieve the shot that you want. When the subject that you need to focus on is tiny, such as a flower stamen, magnifying the Live View or EVF image helps you to see better and focus even more precisely.
Tip: Use this with focus peaking or the Focus Guide (if your camera has them) for even better results!
Focus using the magnification function

1. Move the focus point to the position that you wish to focus on. Make sure that the subject is positioned in the centre of the focus point.

2. Set the lens’ focus mode switch to MF, and press the magnify button. After magnifying by 5x or 10x, turn the focus ring to focus.
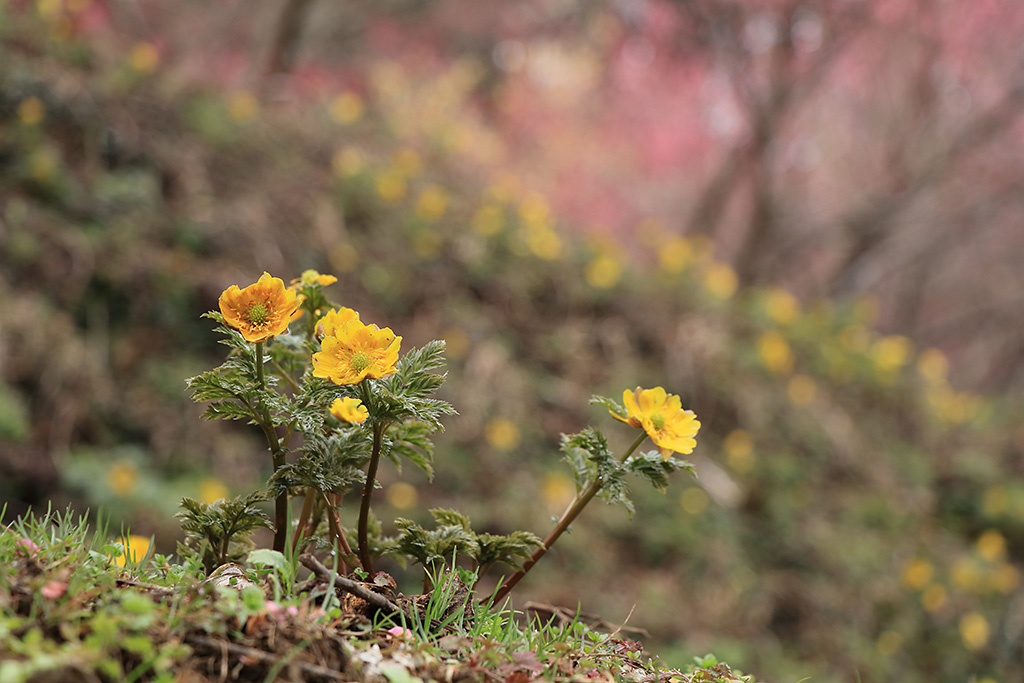
EOS 80D/ EF-S18-135mm f/3.5-5.6 IS USM/ FL: 71mm (114mm equivalent)/ Aperture Priority AE (f/5, 1/160 sec, EV ±0)/ ISO 200/ WB: Daylight
I used a single amur Adonis plant in bloom on a slope as the main subject, and created a beautiful bokeh effect for the other amur Adonis plants and plum trees in the background to express a typical autumn scene. Using manual focus and the magnified display helped me to achieve precise focus on the stamens.
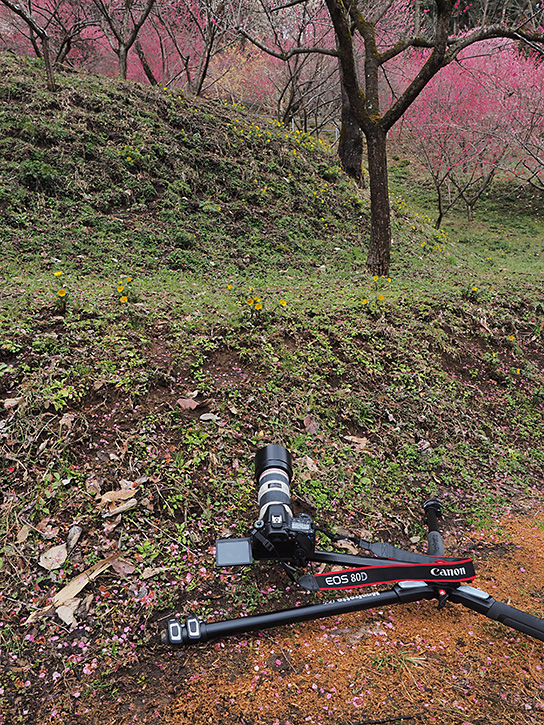
Tip: Get out of tight spots with the Vari-angle LCD screen !
To stack the main subject onto the background, I set my camera in a low position. The Vari-angle LCD screen lets you shoot even in such low positions with less effort.
Useful feature #3: Auto Exposure Bracketing (AEB)
Tricky lighting conditions? No sweat!
When shooting in JPEG, you need to set the exposure accurately for the scene. However, in high contrast situations, it can be difficult to decide the exposure on your first attempt.
You have two options:
- Manually set the exposure compensation for each shot
- Use Auto Exposure Bracketing (AEB)
When you use AEB, the camera automatically adjusts the shutter speed, aperture setting and ISO speed to take successive shots at different exposure levels.
Three bracketed shots are taken by default: One “reference” shot, one with a darker exposure, and one with a brighter exposure. You can choose the exposure level of the reference shot and the difference in exposure level between each shot.

EOS 80D/ EF70-200mm f/4L IS USM/ FL: 165mm (264mm equivalent)/ Aperture-Priority AE (f/8, 1/320 sec, EV +0.3)/ ISO 250/ WB: Daylight
Here, I wanted to colourfully express the cherry trees in a strong pink colour. I selected the area with the densest concentration of blossoms, and shot using AEB. I felt that this shot, taken at EV+0.3, gave the best results. Because the subject may not be completely still due to factors such as the wind, I would recommend taking your shots as quickly as possible. To avoid changing the composition, I shot with the high-speed continuous shooting drive mode.

On some cameras, you can change the number of bracketed shots
On intermediate and advanced camera models like the EOS 80D/90D or EOS RP, you can change the number of bracketed shots (3/2/5/7 shots) in the Custom Function menu. Depending on your subject, you could try setting 5 or even 7 shots.

Tip 1: Choosing the reference exposure
When your subject is a bright object such as a cherry tree, or if the scene you’re shooting has an empty background, try setting a positive value for the reference exposure. For dark subjects, try a negative value.
Tip 2: Use continuous shooting mode or the self-timer
In single shooting mode, you will have to press the shutter button to take each bracketed exposure. For a faster way, use the continuous shooting or self-timer modes. The bracketed shots will automatically be taken consecutively once the shutter is fully pressed.
More tips and techniques for nailing exposure in-camera in:
Understanding Dynamic Range: How to Avoid Unnecessary Blown Highlights
Camera Basics #7: Metering
What are your favourite camera functions for landscape photography? Tell us in the comment section below!
Receive the latest update on photography news, tips and tricks.
Be part of the SNAPSHOT Community.
Sign Up Now!About the Author
Born in 1959 in Yamanashi. After graduating from Nihon University, Hagihara was involved in the launch of the photography magazine Fukei Shashin where he worked as an editor and a publisher. He later resigned and became a freelance photographer. Currently, Hagihara is engaged in photography and written works centring on natural landscapes. He is a member of the Society of Scientific Photography (SSP).
A monthly magazine that believes that enjoyment of photography will increase the more one learns about camera functions. It delivers news on the latest cameras and features and regularly introduces various photography techniques.
Published by Impress Corporation

.jpg "trending tips")

.jpg "trending tips")

