


Focus Stacking: A Pro Technique Made Simpler with Focus Bracketing
Focus stacking (or “depth compositing”) is a technique that is most frequently used by professional product photographers to achieve detailed shots of products. It is a tedious, time-consuming task when done manually, but can be simplified with the help of the in-camera Focus Bracketing function. How are focus-stacked images different, and how do you create them? Read on to find out—you might just be tempted to make your own!

Focus stacking: A technique that combines images shot at different focal distances to achieve a greater depth-of-field
The Focus Bracketing function makes use of the AF system to take multiple shots, each with the focal point placed slightly further away. You can use Canon’s Digital Photo Professional (DPP) post-processing software to merge the in-focus areas of the bracketed shots, which results in a final image that is sharp and fully in focus all the way from the front to the back.

Images A to D are-focus bracketed shots with different points of focus, ranging from the parts of the subject closest to furthest from the camera. Use the Depth Compositing tool in DPP to merge them to create a final image that is sharp all around. (Diagram is for illustration purposes.)
Why do we need focus stacking?
The basics of depth-of-field
We all know that using a wide aperture causes the background to become “blurred”, or more specifically, defocused. In other words, the area in focus becomes narrower. This can also be described as a “shallow depth-of-field”.
“Depth-of-field” refers to the area of the image that appears sharp (“in focus”) after we have established focus on a subject. It is affected by three factors:
1. Aperture
2. Focal length
3. Shooting distance
The relationship between each factor and the depth-of-field is shown below:
| Factor | Depth-of-field | |
| Shallow | Deep | |
| Aperture | Large | Small |
| Focal length | Long | Short |
| Shooting distance | Near | Far |
Which factor affects depth-of-field the most?
The answer will be surprising to some: It is, in fact, shooting distance.
You most likely won’t notice the difference when shooting portraits or natural landscapes, because for these, the subjects tend to be a certain distance away. However, you will probably notice it when you take close-ups and macro shots, because the shooting distance is so much shorter.
Here’s an example to illustrate: Let’s say you want to take a close-up of a small flower. Have you ever set your aperture to f/2.8, intending to create background bokeh, only to end up with a depth-of-field so shallow that you can’t get the entire flower in focus?
Sounds familiar?
In such cases, you would normally narrow the aperture to somewhere around f/11. This not only makes it easier to establish focus, you will still have a nice background bokeh. This is because of the close shooting distance, which still allows you achieve the shallow depth-of-field necessary for background bokeh despite the narrow aperture.
How is focus stacking different from normal deep focusing?

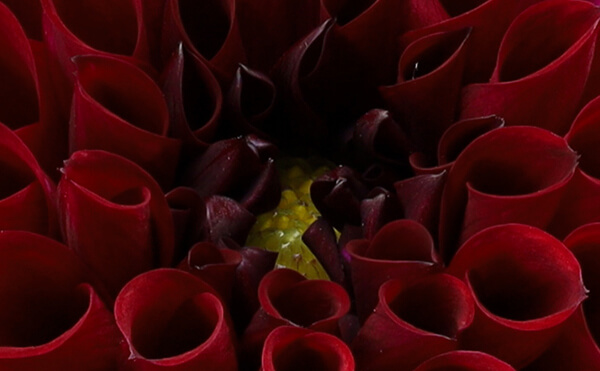
Using a very narrow aperture like f/22 will help us to get shots like this to appear entirely in focus. But if you look closer, you will notice that not all parts are equally sharp.
Shot at f/22

This is the centre of the image. The focus was placed here, but it still looks slightly soft due to diffraction.
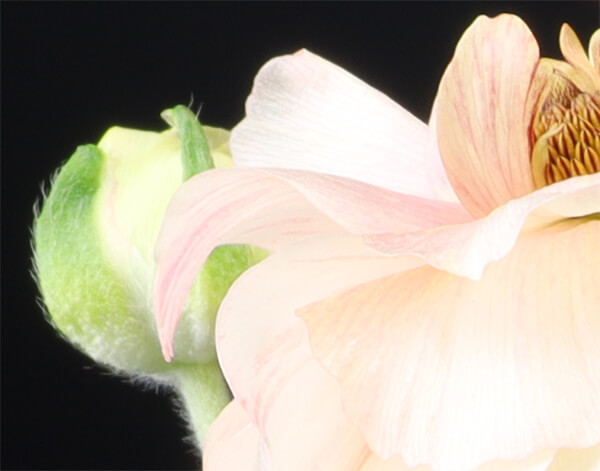
Focus-stacked image
The centre of image, where the focus was placed, appears sharp.
This flower is behind the focal point and slightly outside the in-focus plane. It is therefore looks slightly out-of-focus.
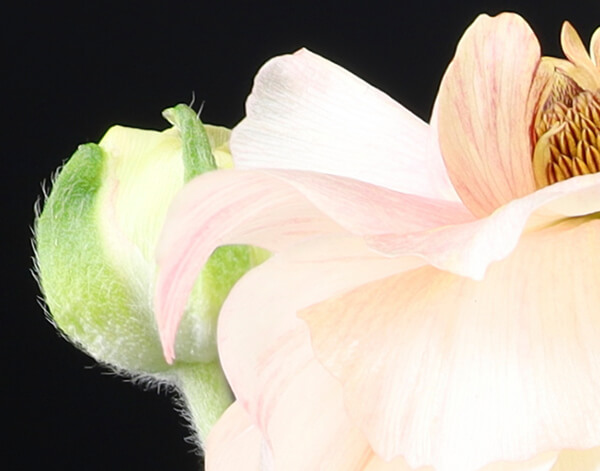
The same flower appears sharp.
Depending on the photographic subject, when you try to deep focus the image with a narrow aperture, it is still possible that the depth-of-field does not extend deep enough for all elements to be sharply in focus. Extremely narrow apertures also increase the chances of diffraction, resulting in image softness.
For this reason, we use focus stacking to ensure that an image with a large depth-of-field is truly sharp with high image quality.
How to use Focus Bracketing
Focus stacking is most widely used in professional product photography. Traditionally, the photographer will use manual focus (MF) to take a number of pictures, shifting the focus incrementally for each shot. They would then align and merge these images with image editing software.
As simple as it sounds, it actually requires a lot of skill and experience to get the images to look right. Using the in-camera Focus Bracketing function simplifies the process by automating the shots, and the Depth Compositing tool in DPP makes it easier to merge the shots into a successful final image.
Step-by-step
1. Set the camera on a tripod. It is important to keep the camera as stable as possible!
2. Decide on your composition. Shoot a little wider: You will need to crop the image later.
3. Make sure that your focusing mode is set to “AF”.
4. Turn on Focus Bracketing. Set the number of images captured per shot, and the focus increment. (Click here for a menu walkthrough)
5. Set focus on the part of your subject that is the nearest to the lens. Release the shutter.
6. Transfer the image files to a computer that has the latest version of DPP installed. (Versions older than v4.10.0 do not have the Depth Compositing tool).
7. In DPP, select all the focus-bracketed images and start the Depth Compositing tool.
8. Check the composited image. If it does not turn out well, change your parameters and try again.
(You might need to do a reshoot using different focus increments.)
How to set Focus Bracketing on your camera

Select “Focus bracketing” from the Shooting menu. Select “Enable”.

Set the number of images per shot.
Note: If you set too many images, it will take longer to merge them.

Set the focus increment. A narrower increment means that the focal points for each image will be quite close to each other; a wider increment means that they will be further apart. Usually, smaller subjects will require narrower increments and vice versa. Consider the final image when you adjust this.

Usually, the exposure is fixed at the first shot. But on cameras that support exposure smoothing, tiny adjustments are made for every image to prevent fluctuations in image brightness.

Once you have taken the shots and uploaded them to DPP, select the images and start the Depth Compositing tool from the DPP menu.

You can adjust different parameters before running the tool.
Practical uses of Focus Bracketing
Focus stacking is most commonly used to take images of products for advertisements, but you can also use it to shoot product images for e-commerce sites or online auctions. You might also want to try using it to shoot natural landscapes—it’s one way to achieve deep focused images without risking narrow aperture diffraction.
You might also be interested in:
Landscape Photography: Quick Tips for Stunning Deep Focused Images
Cameras with Focus Bracketing
EOS RP

Focus bracketing: Enable/Disable
No. of shots: 2 – 999
Focus increment: Narrow – Wide (1 - 10)
Exposure smoothing: Enable/Disable
Compatible lenses*
RF24-105mm f/4L IS USM
RF28-70mm f2/L USM
RF50mm f/1.2L USM
RF35mm f/1.8 Macro IS STM
EF16-35mm f/4L IS USM
EF24-70mm f/4L IS USM
EF100mm f/2.8L Macro IS USM^
EF180mm f/3.5L Macro USM^
EF-S35mm f/2.8 Macro IS STM
EF-S60mm f/2.8 Macro USM^
*As of October 2018
^With exposure smoothing disabled
EOS 90D

Focus bracketing: Enable/Disable
No. of shots: 2 – 999
Focus increment: Narrow – Wide (1 - 10)
Exposure smoothing: Enable/Disable
Compatible lenses*
EF16-35mm f/4L IS USM
EF24-70mm f/4L IS USM
EF100mm f/2.8L Macro IS USM
EF180mm f/3.5L Macro USM
EF-S35mm f/2.8 Macro IS STM
EF-S60mm f/2.8 Macro USM
*As of August 2019
EOS M6 Mark II

Focus bracketing: Enable/Disable
No. of shots: 2 – 999
Focus increment: Narrow – Wide (1 - 10)
Exposure smoothing: Enable/Disable
Compatible lenses*
EF-M28mm f/3.5 Macro IS STM
EF-M15-45mm f/3.5-6.3 IS STM
EF-M18-150mm f/3.5-6.3 IS STM
EF16-35mm f/4L IS USM
EF24-70mm f/4L IS USM
EF100mm f/2.8L Macro IS USM
EF180mm f/3.5L Macro USM
EF-S35mm f/2.8 Macro IS STM
EF-S60mm f/2.8 Macro USM
EF-S18-135mm f/3.5-5.6 IS USM
*As of August 2019
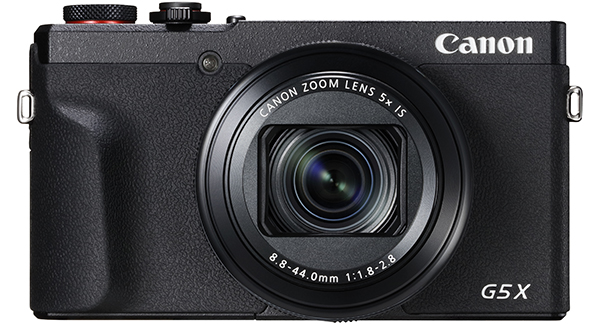
PowerShot G5 X Mark II
Focus bracketing: Enable/Disable
No. of shots: 2 – 100
Focus increment: Narrow – Wide (1 - 10)
Exposure smoothing: Nil
PowerShot G7 X Mark III
Focus bracketing: Enable/Disable
No. of shots: 2 – 100
Focus increment: Narrow – Wide (1 - 10)
Exposure smoothing: Nil
Find out more about the PowerShot G5 X Mark II and PowerShot G7 X Mark III here
Sample images

EOS RP

EOS RP

PowerShot G5 X Mark II

PowerShot G7 X Mark III
For more tips on product photography, check out the following articles:
Basic Techniques for Product Photography
How to Create a Sparkly Background with Bokeh Circles for Pretty Trinket Pictures
Receive the latest update on photography news, tips and tricks.
Be part of the SNAPSHOT Community.
Sign Up Now!.jpg "trending tips")

