


In order to make full use of the wide array of features on the EOS 6D, the key is to learn to utilize ”Quick Control,” which enables you to alter the settings quickly. In the following article, I will explain the steps to make changes using Quick Control, and the main settings that can be adjusted. (Reported by: Ryosuke Takahashi)
Pages: 1 2
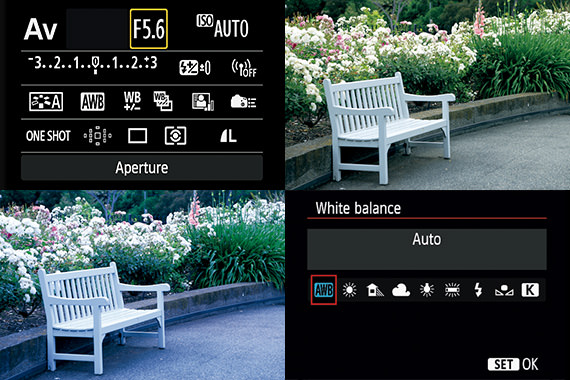
Quick Control screen during viewfinder shooting
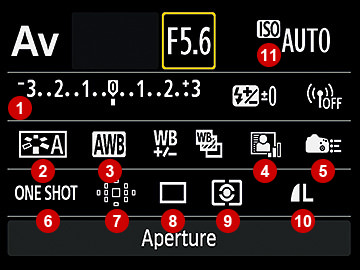
- Exposure compensation/AEB setting
- Picture Style
- White balance
- Auto Lighting Optimizer
- Custom Controls
- AF operation
- AF point selection
- Drive mode
- Metering mode
- Image-recording quality
- ISO speed
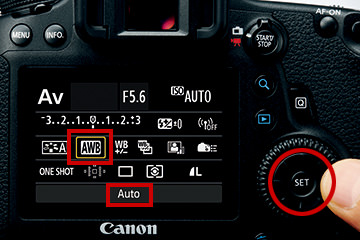
Pressing the Quick Control button launches the screen on the left. This is the fastest way to access the white balance settings.
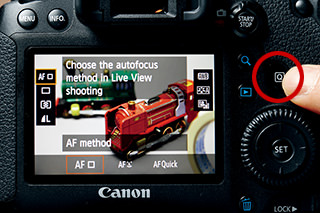
Quick Control during Live View shooting
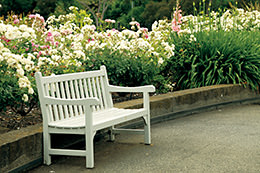
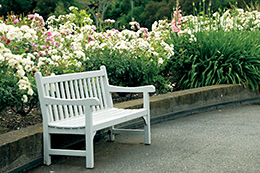
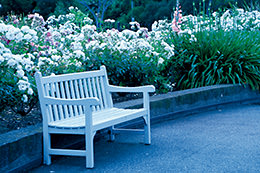
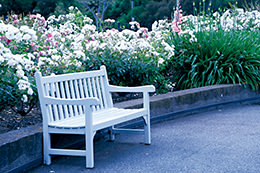
FL: 50mm/ Aperture-priority AE (1/500 sec., f/8, -0.3EV)/ ISO 100/ WB: Auto
During Live View shooting, icons appear on both sides of the image, while the settings of the selected feature are displayed at the bottom of the screen. If a feature is not found here, you will have to access it from the menu.
Quick Control for quick setting changes
The “Quick Control” feature provides a useful interface for viewing or changing the list of major shooting settings. It comprises items that are used most frequently, which are sufficient for scenes in general.
It is very easy to use. Simply move the frame to the feature you want to select, followed by choosing a setting. With this feature, you do not have to worry about getting lost in the multitudes of menus, or being confused by the button operations. By using it as the “gateway” to the settings, even features that seemed complicated before will become more intuitive.
Make use of the four buttons at the top.

Dedicated buttons are also available for commonly-used features.
Determine whether to use these dedicated buttons, or the Quick Control feature according to the scene.
Quick Control setting during viewfinder shooting
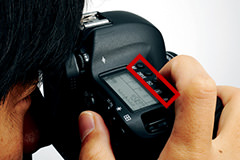
1.Press the Quick Control button
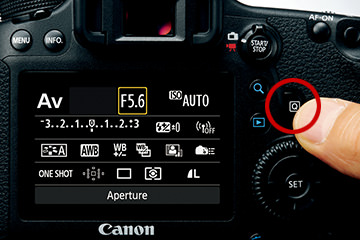
Pressing the Quick Control button in the ready-to-shoot state launches the Quick Control screen. The example here shows the "Creative Zone" screen.
2.Select an item with the Multi-controller
Use the Multi-controller to select a feature. The selected feature is highlighted by an orange frame.
3.Turn the dial to change the setting
With the orange frame displayed, turn the Main Dial or Quick Control Dial to select a setting.
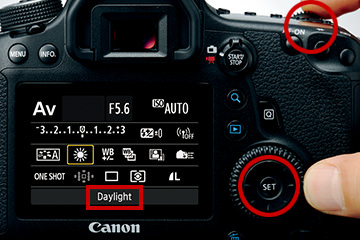
White Balance Setting for Changing Colour
Change your White Balance setting to alter the colour of your photograph. Besides Auto, there are preset White Balance options for you to select. Each resembles the different colour temperature of the light source.
Understanding and expressing the colour of light
Adjust the White balance (WB) to reproduce the colours of the subject faithfully. The colour of the subject changes considerably depending on the type of light source. However, you can also shift the white balance intentionally to alter the impression of a photo. For example, for an indoor shot, a warm reddish tone exudes a cheerful mood, while a cool bluish tone suits the ambience of an early morning view. You are encouraged to express colours freely according to your photographic intention.

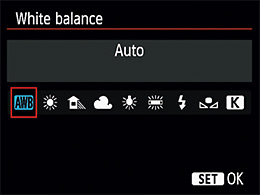
Auto

Daylight
Shade
Cloudy
Tungsten light
White fluorescent light

Flash
In the preset menu, white balance is set to the correct colour according to the type of light source. The examples here were all taken under the sun. The colours are produced faithfully in the [Auto] and [Daylight] settings, while a setting that does not match the type of ambient light changes the colour hue. However, this can also be employed intentionally as a photographic expression technique.

Born in Aichi in 1960, Takahashi started his freelance career in 1987 after working with an advertising photo studio and a publishing house. Photographing for major magazines, he has travelled to many parts of the world from his bases in Japan and China. Takahashi is a member of the Japan Professional Photographers Society (JPS).

