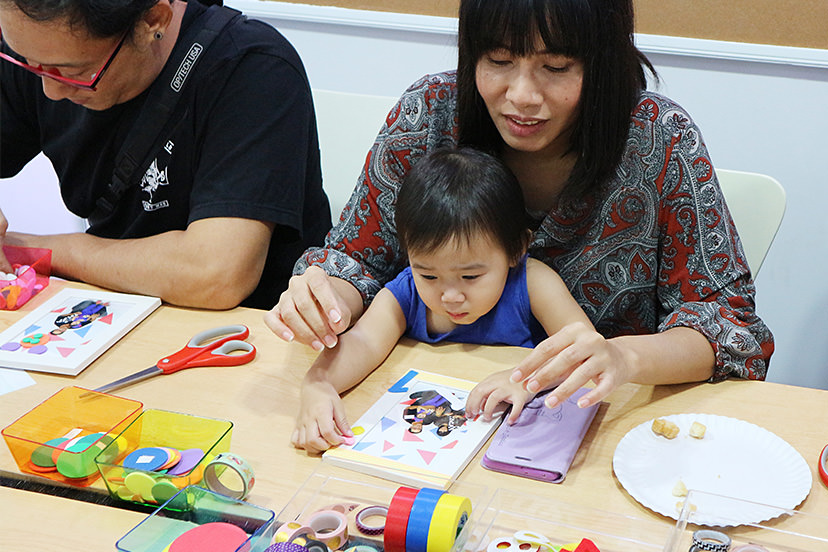
On July 3, 2016, a seminar and photo craft workshop on how to take commemorative photos of children was held at Canon Image Square in Khon Kaen, Thailand. Here are some highlights of what the participants learnt. (Edited by Etica)

Cute backdrops and props can be used to capture a treasured shot of children!
The lesson was conducted by Naomi Yajima, editor of a camera magazine in Japan, and photographer masacova! The two of them have conducted many child photography seminars in Japan.
For this workshop a variety of original props, including colourful and stylish backgrounds, panels filled with numbers, balloons, hats, skirts, frames, and so on, were prepared for the participants to have fun during the shoot.


Let’s take a look at what was covered in the workshop.
2 important points in child photography
Point 1: Visualize how to shoot the photo before taking it
- Before taking the photo, use some props for styling purposes.
- Decide the framing and composition beforehand. If you are able to visualize how to get the child to stand in a certain spot, how to get them to sit, how to get up close to take the shot or shoot from a distance and so on before taking the photos, you will be able to concentrate on the photoshoot without having to rush.
- Set up the camera on a tripod and actually compose the shot. Take note of the horizontal and vertical axis, and adjust them accordingly so that they are not crooked.
For photos that give a different perspective, why not try photographing your child from different angles, or making good use of lighting and bokeh?
If you are photographing siblings, we also have some adorable concepts you could consider.

Point 2: Drawing out nice expressions of the child
- Create a fun mood.
- Match the pace of the child, instead of forcing them to match yours.
- Don't shoot for long periods as the child will get tired. The photos should be captured quickly.
- Even a picture of the child crying is a proof of their growth. Keep a shot as a momento.


TIP: When the photo is dark, use exposure compensation to make it brighter!
There are times where photos turn out dark when shot against a white background. Set the shooting mode to the < P > (Program AE) mode, < Av > (Aperture-priority AE) mode, or < Tv > (Shutter-priority AE) mode, and set the Exposure Compensation function to a positive value to adjust the brightness to your preference.

On the EOS 80D, exposure compensation can be adjusted by turning the Quick Control Dial.
Photo craft is great for decorating photos!
After finishing the shoot, we selected the pictures we liked best and went to print them. It looks like everyone was so happy to have been able to capture so many cute shots of their kids!

After printing the photos, we inserted them into photo frames, and then decorated them with stickers and decorative tape. This is known as photo craft.

2 key points of photo craft
Point 1: Look at the photo carefully and determine the materials to use in the collage accordingly
By coordinating the colours of the materials and unifying the shapes used, you can achieve a beautiful finish to your framed photo.

Point 2: Have fun unleashing your creativity!
Try creating your own original designs, by cutting the decorative tape into round shapes with a pair of scissors, or tearing it into shreds, and then arranging the materials into a variety of shapes.

Every time I look at the photo it brings back happy memories of the day I took the shot, making it a really wonderful photo frame.


Receive the latest updates on photography news, tips and tricks by signing up with us!
The team behind Japanese camera magazine,“Camera Biyori” as well as numerous other books. Also organizes events and runs the "Tanoshii Camera School", a photography school(@tanoshiicamera).


