


Canon’s recent cameras are equipped with the RAW burst and pre-shooting features, which promise to up your chances of capturing quick, unexpected moments. How do they work, and how do you use them? Read on to find out. (Reported by: Yuta Murakami, Digital Camera Magazine)

What are the RAW burst and pre-shooting modes?
What are the RAW burst and pre-shooting modes?
The short answer:
RAW burst and pre-shooting are camera features that, when used together, can help you retrieve moments that you miss. They work by recording images into your camera’s buffer memory when you half-press the shutter button.
The longer answer:
In RAW burst mode, the camera uses the electronic shutter to continuously shoot and record RAW files at up to 30 fps (depending on the camera) into your camera’s buffer memory. All the shots in the burst are saved in the same file instead of separate files for each shot, which makes data management easier.
Pre-shooting is a feature that becomes available when RAW burst mode is turned on, and arguably the main highlight of the mode. When enabled, it starts recording images into your camera’s buffer memory as you half-press the shutter button. When you fully press the shutter button, the moments from up to 0.5 seconds before full shutter release will be recorded into your memory card as a single RAW burst file.

This train photography scene is a good example of the advantage provided by RAW burst mode and pre-shooting. It’s a situation that I frequently encounter: there is only a tiny window of opportunity where a train would be in the perfect position, but the trees are blocking my view of approaching trains, making it hard to anticipate and press the shutter button in time. As you can see from the examples below, pre-shooting helped to capture up to two decent candidates, whereas without it, even a 30-fps burst would have missed the best moment.
Shot up to 0.5 sec before full shutter press (pre-shooting)
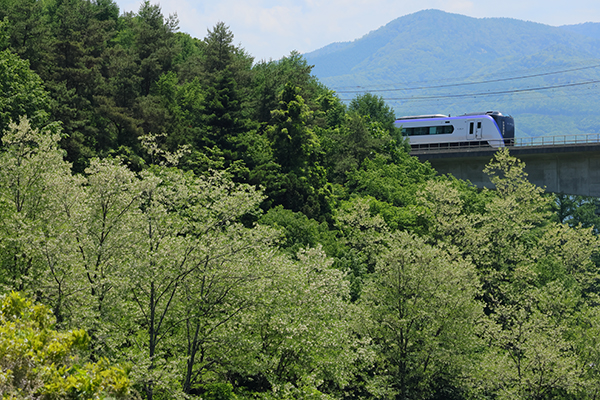
1
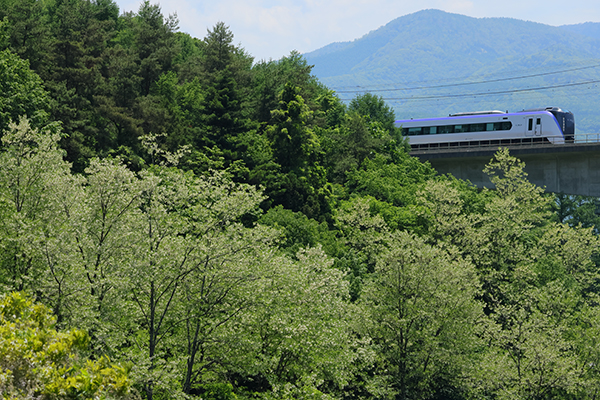
2
Shot after full shutter press (train is already partially out of the frame)
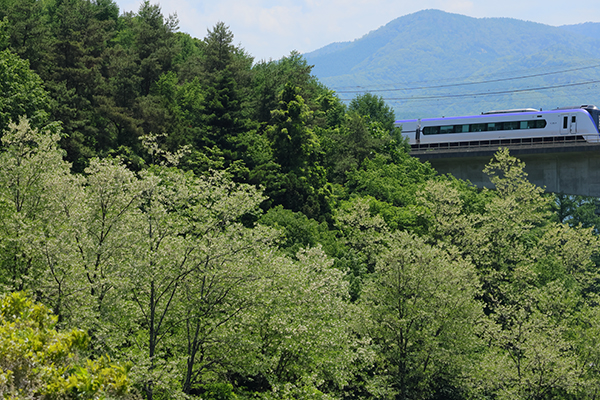
3

4

5
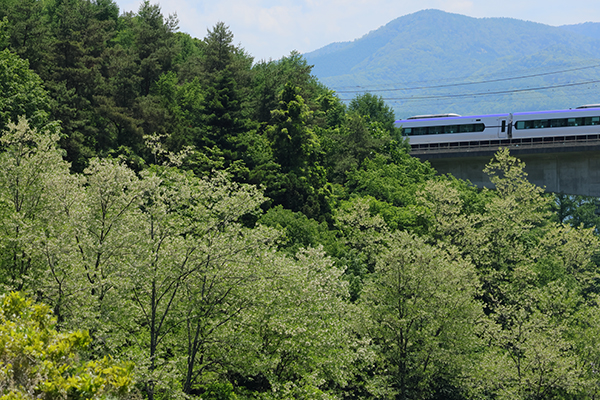
6
How is RAW burst mode different?
How is RAW burst mode different from conventional continuous shooting?
RAW burst mode saves all the shots in the sequence into a single RAW file (roll), unlike conventional continuous shooting where each shot is a separate file on its own. The file extension is .CR3, the same as other conventional RAW files.
Also, RAW burst mode uses the electronic shutter. Be careful about using it to shoot fast-moving subjects close up or in other situations where rolling shutter distortion might be obvious (Some tips in this section). In P, Tv, and Av modes, ISO speed is fixed at AUTO mode. In Tv, Fv, and M modes, you can’t set a shutter speed that is slower than 1/30 sec.
Otherwise, it works like the normal continuous shooting mode: fully press and hold down the shutter button to shoot continuously. The camera records until you release the button or the buffer is full.
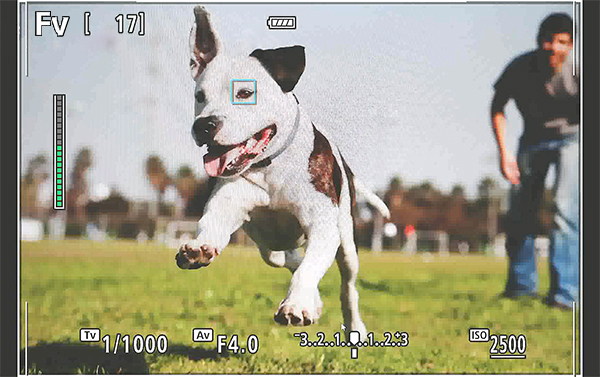
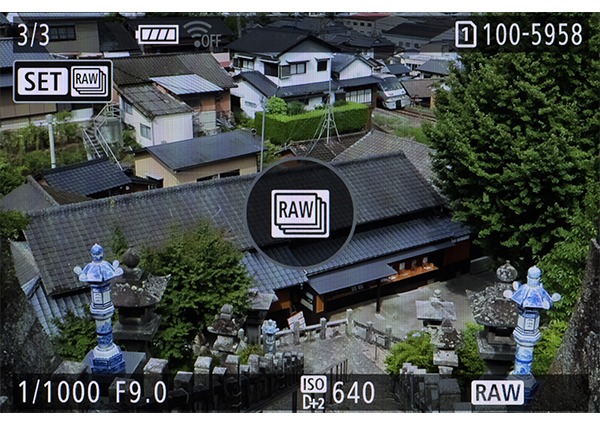
The indicator on the left side of the screen shows the buffer status. It is green when you start shooting. When it fills up and becomes red, the buffer is full and you will not be able to record any more images.
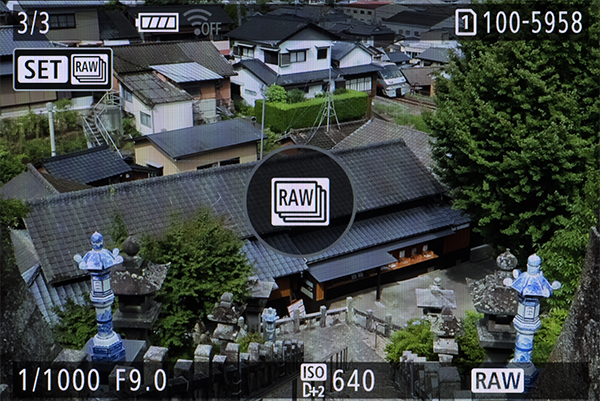
During playback, the RAW burst sequence is consolidated into one file. Press the “SET” button to view and extract the individual shots in the sequence. The RAW burst images must be extracted either in-camera or with Canon’s Digital Photo Professional 4 software.
Pro tips
- Once you have released the shutter button, the camera might take some time to write the files to the memory card. This depends on your camera model, memory card, and the number of shots in the sequence.
- If you want to record faster or take longer bursts, get a memory card with a higher capacity and faster writing speed.
How do I enable RAW burst and pre-shooting?
How do I enable RAW burst and pre-shooting?
Step 1
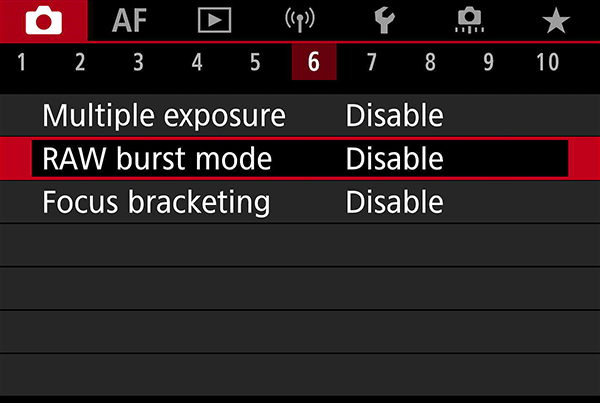
Locate and select “RAW burst mode” in the SHOOT (red) menu. The tab number depends on the model. On the EOS R7, it is on Tab 6.
Step 2
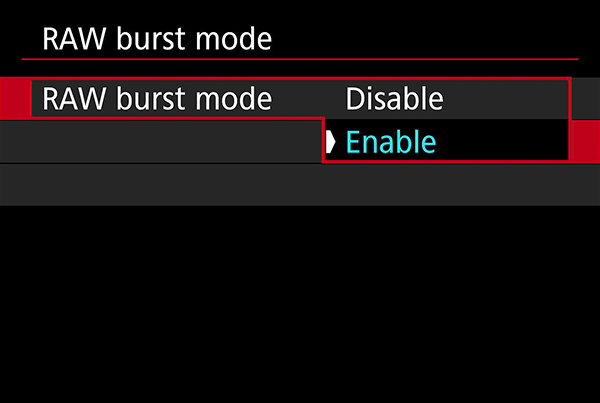
Select “Enable”.
Step 3
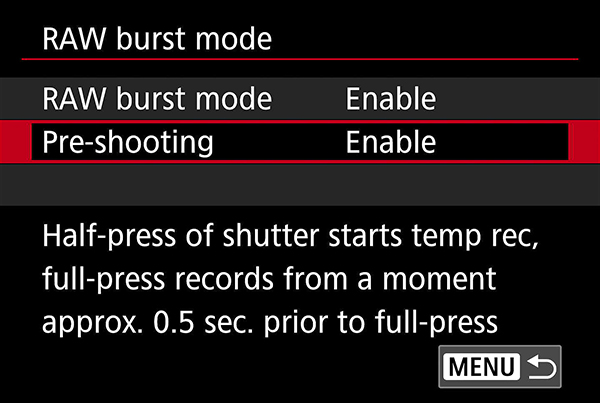
Once RAW burst mode is enabled, the pre-shooting function becomes available. Select it to enable it.
How do I extract a shot from a RAW burst sequence?
How do I extract a shot from a RAW burst sequence?
Regardless of whether pre-shooting is enabled or disabled, all images in a RAW burst sequence are recorded as a roll in a single RAW image file. If you enabled pre-shooting, the roll will also include the images shot up to around 0.5 seconds before you fully press the shutter button. Warning: Long sequences result in larger files!
There are two ways to view and extract images from RAW burst sequences: in-camera, and using Canon’s Digital Photo Professional 4 software.
Method 1: In-camera
Step 1
Go to playback mode and locate the RAW burst file you want to review. Press the SET button.
Step 2
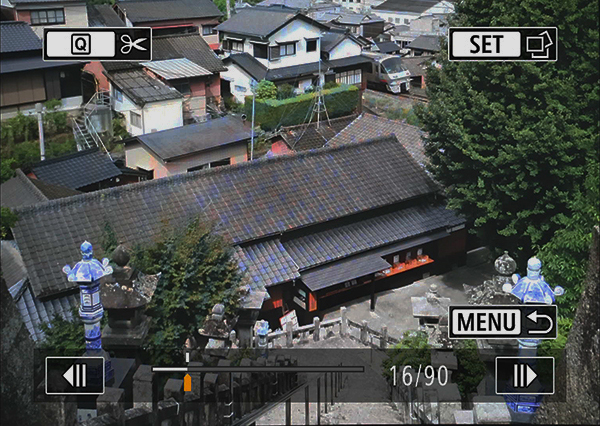
You will see the screen above. Use the cross keys/Multi-controller/Quick Control dial (depending on your camera) to view the individual images in the sequence. You can magnify the images for closer examination.
Step 3
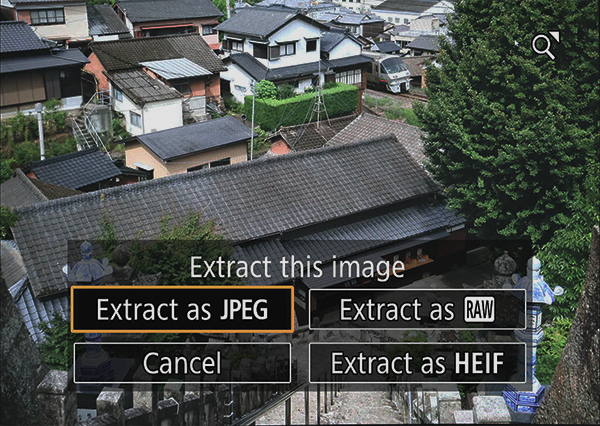
To extract an image, press the SET button. The above menu will appear. Select the desired format. Note that you won’t be able to magnify the extracted image file in-camera.
Extracted image

If you extract the image to JPEG or HEIF, you can make selected global edits to the extracted image in-camera, such as brightness adjustment, white balance, and Picture Style. JPEG files can be sent to your smartphone via the Camera Connect app for immediate uploading to social media!
However, the magnification function and Creative Assist edits will be unavailable. For more extensive editing, import the RAW image file into your computer.
Method 2: Canon’s Digital Photo Professional 4 software
You might find it more convenient to review and extract the RAW burst images using the Digital Photo Professional 4 (DPP) software on your computer. The software is free to use for Canon camera users, and you may download the latest version here.
Step 1

Select the RAW burst file in DPP. Then, go to [Tools][Start RAW Burst Image tool].
Step 2

Use the slider (1) to find the best image in the sequence. Then click on the extract button (2) to extract and save the selected image as a RAW image file. You can also extract and save a selected sequence of images from the original RAW burst file.
Extracted image

You can post-process the extracted RAW image file in DPP or your preferred image editing software just like any other RAW image file.
Learn more about what you can do in Digital Photo Professional in:
5 Easy Steps to Merge Light Trails in Digital Photo Professional
5 Essential Adjustments to Do with Digital Photo Professional
Find out more about the modes and functions in your camera in:
Camera FAQ: What Does In-Camera Lens Aberration Correction Do?
ISO Auto Tip: Prevent Subject Blur with this Must-know Setting!
Touch & Drag AF Customisations for Better EVF Shooting
About the Author
A monthly magazine that believes that enjoyment of photography will increase the more one learns about camera functions. It delivers news on the latest cameras and features and regularly introduces various photography techniques.
Published by Impress Corporation
A native of Shimbashi, Tokyo, where the Japan’s railway system originated, Murakami was born in 1987, which makes him the same age as Japan Railways and the EOS system. An active photographer since his high school days, where he frequently competed in photography competitions for high-schoolers, he graduated with a degree in photography from the Nihon University College of Art. He loves riding trains as much as photographing them, and his train photos are usually shot on his train trips.

