The HDR mode on the EOS 5D Mark III is a remarkable feature that comes in handy under conditions with drastic contrast in brightness. In the following article, I will provide an overview of the HDR mode together with some tips for making good use of it in capturing shots. (Reported by: Hidehiko Mizuno)
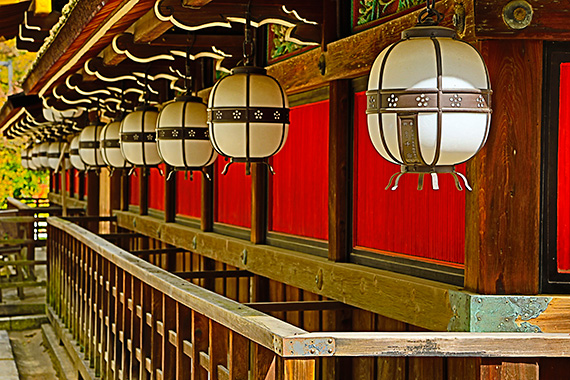
EOS 5D Mark III/ EF24-105mm f/4L IS USM/ FL: 105mm/ Manual exposure (1/125 sec., f/11)/ ISO 400/ WB: Daylight/ HDR mode: Art Bold
Enjoying Handheld HDR Photography!
Use HDR Mode to Overcome the Drastic Contrast in Brightness
HDR is the abbreviation for "High Dynamic Range." It is a technique that merges multiple images of different exposures to produce an image with minimal blowout and black crush. More specifically, three shots of different exposure levels (standard exposure, overexposure, and underexposure) are captured, among which those parts where gradation is retained are combined into a final image with a wide dynamic range. The advantage of this technique is that you can reproduce both high- and low-brightness details in a single image, which otherwise cannot be obtained by a shot taken at a single exposure.
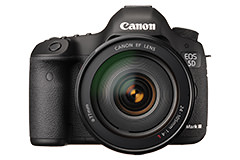
EOS 5D Mark III is popular for its approx. 22.3 megapixel full-frame CMOS sensor, standard ISO range from ISO 100 to ISO 25600 which is also expandable to ISO 102400, and its formidable 61-point High-Density Reticular AF sensor.
Can shoot HDR images handheld with the EOS 5D Mark III
With the EOS 5D Mark III, you can generate an HDR image (JPEG format) simply by setting the camera to the HDR mode while you are shooting. In the past, the conventional method of generating HDR images was by using an image-editing software program after the shots are captured. The HDR mode on the EOS 5D Mark III allows you to enjoy HDR photography on the camera itself. Not only so, by setting [Auto Image Align] to [Enable], you can produce handheld HDR shots without the use of a tripod, as slight misalignments in the position that occurs due to camera shake or during the continuous shooting process are automatically corrected within the camera. Since merging is carried out automatically inside the camera, you can view the resulting HDR image on the rear LCD monitor. For HDR photography enthusiasts, a pleasing advantage of these features is that you can enhance the quality of your works while photographing successive handheld shots. This allows for shooting styles not possible in conventional HDR photography, which requires merging of images on a PC after they are captured. However, note that the edges of the images will be cropped when Auto Image Align is enabled, so the angle of view of the resulting image may appear slightly narrower than what you see through the viewfinder. Also, bear in mind that if the subject is moving by itself or moved by the wind during HDR shooting, afterimages of the subject may appear.
Features of the "HDR Mode" on the EOS 5D Mark III
- Eliminates blowout and black crush caused by drastic contrast in brightness
- Supports handheld photography
- Automatically records images in the JPEG format even when you shoot in the RAW setting
- Setting "Adjust dyn range" to [±3] is recommended
- The edges of the images are cropped when [Auto Image Align] is enabled
Challenge creative expressions using effects like [Art vivid] and [Art bold]
By taking the above pointers into consideration, you can obtain a smooth gradation similar to that on a cloudy day even when you are shooting in a backlit condition where the sky is subject to blowout, or when the shadows of a building tend to appear crushed. In addition to the [Natural] effect, four other options are available in the HDR mode of the EOS 5D Mark III, including [Art standard], [Art vivid], and [Art bold]. Each of these effects alters how the color and shadow appear, and you are encouraged to try them out.
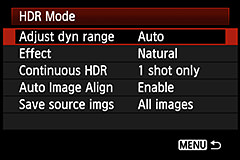
You can set the dynamic range to [Auto], [±1], [±2], or [±3]. Also, you can choose the type of effect, and whether you want to end HDR shooting after a single shot or apply it continuously to every shot. All the options available are easy to understand.
[Natural] Effect is Easy to Use
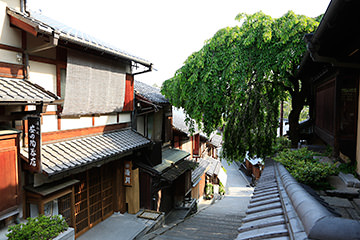
HDR Off
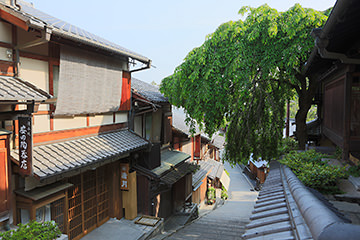
Natural [±3]
[All Photos] EF24-105mm f/4L IS USM/ FL: 28mm/ Manual exposure (1/80 sec., f/11)/ ISO 400/ WB: Daylight
The contrast in brightness is eliminated with the use of HDR, thus helping to restore the gradation of the blown-out sky and the areas shadowed by the architectural structures. At the same time, details are reproduced with the exposure of the reflective walls and tiles reduced. Among the five effects, the [Natural] option produces an image that appears closest to what we see through our eyes.
Effects with Great Individuality
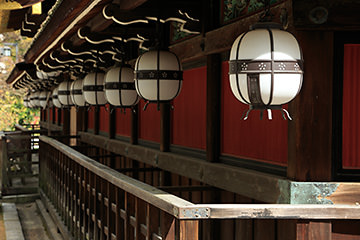
HDR Off
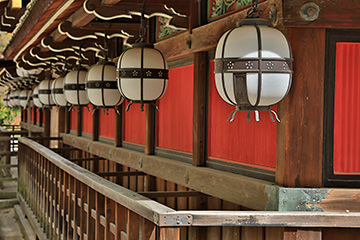
Art Standard
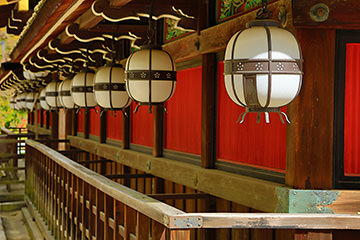
Art Vivid
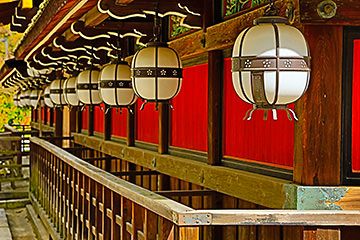
Art Bold
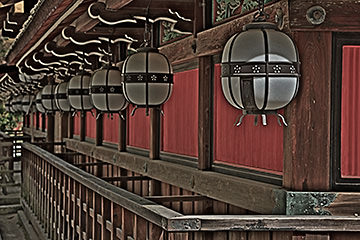
Art Embossed
[All Photos] EF24-105mm f/4L IS USM/ FL: 105mm/ Manual exposure (1/125 sec., f/11)/ ISO 400/ WB: Daylight
A shot of the Kitano Tenmangu Shrine in Kyoto. The shot applied with the [Art standard] effect turns out realistic and vivid. [Art vivid] produces a flat tone that resembles computer graphics. [Art bold] has a relatively strong contrast and high saturation, while [Art embossed] creates an impression that is reminiscent of the color of vintage photos.
Combine the use of the Digital Lens Optimizer with HDR
When HDR is used to eliminate the difference in brightness, highlights may be lost, and you may result in a low-contrast image with no dimensionality. To address this issue, you can perform post-image processing to enhance the quality of your photographic work. For example, by making use of Canon's Digital Photo Professional (DPP) RAW image development software program that comes bundled with all EOS Digital camera models, image processing such as increasing the contrast and restoring the highlights can be done with ease.
Not only so, HDR images can be generated with the latest DPP version. The HDR tool of the said program allows you to fine-tune the contrast and saturation, in addition to the strength of the effect. At the same time, you can also choose to save the images in other data formats (such as TIFF) besides JPEG. For those who wish to produce high-quality photographic works, you are recommended to combine the use of the Digital Lens Optimizer (DLO), a hot feature available on the DPP. To do so, use the DLO feature to write out the image data for merging, followed by using the HDR tool of the DPP to obtain a high-resolution HDR image. With Canon's DPP program, you can produce photographic works that add the high resolving power of the DLO feature to the wide dynamic range and huge amount of information carried by the HDR image.

Born in 1968 in Kyoto. The works he has released center on the beautiful scenery, and also the shrines and temples of Kyoto.


