While autofocusing technology just keeps getting better and better, there are still scenarios where photographers still require the control and precision afforded by manual focusing. Previously a challenge that required time and lots of deep concentration, especially when shooting with the optical viewfinder on a DSLR camera, it has been made much easier with mirrorless camera technology. Besides magnifying the Live View display, there are now two in-camera visual aid functions that assist manual focusing: MF peaking and the Focus Guide. (Reported by: Kazuo Nakahara, Digital Camera Magazine)

Focus information in real time
On Canon’s Dual Pixel CMOS AF system, all pixels on the camera’s image sensor can conduct phase detection. As these pixels search for subjects, they acquire tremendous amounts of information. This information helps to acquire subjects through autofocus, but can also be used to assist manual focusing.
On mirrorless camera systems like the EOS R and EOS M systems, having no mirror means that you are able to see the image captured by the image sensor in real time together with information overlays—not just when you are using the rear monitor, but also when you are looking through the electronic viewfinder (EVF). This makes it even more convenient to apply visual focusing aids such as MF peaking and the Focus Guide during your shoot.

On the EOS R, EOS R5 and EOS R6, you can find the MF peaking and Focus Guide in AF Menu 2.

On cameras without the AF menu tab, you can find the MF peaking function in the SHOOT menu. On the EOS RP, it is on SHOOT Menu 8.
MF peaking: See which areas are in focus
When things are in focus, their edges are sharper (have a higher amount of contrast). MF peaking is works by analysing the Live View image in real time to detect edges with high contrasts. It tints these outlines in a given colour, allowing you to see which parts of the image are in-focus. It’s a great time-saver!

EOS R/ RF28-70mm f/2L USM/ FL: 50mm/ Flexible-priority AE (f/2, 1/80 sec, EV +0.3)/ ISO 200/ WB: Auto
A scene with lots of glass. MF peaking is useful for scenes like this, where you want more control over the plane of focus but don’t require extreme precision.
MF peaking in action
Focus on glass in the middle

Focus on the glass in front

The areas with high contrast (in-focus areas) are tinted in red. If you turn the focus ring, you will see that the red areas will change.
Know this: You can change the peaking level and colour

Changing the level
High

Low

The “Level” setting lets you adjust the edge detection sensitivity. ‘Low’ will ensure finer, more precise focus, but it is also harder to see the peaking.
Changing the peaking colour
Red

Yellow

Blue

There are three peaking colours to choose from: red, yellow, and blue. Choose a colour that is visible against the subject.
See examples of scenes where MF peaking proved useful in:
6 Useful EOS R Features for Photographing Mountains with Clouds
Macro Photography Techniques: Flowers in Water Droplets
Focus Guide: Turning distance information into a visual aid
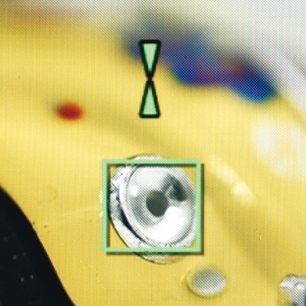
When the Dual Pixel CMOS AF system conducts AF detection, it acquires information about the distance of subjects from the image sensor. The Focus Guide uses this information provide visual indicators of the manual focus position: whether it is in front of the subject, right on point, or behind the subject.

EOS R/ RF28-70mm f/2L USM/ FL: 60mm/ Aperture-priority AE (f/2, 1/320 sec, EV +0.3)/ ISO 200/ WB: Auto
MF peaking also works when the AF frame size is set to ‘Small’. Combine it with MF peaking to easily achieve precise focus in scenes like this one, where you need to focus on a small subject and the depth of field is very shallow!
Try this the next time you use manual focus to take macro shots or capture flowers with intense bokeh!
Focus Guide in action

Front focused

On point

Back focused

Focus position is in front of subject: White display. The middle arrow points inward; the outer arrows point outward.
Focus is accurately on subject: Green display.
Focus position is behind subject: White display. The middle arrow points outward; the outer arrows point inward.
Tip: You can leave the Focus Guide perpetually on

The Focus Guide is turned off by default. Even when you switch it on in the menu settings, it starts up (shows the indicators) only in manual focus mode, so you can simply leave it set to ‘On’.
Note: It is a large source of power consumption when in operation.
Know this: Focus Guide won’t work in scenes where AF is not possible
As the Focus Guide uses distance information from the AF frame, it will not work in scenes where AF is not possible. These include:
- Scenes with no or very low contrast, such as clear blue skies.
- Extremely dark conditions beyond the camera’s low light AF capabilities
When the Focus Guide is not available, you will see the following grey display.

The Focus Guide also won’t be displayed when you magnify the EVF/Live View display.
Receive the latest update on photography news, tips and tricks.
Be part of the SNAPSHOT Community.
Sign Up Now!About the Author
A monthly magazine that believes that enjoyment of photography will increase the more one learns about camera functions. It delivers news on the latest cameras and features and regularly introduces various photography techniques.
Published by Impress Corporation
Born in Hokkaido in 1982, Nakahara turned to photography after working at a chemical manufacturing company. He majored in photography at the Vantan Design Institute and is a lecturer for photography workshops and seminars, in addition to working in commercial photography. He is also a representative of the photography information website studio9.


