


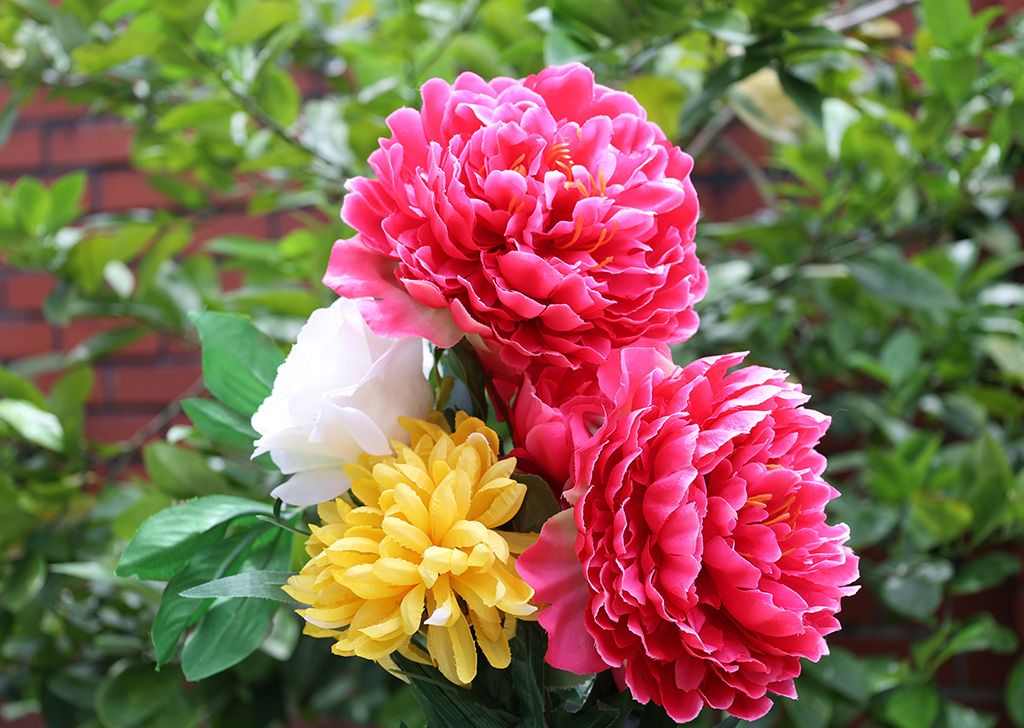
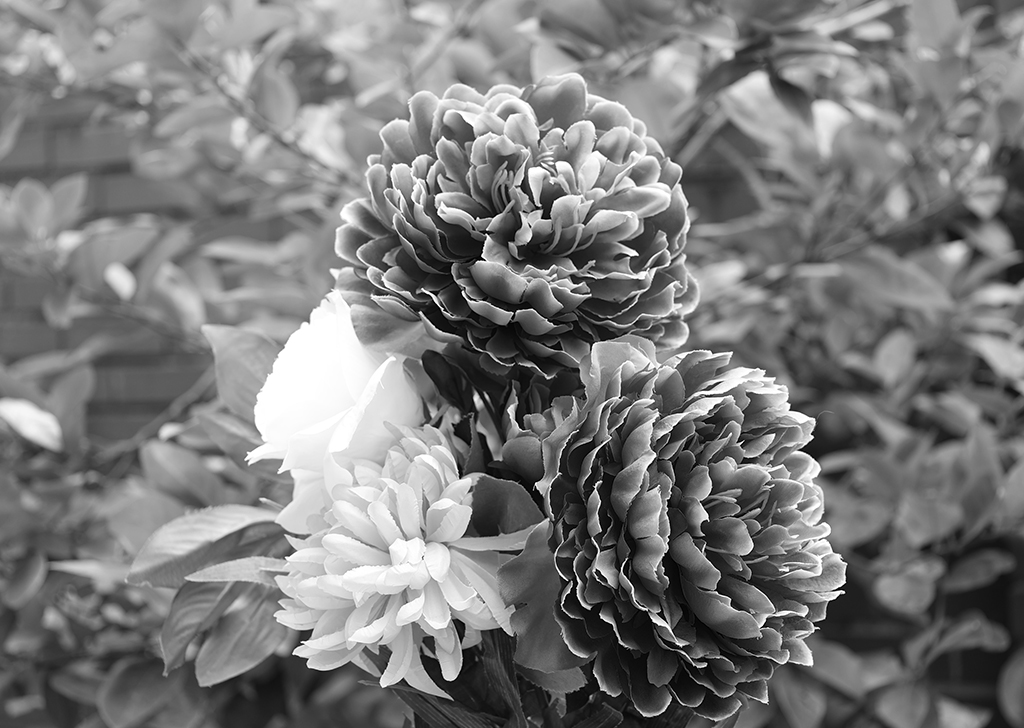
 Original image in colour
When you think of black-and-white photography, it’s easy to just imagine a monochromatic photo that shows various colours as shades of grey. But did you know that colour filters can dramatically alter the look and tone of your black-and-white pictures?
In the past, photographers would screw coloured filters on their lens when the camera was loaded with black-and-white film. With digital photography today, we have the option of doing this either through post-processing on a computer or by changing the colour settings on the camera. The great advantage of doing this in-camera is that you get to see the effect on the LCD first and also the flexibility of changing the filters to suit the subject. By being able to see the final image on the LCD before pressing the shutter also helps you to recompose the shot if necessary, and that can make for a better shot.
Before we dive into that, let’s see the varying effects that colour filters can have on black-and-white images.
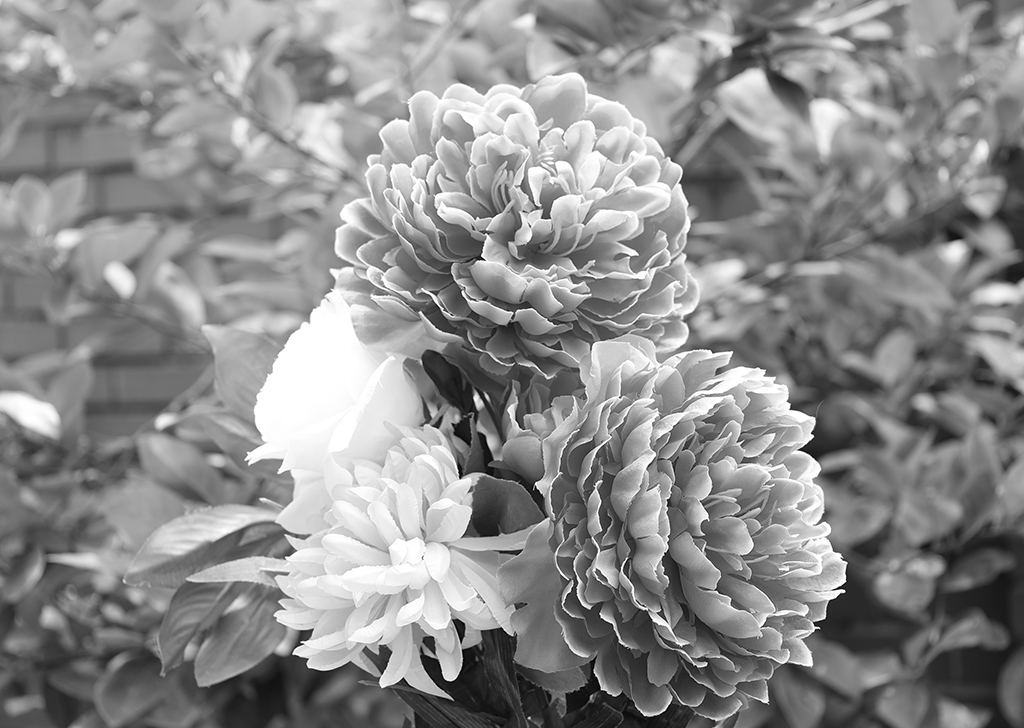 Picture with the yellow filter applied in-camera.
Yellow Filter
A yellow filter is one of the most commonly used colour filters to alter contrast in black-and-white photography. It is the “go-to” filter to darken blue skies, making the white clouds more prominent. This increase in contrast by way of visual separation is useful for landscape photographers who may be capturing a wider expanse of the sky.
With a yellow filter applied, other colour tones such as green, red, yellow and orange are also reproduced in lighter shades of grey.
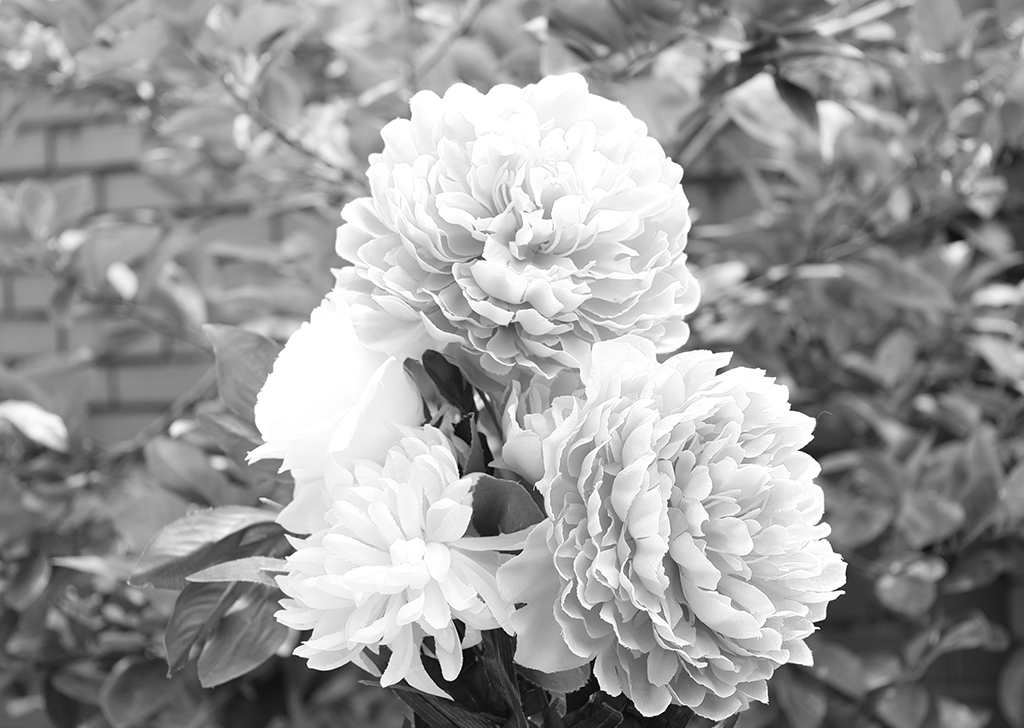 Picture with the red filter applied in-camera.
Red Filter
Photographers who want to create bold and dramatic effects often look to the red filter. When this filter is used, blue skies are rendered almost black, which will make the white clouds stand out even more.
You can also use a red filter for photographing buildings, where the structures may gain more clarity due to the enhanced contrast. This can make lines appear bolder and stronger, suggesting a different feel and texture to the architecture.
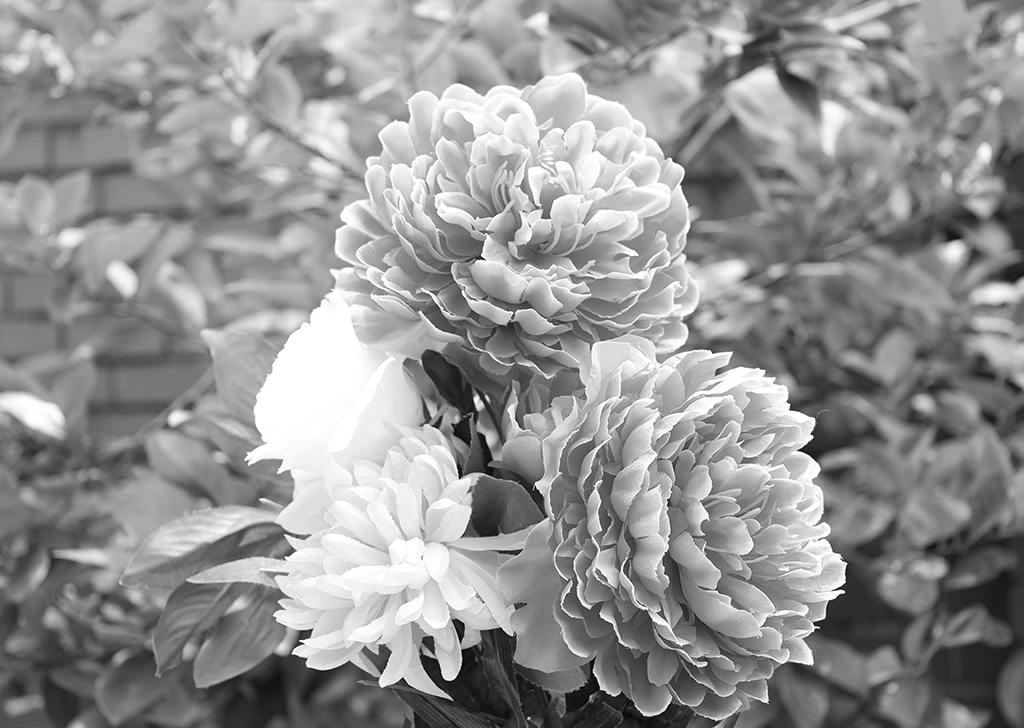 Picture with the orange filter applied in-camera.
Orange Filter
An orange filter delivers results that are in-between the red and yellow filters. Photographers looking for more balanced tones will stand to benefit from using an orange filter. While the effects are not as dramatic as using a red filter, it still delivers more ‘punch’ compared to a yellow filter.
 Picture with the green filter applied in-camera.
Green Filter
A green filter is excellent for shooting foliage as it directly affects varying shades of green and its reproduction in greyscale. Certain green tones may be lightened, whereas darker green tones can be rendered almost black. This allows landscape photographers to alter the contrast for specific green tones while maintaining the effects of the sky.

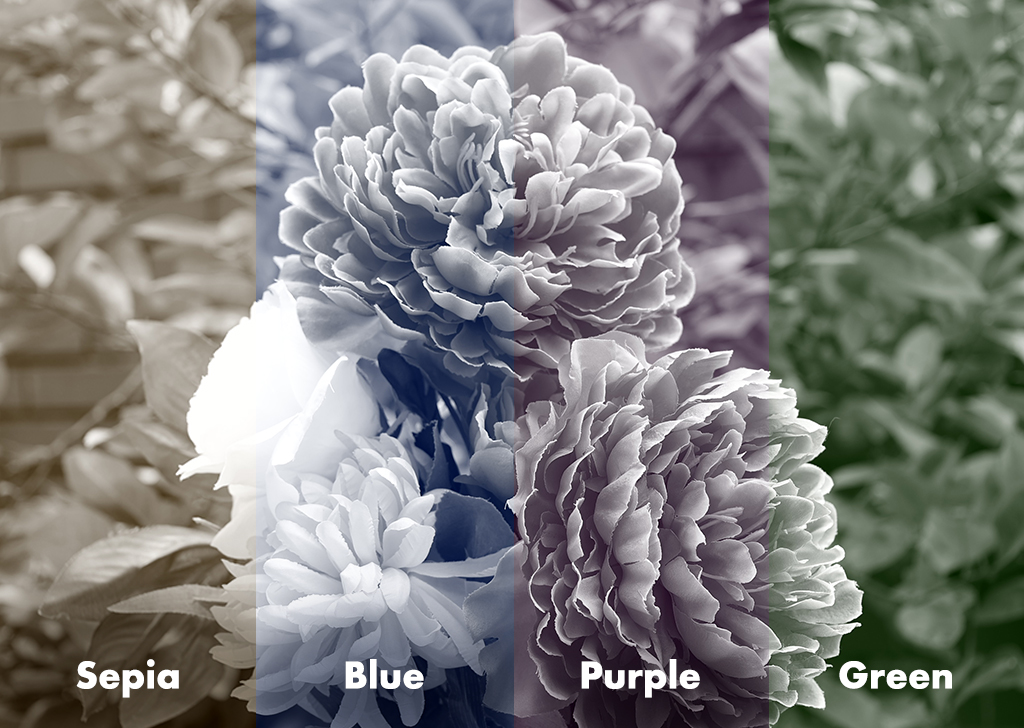
Sepia
Instead of greyscale, your monochrome image now has a brown tone when you turn on the sepia filter effect in your camera. This is often associated with photos taken in the past and can introduce a sense of nostalgia to the scene.
Blue, Green and Purple Tone
The blue, green and purple tone effect filters in the monochrome settings introduce the respective colour tones into the black-and-white photo. While these may not sound like common colour tones to overlay on your photos, they do make for an interesting colour palette that can make your monochrome photos stand out from others.
Now that you have a basic understanding of how colour and tone filters affect the grey in black-and-white photography, here are 3 tips to help you apply them:
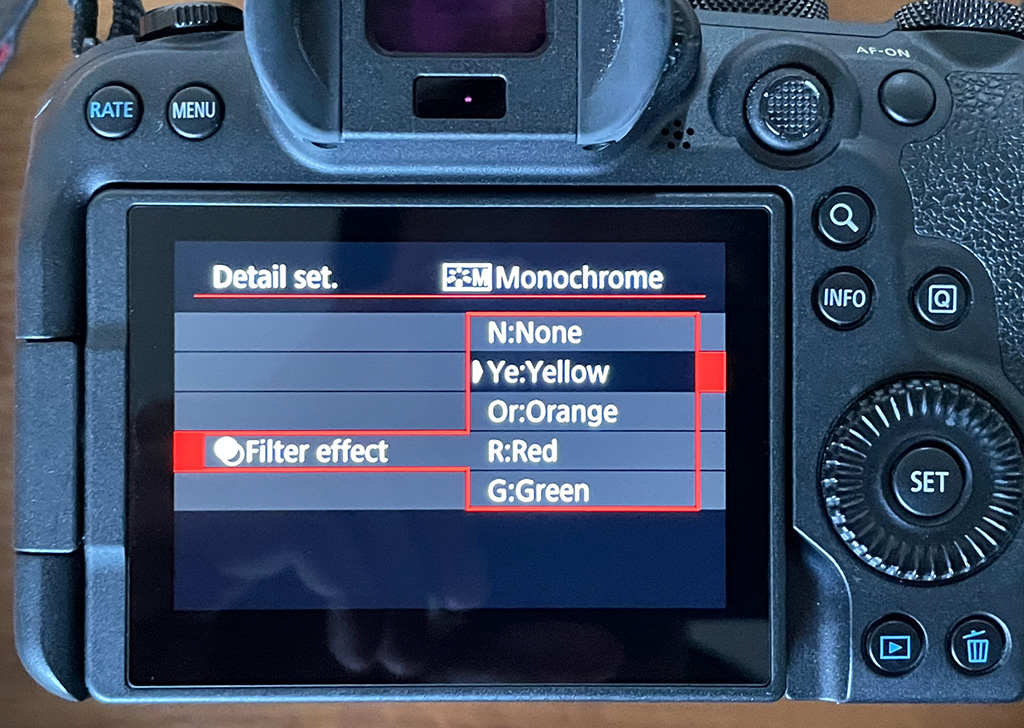
1) In your Canon camera, set it to the Monochrome function. Now when you access the camera settings, you should be able to see the Filter and Tone options. From there, you can choose what filter you want to apply in your next shot.
2) If you are using a DSLR, activate Live View after selecting a colour or tone filter. This will apply the effects on the screen, and you will be able to see how your black-and-white image will look with a particular filter applied.
3) For more flexibility, shoot RAW + JPEG. This way, you not only have the monochrome version in JPEG that is ready to be shared with your friends or on social media, but the RAW copy is in colour, and you can edit it further on your computer in black and white and make more adjustments to your liking.
Do note that different cameras may offer different sets of filters, so go ahead and dive into your camera’s menu to see what is available for your next shoot.
Now that you have a better idea of how coloured filters alter the look of black-and-white images, why not give it a try the next time you’re out on a shoot? Maybe you will be surprised by the results!
For similar articles:

