


Introduction to Fine Art Printing – Part 4: How Light Affects Colour
In this segment of our introductory series on fine art printing, we will learn about the ideal lighting environment for accurately appraising colour of your screen and printout.

The importance of controlled ambient light
Our appreciation and interpretation of colour is highly dependent on the light source that we use. In any given environment, there could be numerous light sources, each with different colour characteristics. Picture a room lit by both window and fluorescent light. Depending on where you position your monitor or printout, e.g. next to the window or under the fluorescent light, your perception of colour can be remarkably different. This is due to a difference in colour temperature – warm light versus cold light – that changes our perception of colour.
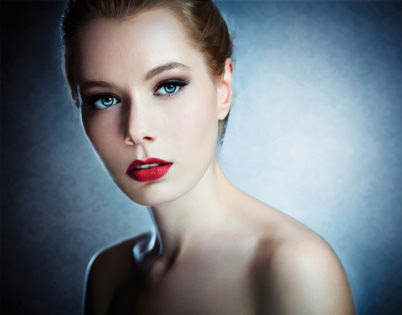
Cool

Warm
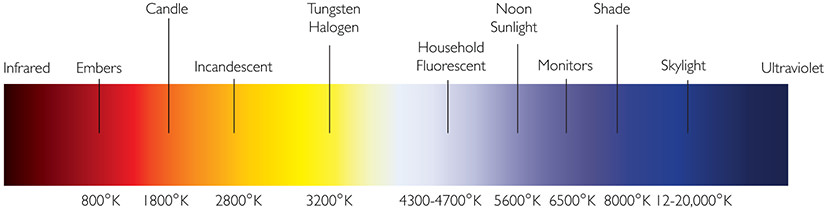
What is colour temperature?
Colour temperature is a method of describing the colour characteristics of light. Light can be warm (yellowish) or cool (bluish), and it is measured in degrees of Kelvin (K). The Kelvin Colour Temperature Scale tracks the light colour changes of a black body object as it glows, e.g. a lamp filament being heated. As it gets hotter, its glowing colour will shift from deep red, to orange, to yellow, and finally to white. Light sources that glow this way are called "incandescent radiators”. They radiate light energy at all wavelengths of their spectrum, therefore rendering all the colours of a scene equally.
What is the Colour Rendering Index?
The Colour Rendering Index (CRI) ranks the ability of a light source to identify colours, and is measured on a scale of 1 - 100. On this scale, a rendering of 1 is monochromatic light, and a rendering of 100 is natural sunlight. The scale is a measure of the quality of light produced by the source. So a sodium street lamp gives out a lot of light however its CRI is low (about 40) as it is unable to show the colours of the object it shines on accurately. On the other hand, the CRI of a good fluorescent tube can be above 95, meaning that it emits a good quality of light that accurately depicts colour. The CRI scale may also be referred to as the Ra or CIE Ra value. This is the name of the international standard for the CRI scale.

CRI=51

CRI=80

CRI=90
Take control of your ambient lighting
Now that we have some knowledge of colour temperature and colour rendering index, we can now choose light sources that offer the best ambient light environment for printing.
Remove sunlight from your room
The colour temperature of natural daylight coming through the window changes during the course of the day. It can range from a warm 4000K during sunset/sunrise to a cool 8000K during an overcast day. As such, it is wise to perform colour-critical work in a room without having the ever changing influence of sunlight.
Ceiling lights
It is important to ensure that the brightest light source in the room, e.g. ceiling lights, are at the same colour temperature as your screen, which is about 5000K and CRI of 95. The best way to achieve this is to use full spectrum fluorescent tube lights such as the PHILIPS TL 950 - T8. This fluorescent tube has a colour temperature of 5000k and an extremely high CRI of 98. A pair of these fluorescent tubes offers approximately 200 lux illumination at your workstation (from a ceiling height of 2.5 metres) – giving you good quality light to check both screen and printed colour. Lux is a measure of brightness and is approximately the brightness of one candle. Hence 200 lux is equivalent to the illumination strength of 200 candles.
Adjusting the brightness of your monitor
The brightness of your monitor is crucial for accurate colour and tonal representation. For example, if you are viewing a landscape photo with subtle cloud details in both highlight and shadow areas, a dim or an excessively bright monitor will not accurately display the range of mid-tones. The ideal brightness level for monitors is set at gamma 2.2. If your display appears to be too dark or bright, do check on the gamma value at the Display setting tab on your Windows computer or the under the Display icon in System preferences of Mac OS computers.
Desktop lamp
When you are performing side-by-side comparison of a fine art print against your computer display, you will need a desktop lamp capable of putting out full spectrum light at 5000K. The ideal illumination level at the surface of the printout should be about 650 lux in order to match the brightness of your computer screen. Some professionals use lamps such as the Eizo Z80 Pro for this purpose, but there are many others to choose from.
Wall colour
When performing colour-correction work, avoid rooms with coloured wall paint or wall paper. The presence of these large coloured surfaces will impact on how colour is perceived. The ideal colour for walls and surfaces is neutral grey. If you are using white wallpaper, please choose one that does not contain optical brighteners as they enhance the representation of cooler tones, making accurate colour visualization more difficult.
Best practices when at your workstation
1. Do position your workstation with the ceiling lights behind your chair so that direct light does not enter your eyes. This reduces eye strain and enhances your ability to perceive colour.
2. It is also important to minimize background reflections that might influence colour perception of the displayed image. Background reflections can be easily eliminated by hanging a large gray backdrop behind your seat.
3. Do wear neutral coloured clothes e.g. grey or off-white tops, when working on your colour images. Avoid wearing brightly coloured clothes as they can show up as unwanted reflections on your screen, making accurate colour assessment difficult.
4. Avoid using colourful desktop wallpaper designs for your computer desktop as bright colours can distort your colour perception. It is best to use a grey background as the wallpaper for your desktop wallpaper.
5. Avoid putting bright coloured objects such as dolls and toys in your line-of-sight as this might affect your perception of colour.
6. To minimize the effect of ambient light on your screen’s ability to display colours and tones, we recommend placing a hood around the monitor. The hood should be about 4 to 6 cm deep in order to offer enough protection from stray ambient lighting.
In our next article, we will be continuing our discussion on colour perception and colour management.
Receive the latest update on photography news, tips and tricks.
Be part of the SNAPSHOT Community.
Sign Up Now!
