


Getting Started in Landscape Photography: 5 Things to Know
All ready to go out for your first major landscape shoot with a camera and lens? Take some time to read through these frequently asked questions that many landscape photography beginners have, answered by two professional landscape photographers. (Reported by: Takashi Karaki, Toshiki Nakanishi, Digital Camera Magazine)

1. When’s the best time to shoot?
Right before and after sunrise and sunset, for a start
For any given shooting location, the scene that you see and the colours that you can capture change depending not just on the season but also the time of the day that you shoot.
Some of the “golden times” for landscape photography include the starry sky after sunset, and the sunrise after dawn breaks. At these timings, the rich colours that result from the changing sky and the compositions that are make it easy to capture stunning shots that are also perfect for sharing on social media.
The weather conditions can affect the shot too. Personally, I do not like shooting on a clear day. I prefer to have some clouds in the sky, such as when it’s cloudy with occasional clarity, or when it’s just clearing up just after the rain. I feel that this allows more room for creative expression.

Sunrise
EOS 5DS R/ EF24-70mm f/2.8L II USM/ FL: 24mm/ Manual exposure (f/5.6, 30 sec)/ ISO 250/ WB: Tungsten
Photo by: Takashi Karaki
Night turning into morning. The sky transiting from black to blue, and then to red and orange makes an impressive sight. Most people will still be fast asleep at this timing, but this extraordinary scene is definitely worth waking up for.

Sunset
EOS 5DS R/ EF24-70mm f/2.8L II USM/ FL: 35mm/ Manual exposure (f/9, 0.4 sec)/ ISO 100/ WB: Auto
Photo by: Takashi Karaki
With the right clouds, the sunset can make a very dynamic picture. If the Western Sky is bright right after it rains, it is a sign that there will be a bright, crimson sunset. Stand by and wait, even after the sun has set below the horizon.
Tip: Knowing the sun or moon position ahead of time can help you plan your shoot better. Try an app such as Sun Surveyor.
For more sunrise/sunset shooting tips, check out:
Capture the Fiery, Vibrant Colours of Sunrise
Early Morning Landscape Photography: To Shoot Before or After Sunrise?
Decisions in Landscape Photography: Morning or Evening?
Sunrise, Sunset: Achieving Dramatic Contrasts in Street Photography
2. What accessories will make my shoot easier?
A tripod, shutter release, and lens filters
Tripod and shutter release
Sunrise, sunset, morning and evening golden hour and blue hour, starry skies…these excellent times to shoot landscapes have another thing in common—there is very little natural light. This usually means having to use a slower shutter speed to ensure sufficient exposure, putting your shots at higher risk of blurring from camera shake. A tripod and remote shutter release will help to prevent this and ensure sharper, blur-free photos.

A tripod will keep the camera stable. Tripods come in all shapes and sizes. For the best stability, choose one that has thick sturdy legs made from aluminium. If you want something that is both stable and lightweight, choose one made from carbon fibre.
Other factors that influence the stability of your tripod include:
- How much weight it can hold
- The weight limit of the tripod head
- The weight of your camera body
Tip: When you get your tripod, also get a tripod head that allows you to adjust the camera angle even after the camera is securely attached.
Learn more about what you can do with a tripod in:
Professional Tips for Shooting with a Tripod

Pressing the camera’s shutter button can cause camera shake. To take a photo without doing so, use a remote shutter release, also known as a remote switch. It is often used together with a tripod.
Tip:
- If your camera is Wi-fi enabled, you can use a paired smartphone as a remote shutter release via the Remote Live View Shooting function on the free Canon Camera Connect smartphone app.
- If all else isn't available, try using the 2-second or 10-second self-timer function.
Lens filters
When shooting landscape photography in daylight, how you capture and express the light can mean the difference between a so-so shot and a masterpiece. Lens filters provide a convenient way to control the light captured by your camera.
Two types of filters that are extremely useful for landscape photography are:
- Polarising filters (PL filters), which are used to intensify colours and reduce light reflection; and
- Neutral density filters (ND filters), which help to reduce the light entering the camera, allowing you to use slower shutter speeds or wider aperture settings for greater creative expression.

Tip: ND filters are categorised based on their light reduction effect. Make sure that the one that you choose has an effect that meets your needs. The reduction in light might affect AF operation, but focusing in Live View should help.

Photo by: Takashi Karaki
This long exposure shot of the Meoto Iwa (Married Couple Rocks) in Futami, Mie Prefecture, Japan was taken right after sunrise. As the sky was bright, I used an ND1000 filter, which allows me to shoot at 55 seconds, 10 shutter speed stops slower than without the filter. A longer exposure might have made the sea smoother, but this shutter speed retained some of the waves' shape so that they resemble a sea of clouds.
3. Can I shoot landscapes without a tripod?
Yes, if you make good use of your camera and lens features
How many times have you shot by hand in daylight, thinking that they should be safe from camera shake, only to be sorely disappointed when you finally take a good look at the shots during post-processing?
The truth is, there will always be some risk of camera shake even when you are shooting in bright conditions, because humans are always making small involuntary movements, such as when we breathe. It's safer to use a tripod where possible.
Having said so, of course it's possible to get sharp shots when shooting by hand. Just make sure of the following:
- Use a higher ISO speed
- Use an appropriately fast shutter speed
- Use a lens with image stabilisation (IS) and make sure it’s enabled
- Make sure you have a stable shooting stance.
Image stabilisation technology has improved a lot in recent years, which makes it a more reliable aid than before. If your camera can shoot at high ISO speeds with minimal image noise, you will also be able to leverage on this to use a higher shutter speed in low light conditions.
With tripod

Photo by: Takashi Karaki
A tripod keeps your camera stable when you want to shoot long exposures. Using a long exposure to photograph a river with a regular direction of flow helps you to make it look silky smooth, like in this picture. Many beginners to photography probably aspire to take a shot like that.
By hand

Photo by: Takashi Karaki
More and more famous tourist spots in Japan now ban the use of tripods as they can get in the way of other visitors. That shouldn't get in the way of a good shot! If you use a high ISO speed and a lens with built-in IS, you will still be able to take steady handheld images of low-light scenes such as this autumn leaf light-up in Tenju-an Garden, Nanzenji Temple, Kyoto.
4. What’s the best lens to use as a main lens?
A telephoto zoom lens can be surprisingly convenient for landscapes
Most people think that the best main lens to use for landscape photography is a wide-angle lens, but I actually use my telephoto zoom lens the most. In fact, the EF100-400mm f/4- 5.6L IS II USM is my best friend for shooting the vast natural landscapes of Hokkaido, my main “battlefield”.
See what else Toshiki Nakanishi has shot with this lens in:
Magical Winterscapes: When Diamond Dust Becomes Sun Pillars
The perspective compression and pull-in effects of a telephoto lens are critical for when I want to close in on part of a sparse landscape, or when I need to make elements look more two-dimensional for artistic purposes. You can even use it like a macro lens and close in onto various details.
(Photos below by: Toshiki Nakanishi)
100mm

When I want to depict the landscape in a way that resembles a shot taken on a standard lens, I use the wide-angle end of the EF100-400mm f/4- 5.6L IS II USM. This results in a natural-looking depiction with very little perspective compression.
160mm

The stronger perspective compression at this focal length allowed me to make the hills look flat, just like in a drawing.
400mm

Using a long focal length to crop into part of a faraway scene makes it seem nearer than it really is.
Also see: Composition Tips for Making Mist Pop
5. Is there any etiquette that I should know about?
Remember to respect the people who help to maintain the scenery
Nature may have created the beautiful landscapes that you see, but don’t forget the people who work to maintain them so that they can stay as beautiful as they are. In Japan, all land that you see will have an owner who carries out activities that help to preserve the scenic views. Think of them and respect the environment when you are taking your shots.
Things to keep in mind
- Don’t forget the “seeing” in “sightseeing”. Be in the moment; give the scenery your full attention.
- Take only pictures, leave only footprints.
- Appreciate the subjects that you photograph. Think of them as like human subjects who gave you permission to photograph them, and treat them with the same respect.
- Watch what you post on social media. Don’t post anything that will discourage people from patronising the places.
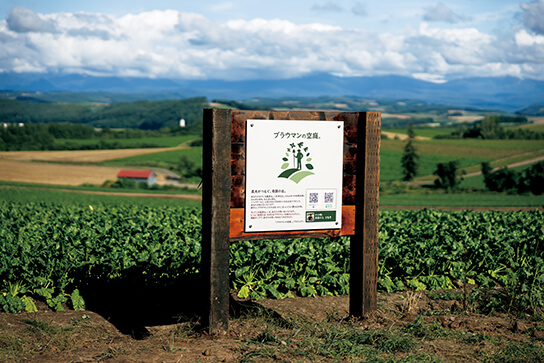
Photo by: Toshiki Nakanishi
In Hokkaido, I collaborate with a friend’s farm on a project that lets people visit and see the farm. Activities like this help people to understand more about the farms that help to make the landscape of Biei what it is today.
Receive the latest update on photography news, tips and tricks.
Be part of the SNAPSHOT Community.
Sign Up Now!About the Author
A monthly magazine that believes that enjoyment of photography will increase the more one learns about camera functions. It delivers news on the latest cameras and features and regularly introduces various photography techniques.
Published by Impress Corporation
Born in 1971 in Osaka. After learning photography on his own, Nakanishi moved the base for his photography activities to the town of Biei located in Kamikawa-gun of Hokkaido. While capturing landscapes that focus on light, he also produces works that bring out the figurative beauty of nature. Head of PHOTO OFFICE atelier nipek.
After some experience as a sports instructor followed by 10 years in magazine production and editing, Karaki moved to Yonago City in Tottori Prefecture, where he became known for his landscapes of the San’in region of Japan. His works have been published in Amazing Village, a booklet of beautiful Japanese villages produced through a CANON × Discover Japan collaboration in 2017, and his shot of the sea of clouds at Akechi Pass in Tottori Prefecture was among 12 images selected by the Japan National Tourism Organization (JNTO) to represent Japan.
Instagram: @karakky0918


