


Pro Tips for Live Concert Photography (4): Tips for Capturing Photos a Cut Above the Rest!
In the last instalment of this series, professional photographer Hajime Kamiiisaka shares with us his tips for capturing live concert photos that are a cut above the rest. We hope you will be able to improve your techniques to bring out the charm of each artist. (Reported by: Hajime Kamiiisaka)

Equip yourself with better techniques to enjoy live concert photography even more.
Prioritise quality over quantity
People often ask me how many shots I take during each photoshoot, but I feel capturing photos that artists will be happy with is not related to the number of shots taken. I will take a number of shots such that I will not look back on the shoot with regret wishing I had taken more. It depends on the nature of each assignment, if I am shooting a band, for example, I will capture photos of all the band members. My shots will include scenes in accordance with each client’s requirements, but I will not engage in continuous shooting unnecessarily. I shoot aiming to get a best shot each time. As such, timing is more important than the number of shots. For instance, I will try to shoot at the right timing when there are changing lighting conditions or when the artist’s expression changes.
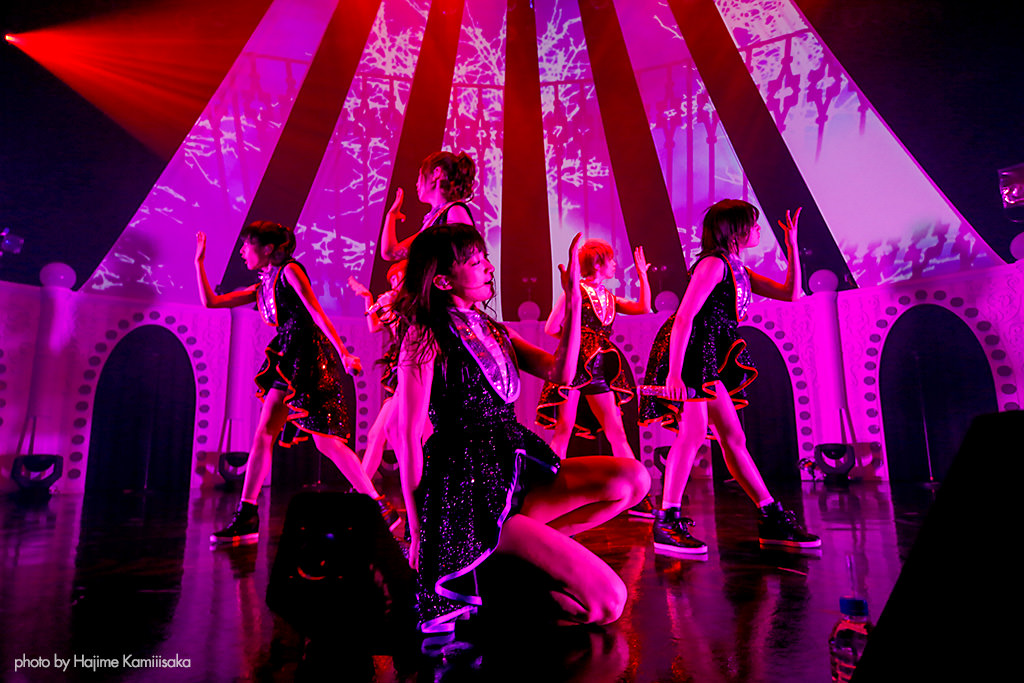
Shooting information: f/5.6, 1/100 sec., ISO 1600
Shooting a large number of photos doesn’t guarantee that their quality. Aim for decisive moments.
The trick is to find out everything you can about the artist in advance. If the artist is on a tour, collect as much information as you can, determining what kinds of performances and events will take place. You will be able to capture shots calmly even when the artist jumps during the performance if you know which are the high points in each song.
When it comes to the setting the recording format for photos, I personally only shoot in JPEG. Most of the times, I adjust white balance and colour tones depending on which medium the photos will be used in, and deliver the photos almost immediately after each photoshoot.
Don’t waste a moment while shooting
Do not take your eyes away from the stage during a live concert. Hold your camera such that you will be able to snap a shot right away as you observe the live concert. An effective way of getting the right timing to capture an instant is to look through the viewfinder with your dominant eye while your other eye watches what takes place on stage. The timing to capture a best shot will have passed before you know it, so you will be missing out on capturing worthwhile scenes if you are checking out the images you have taken. It would be good if you carry more than one camera with you, since the time spent switching memory cards or lenses can be used better.

A live concert generally lasts for 2 to 3 hours. Keep your eyes fixed on what is taking place on stage even as you shoot.
As I previously mentioned, you have to know how to operate your camera smoothly so that you do not waste a moment (See Part 3 of this series). Make sure you can concentrate at the live concert venue. You will control the camera effectively only when you can adjust settings without looking at the controls on the camera. After I purchase a new piece of equipment to replace another one, I will spend a period of time thoroughly checking out how the new one is different in terms of operations, functions, etc. I also customise some controls to save as much time as possible adjusting settings.
Tip: The advantages of using more than one camera
Most professional photographers go to photoshoots with more than one camera. Another common practice is to mount a full-frame camera with a wide-angle lens, and an APS-C camera with a telephoto lens. These are effective for shooting different angles of view and doing away with time wasted switching lenses. If it is difficult for you to obtain more than one camera for shooting during a live concert, you could complement a DSLR with a compact camera.

Kamiiisaka uses a set of four cameras. The lens mounted on each camera is as follows (from left).
EF16-35mm f/2.8L III USM
EF24-105mm f/4L IS II USM
EF70-200mm f/2.8L IS II USM
EF400mm f/2.8L IS II USM
These will cover all angles, from wide-angle to super telephoto.
Add more variation to bring out your originality
With the techniques I have introduced so far, I believe you would be able to capture the live concert photos that you want to a certain extent. Once you have shot at more live concerts, you will be able to get better. As we come to the end of this series on live concert photography, I would like to share 3 tips for getting a variety of shots.
Tip 1: Review the photos you have taken
It is important to review the photos that you have taken to date. Determine which angles of view you prefer, which angles of view you are better at, and understand your strengths and weaknesses. For example, if you find that your wide-angle shots do not stand out, keep in mind to shoot when a live concert peaks (See Part 2 of this series). It would also be good to take note of the image composition.
Tip 2: Include items distinctive to an artist in a shot
I recommend capturing items that are distinctive to an artist in your shot. You will be able to capture the atmosphere of the live concert if you include the artist’s logo, name of the tour, stage setup, etc. in your shot. In addition, the audience swaying their hands above their heads, light sticks, towels, and smoke effects are also useful for depicting the atmosphere of the live concert.
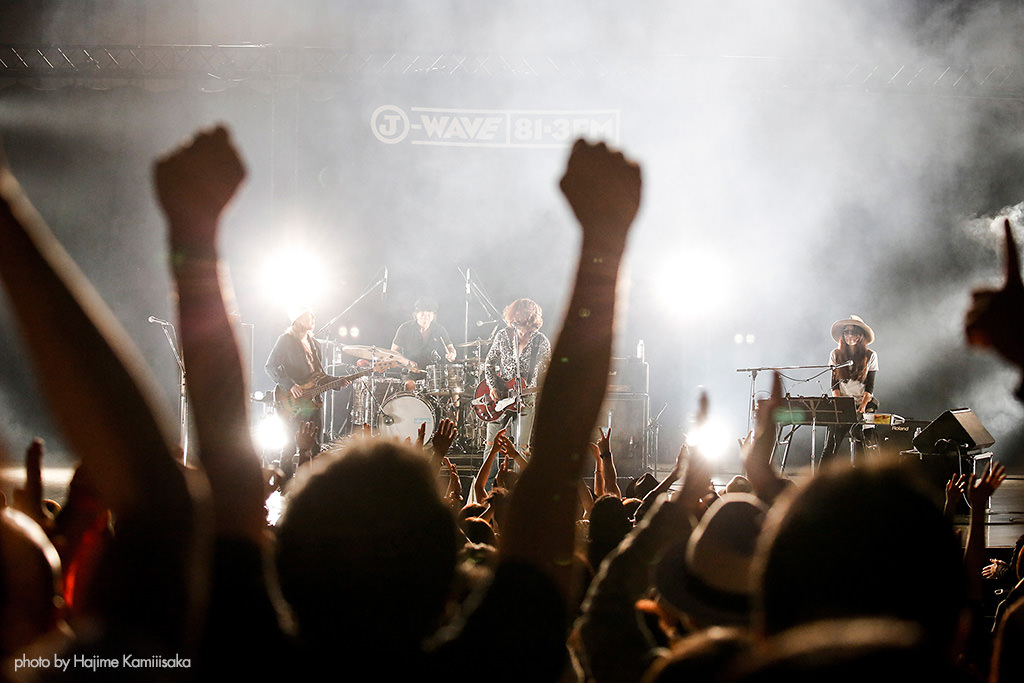
If you include the name of the tour and the artist’s logo in the frame, it would be easy to tell which artist’s live concert is in the picture. Another way to feature the excitement during the concert is to capture the audience’s raised hands and the light sticks.
Tip 3: Supplement with more equipment if necessary
Although you will be able to capture various angles of view with a kit lens, you will be limited by how much you can open up the aperture because of the high maximum aperture f-number (See Part 1 of this series). As you will have to increase the ISO speed, if the amount of noise bothers you, it would be better if you add on a brighter lens to your set of equipment. I use lenses such as the EF16-35mm f/2.8L III USM, the EF24-105mm f/4L IS II USM, and the EF70-200mm f/2.8L IS II USM.
When it comes to the camera body, I check for the number of AF points. The AF area for the EOS 5D Mark IV has 61 AF points, and the EOS 750D’s AF area has 19 AF points, so the extent of coverage differs and so does the AF performance. Start by handling your equipment and controlling them better, and then you can go on to think about which equipment you need to replace.
Image of the EOS 5D Mark IV’s AF area

Image of the EOS 750D’s AF area

Compared with the AF area of the EOS 5D Mark IV, you can tell that the AF area of the EOS 750D covers a narrower area. When trying to shoot the same composition, it will be relatively more difficult to lock focus on the subject from the screen.
Tip: When imperfections are captured
When you notice some imperfections in the photo after shooting, you can use the Stamp tool in DPP (Digital Photo Professional), which comes with the camera. By digitally processing the image, you will be able to get rid of imperfections.
Also, use the Sensor cleaning function to maintain your camera. By shooting a blue sky or white wall, you can check if there are any foreign particles on the sensor. If you still can’t clean the sensor, check with the service centre.

You can easily rid your photos of imperfections by using the Stamp tool in DPP (Digital Photo Professional).
Correcting unwanted spots with Digital Photo Professional Ver.3.9 (Copy Stamp Tool)

When there are foreign particles on the sensor, maintain your camera by using the Sensor cleaning function.
[Lesson 17] How to Clean the Image Sensor
For more about Kamiiisaka and his work, check out our Interview with Celebrity Photographer Hajime Kamiiisaka:
Part 1: From Record Label Executive to Pro Photographer
Part 2: Tricks of the Trade
Receive the latest updates on photography news, tips and tricks by signing up with us!
Entered Epic/Sony Records in 1993, joining the design production division after gaining experience as a promoter and in A&R. Left in 2002 to become an assistant to fashion photographer JFKK, before striking out to take on photography assignments on his own. Since then, he has been active mainly in the commercial fashion, film, music and visual arts scenes.

