


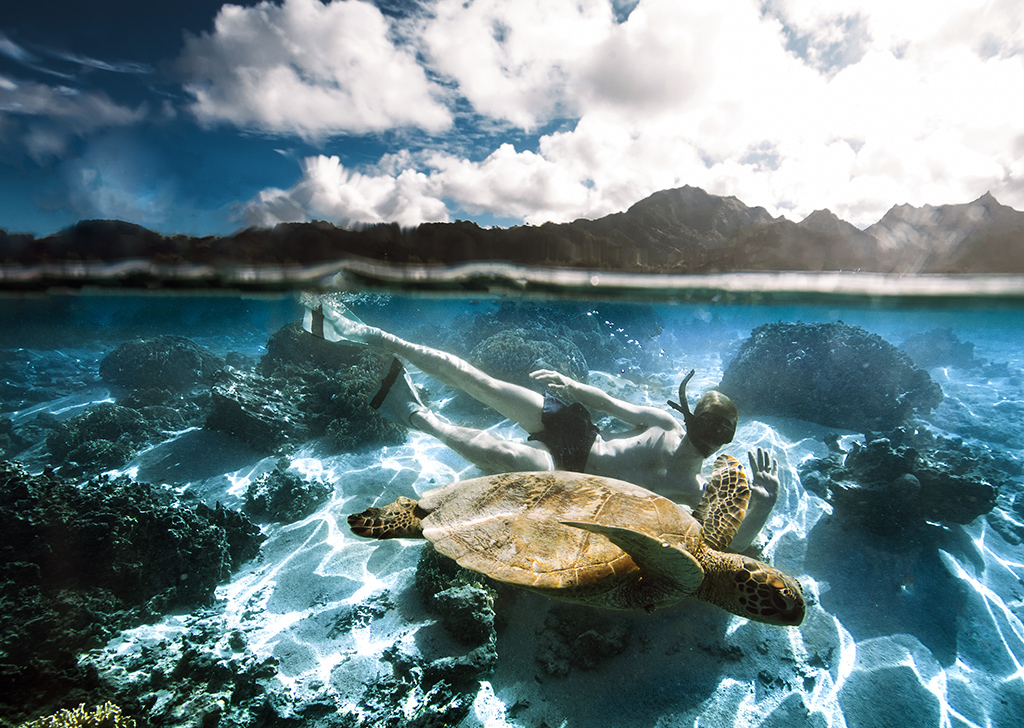
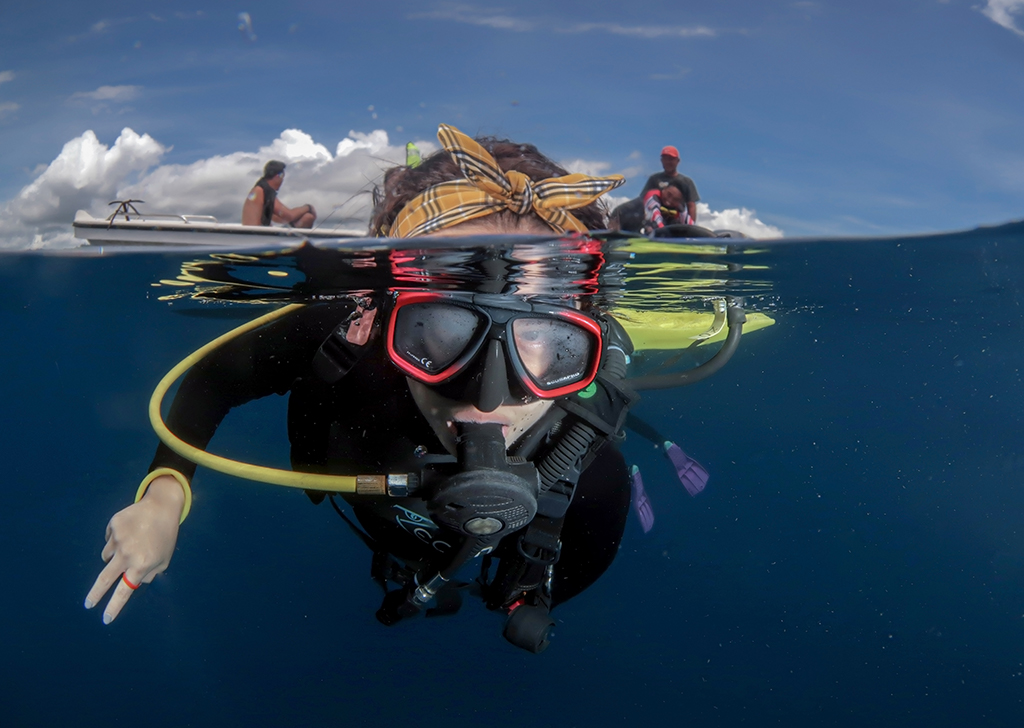
EOS 5D Mark IV, EF14mm f/2.8L II USM, f/14, ISO 320, 1/200s, 14mm by @charlottepiho
Over-under photos are irrefutably eye-catching. They showcase an interesting perspective of two scenes within an image, telling a story above and below the water level. They are often photographed with distinct contrast in the ‘over’ and ‘under’ zone. Additionally, they make an exceptional contribution to your underwater photo story!
If you’re curious and keen, read on to learn tips on how to get started in your first over-under photography project!
Composition and Storytelling
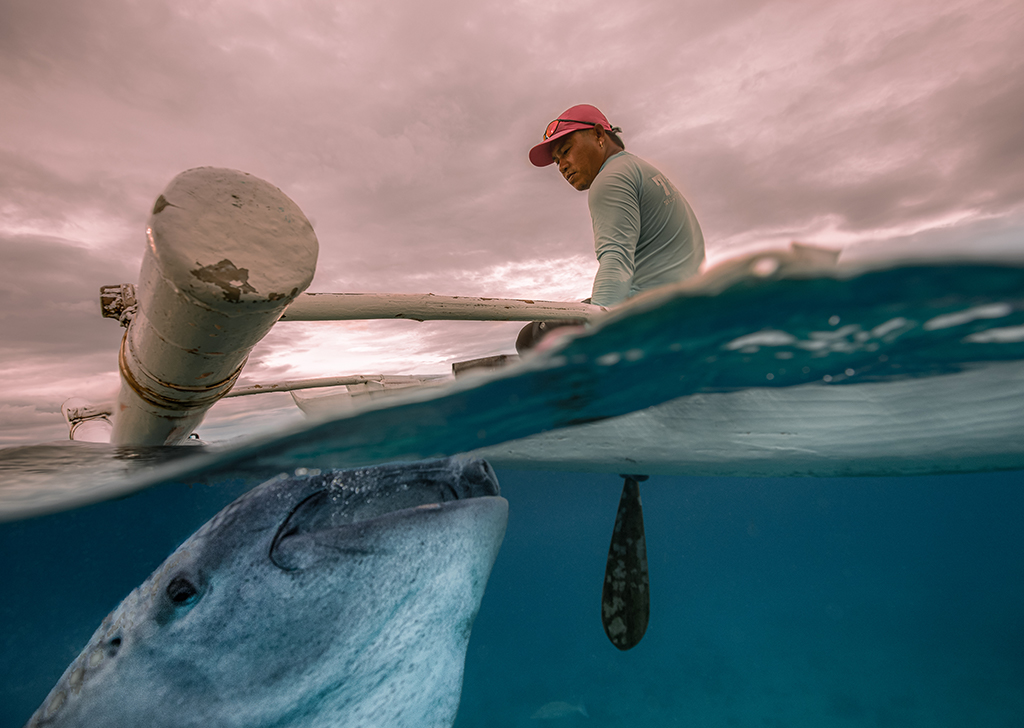
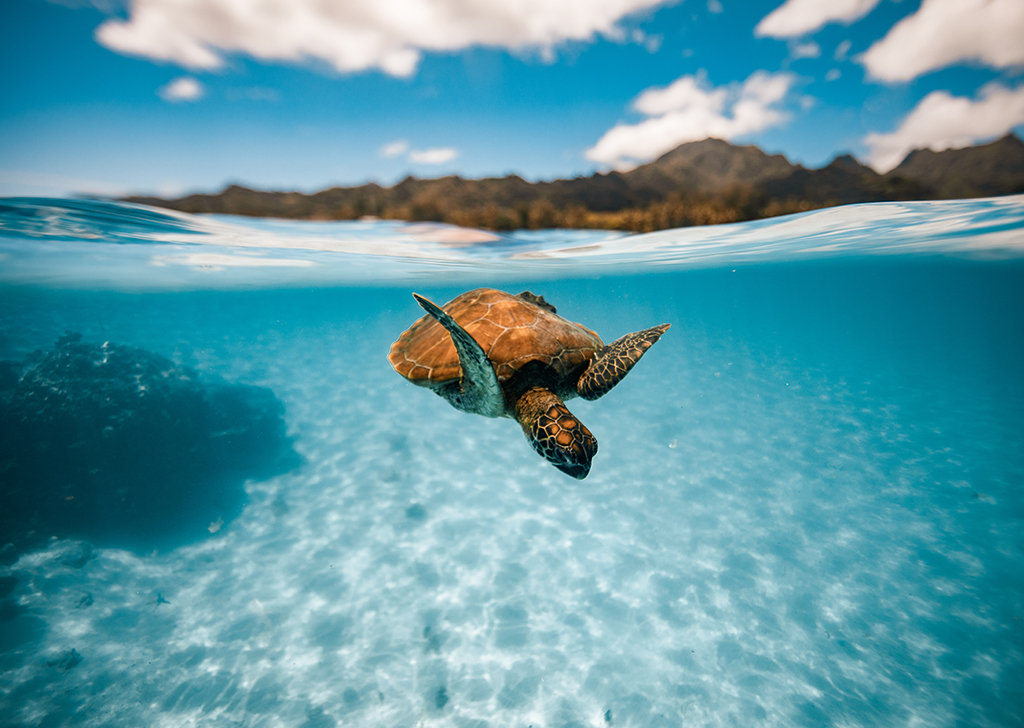
EOS 5D Mark IV, EF16-35mm f/2.8L II USM, f/6.3, ISO 200, 1/160s, 16mm by @universal_jones
The first and foremost thing you need to do is look for a story to tell in your over-under shot by working with what you have around you. As there are two different areas in the image, think about what you want to portray, be it subject, mood or composition, within each scene. For example, you can showcase a sunny bright skyscape in the above water scene but contrast it with a known predator in the underwater scene to create a ‘you’ll never know where danger lies’ storyline.
Remember, what lies underwater is often a mystery to many viewers, so you can use that to your advantage to be adventurous and experimental with your storytelling. You can also create a strong storyline by finding differentiation in the two separate scenes and connect them with an idea.
Equipment and Dome Port
PowerShot G7 X Mark II, f/6.3, ISO 125, 1/320s, 10.84mm by @yubzukamoto
Underwater safety equipment and research aside, a wide-angle lens is an essential piece of underwater equipment you need to nail a split shot. A wide-angle lens offers you the largest angle of view possible. This means that you can include more elements and surroundings in your shot.
Typically, a wide-angle lens with a 24-35mm focal length range works wonderfully for a split shot. For an ultra-wide lens, you can opt for a focal length range of 16mm onward. Some of the best Canon lenses you can pick are Canon EF-S10-18mm f/4.5-5.6 IS STM or the Canon RF 15-35mm f/2.8 IS USM lenses.
You should also bring or rent the largest diameter dome port available as the larger the dome, the steadier your camera will be. Once you are ready to shoot, you can look at your display screen and place the dividing waterline in your shot. Depending on what you’re trying to show or tell, you can emphasise each area by giving it more prominence in the shot. This means that you can have more of the ‘under’ zone and less of the ‘over’ zone (or vice-versa) to create a more dynamic split shot.
Exposure and Visibility
PowerShot G7 X Mark II, f/5.6, ISO 200, 1/320s, 13.91mm by @yubzukamoto
Light and water visibility are two important factors to consider as they would make or break your shot. If the water is clear, that's excellent. If it’s not, you would have a tough time capturing a great shot in murky waters. Underwater shooting goes best with crystal clear water, so don't settle for anything less!
Also, ensure that you check out the weather forecast to pick a bright day to shoot the split underwater shots. Midday sunlight is your best bet as the light is strong enough to penetrate the water, brightening the ‘under’ zone. The rule of thumb is also to not include underwater scenes beyond 15 feet as light will diminish significantly!
If the lighting condition isn’t the most ideal, try to focus the exposure on the top half. Even though this will result in the bottom half being underexposed, it’s easier and more straightforward to adjust an underexposed photo rather than an overexposed one in post-processing. Shooting in RAW helps too!
Settings To Consider
PowerShot G7 X Mark II, f/8, ISO 200, 1/1000s, 10.58mm by @yubzukamoto
As it can get tricky and tough to adjust settings underwater, set your camera on the Auto ISO mode while shooting in Aperture Priority. An aperture over f/8 is great, but you can also experiment with an f/13 or even f/16 to keep maximum clarity on both sides of the scene.
Usually, Auto White Balance will be the best choice as it helps you choose the best colour temperature suitable for the scene without needing to manually change the settings in the midst of trailing your wildlife subject.
While shooting horizontally is a good option, you can also experiment with vertical composition. This way, you can include more height in the image.
No Water Droplets
EOS 5D Mark IV, EF14mm f/2.8L II USM, f/2.8, ISO 100, 1/2000s, 14mm by @charlottepiho
You don’t want to have water droplets in your images, as removing them in post-processing can be very time-consuming and difficult. Therefore, choosing a glass dome makes complete sense as it’s less likely to hold the water droplets.
However, if you end up with water droplets in the dome, you can take a cue from divers who spit in their mask to prevent it from fogging up once underwater. Spread a bit of saliva on the top half of the dome and wash it off right away. This way, you'll have a few precious seconds to capture a droplet-free shot. It doesn’t sound very appealing to do so, but it does get the work done.
As much as you can try this genre of photography in the deep blue ocean, you can also do it in clear lakes, deep puddles, swimming pools or even aquariums (depending on the size). All you need is an environment that has sufficient water depth and allows you to submerge your camera in a dome port to achieve that distinguishable waterline.
For similar articles:
4 To-dos for Spotting Underwater Critters EfficientlyUnderwater Macro Photography with Lilian Koh: A Tiny Life In The Deep Vast Sea
Photography Tips from a Professional Underwater Photographer


