Sometimes, humans can be the unwanted elements in your photos. So, here are two ways to remove them from your images without physically asking them to move out of your shot. Images in this article are supported by Nelson Thaksakorn.
Essential item
.jpg )
Before we start, you will need a tripod to stabilise your camera for both methods. The image stacking method requires you to photograph at the same spot at an interval for at least a few minutes. Ensure the photographed images do not have composition changes to ensure you have fewer issues during the stacking process.
For the ND Filter with long exposure method, you will need to hold the shutter button (or use Bulb Mode) to photograph the scene, so will need a tripod to eliminate camera shake.
Image Stacking in Post-Processing
This method allows you to stack the images and brush away unnecessary elements in your post-processing software like Photoshop.
Step 1: Pick your scene
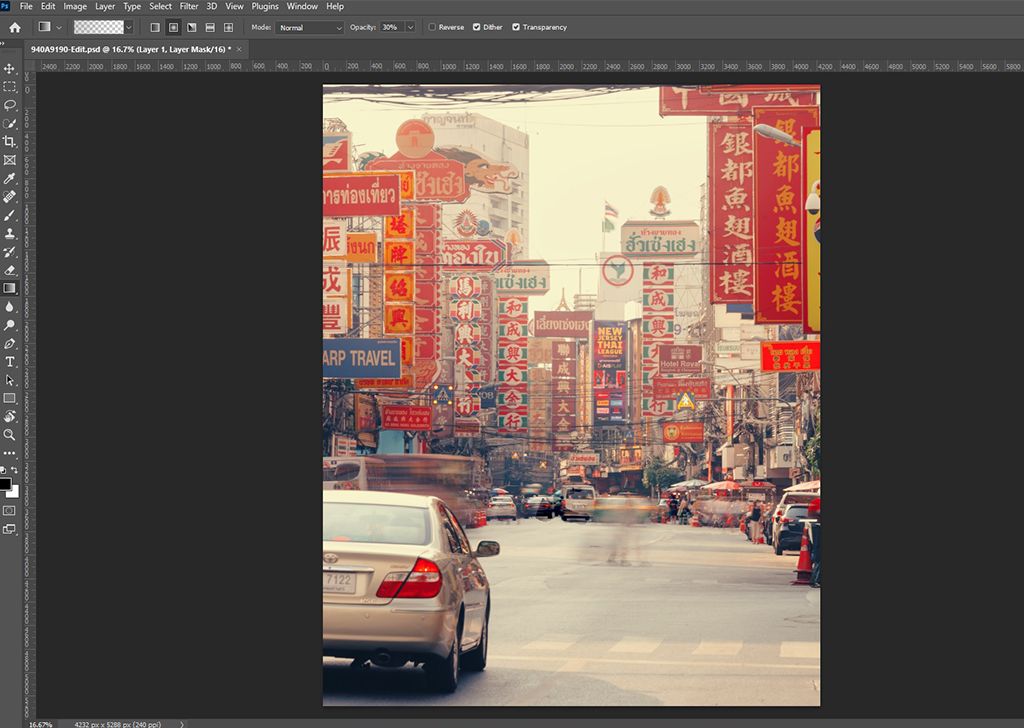
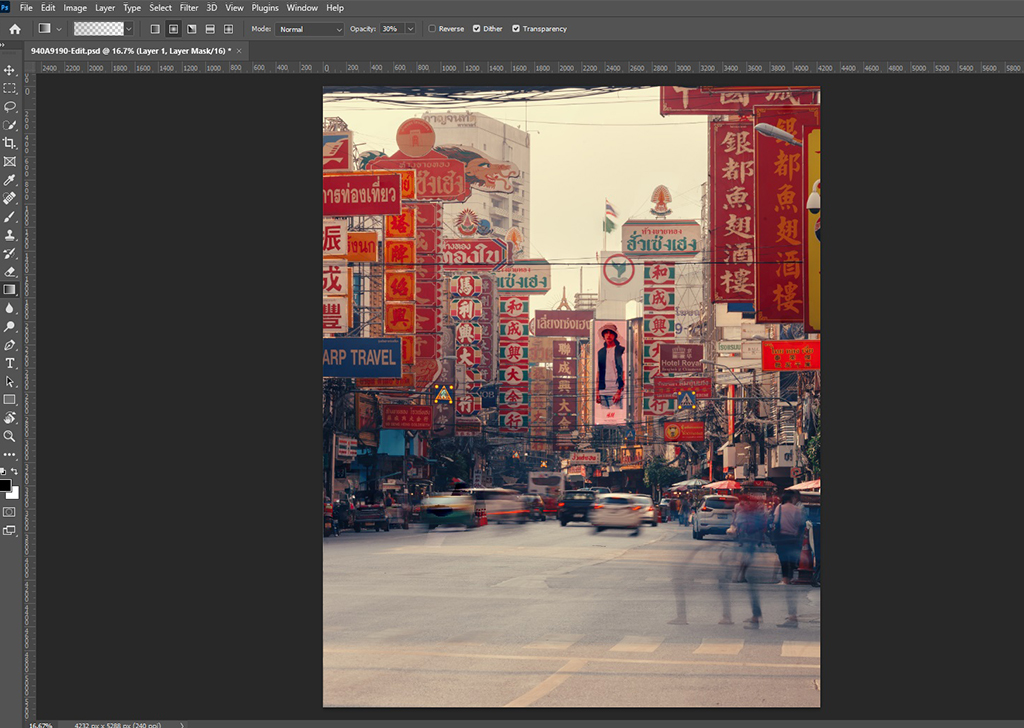
Picking your scene isn’t as essential if you’re utilising the image stacking method, as it can be rather forgiving. Here we have an example shot of Chinatown in Bangkok, Thailand, where cars and pedestrians are in the shot:


Step 2: Pick your interval
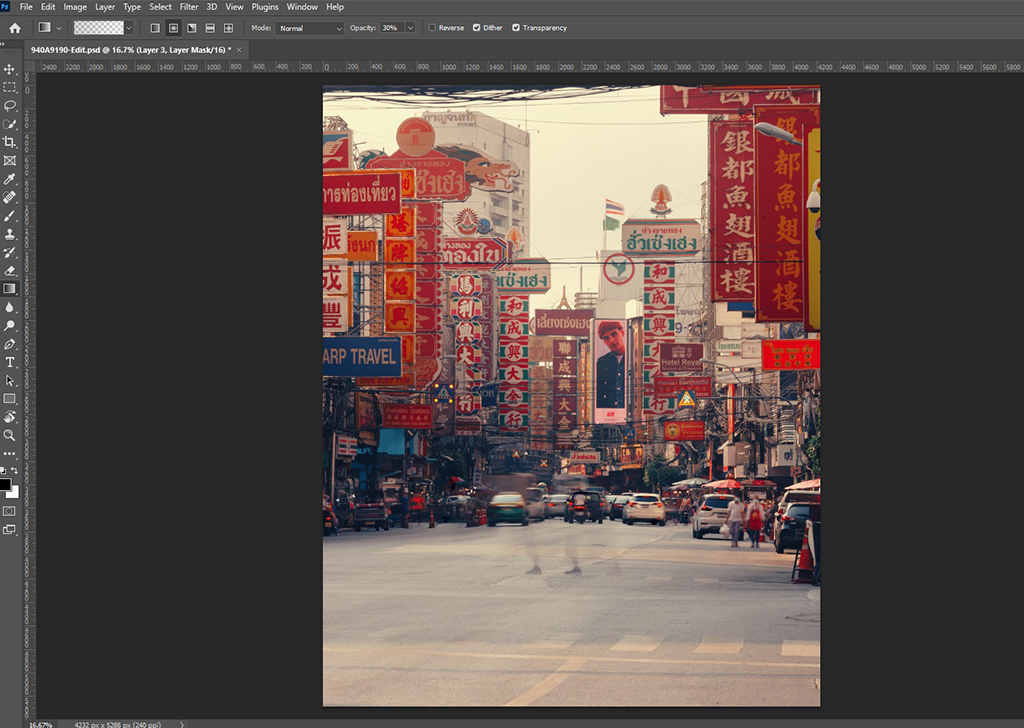
For this scene, the photographer took about 20-30 seconds before each interval and decided to stack about five different images. The interval can only be decided by the speed of your unwanted subjects in the frame. If the unwanted subjects move slower, you will have to space out the interval more. The number of images to photograph and stack varies from location to location, but it will never hurt to photograph more just in case.
You should also use manual focus to focus on one point and manual mode to reduce exposure discrepancies between shots. For the interval shots, you can try using the tethered shooting technique with Canon EOS Utility App to avoid shaking the camera.
Step 3: Brushing away
-
In Photoshop – File > Scripts > Load Files into Stack
-
Load layers - Check the box to automatically align source images
-
Choose the layer on which you want to apply a layer mask. Create layer masks to remove the unnecessary elements in the photos. The brushed-out area will take on another photo area as the backdrop.
.gif )
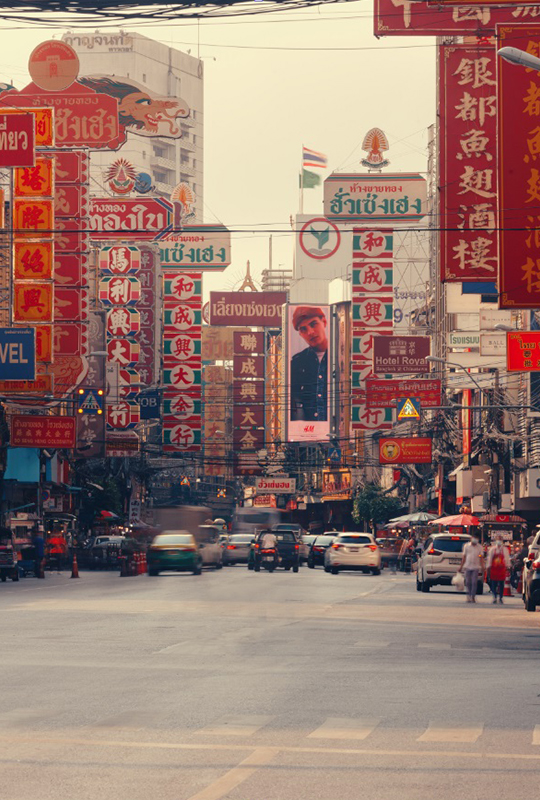
Final image

When done right, you will get an image like the above where the unnecessary elements are out of the picture.
When stacking images and brushing out unwanted elements, there is more control on placement and precision. If you can predict the outcome of human movement, it takes most of the guesswork out when using specific shutter speeds.
ND Filter with long exposure
To start, if you don’t know what an ND filter is, read this basic guide to learn the benefits, pros, cons, and the different offerings of ND filters that Canon carries! This method utilises long exposure (slow shutter speed that is longer than a few seconds) to remove moving elements out of the shot. An ND filter comes in handy when trying to achieve a well-lit image even with long shutter speed without compensating exposure with aperture or ISO.
Step 1: Pick your scene
When using this method, it is important not to photograph scenes that are too bright as it will limit your slow shutter speed value. This means it may not be slow enough to completely remove the unwanted subjects. Try to photograph during the late afternoon, early morning, or in shaded areas for the best effect. Here we have an example shot near a mall with human elements:
.jpg )
EOS R5, EF24-105mm f/4L IS USM, f/6.3, ISO 125, 1/200s, 24mm
Step 2: Experimenting with long exposure
With this method, you may need to experiment a few times because when the subject is not moving fast enough, it may leave a visible trail in your shot. You will also need to tweak and determine the best shutter speed without underexposing or overexposing the scene.
Also, if there is a stationary human subject in the scene, the particular subject will not be removed, so you will need to recompose your shot to exclude it if necessary.
Final image
.jpg )
EOS R5, EF24-105mm f/4L IS USM, f/11, ISO 100, 25s, 24mm
This method works to remove the human elements, but it does alter the image as well.
When you zoom in on the image, the swaying leaves were blurred in the shot. This may not be ideal. Therefore, we would recommend this method for scenes where the subject choice is fully stationary, like buildings, objects or statues (and excluding elements that may move due to external factors like a gust of wind).
For similar articles:


