


Light painting is a fun way to express your creativity with photography. Through using long exposure and a light source, you can draw light streaks across the frame, and the variations are only limited by your imagination.
How can you up the ante if you have already mastered light painting? By introducing a flash such as the Speedlite EL-1, where you can freeze and expose a subject in the shot while having light “painted” on the subject, or as streaks in its surrounding.
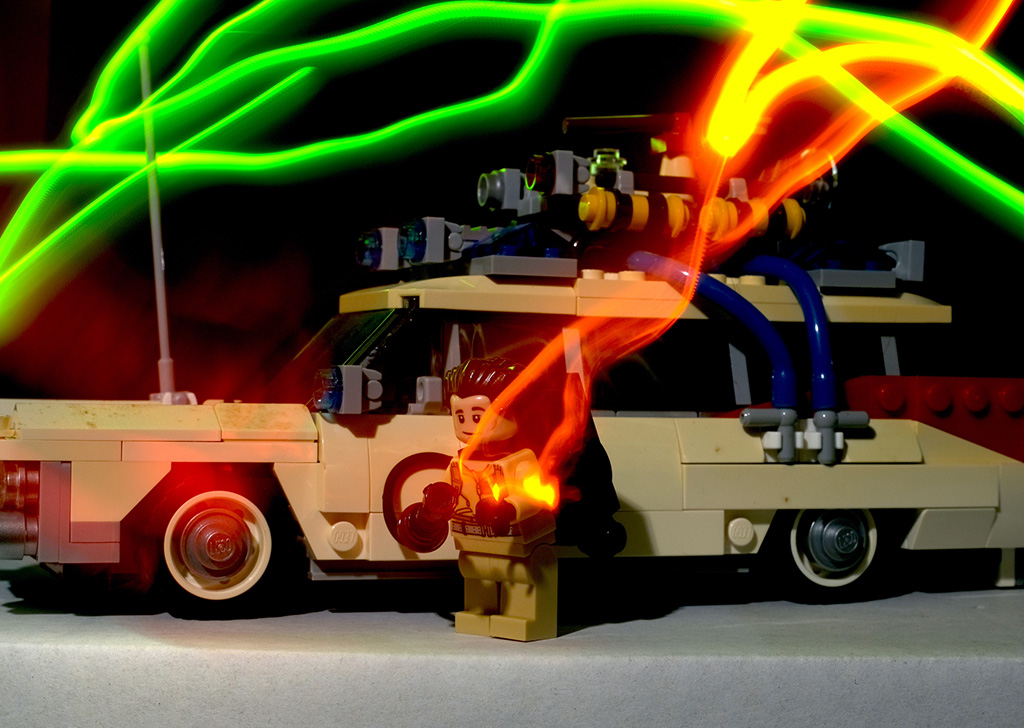
EOS 5D Mark IV, EF24-70mm f/4L IS USM, f/8, ISO 160, 10s, 70mm
But before we dive into the setup and techniques, you need to know the difference between first and second curtain sync for your flash.
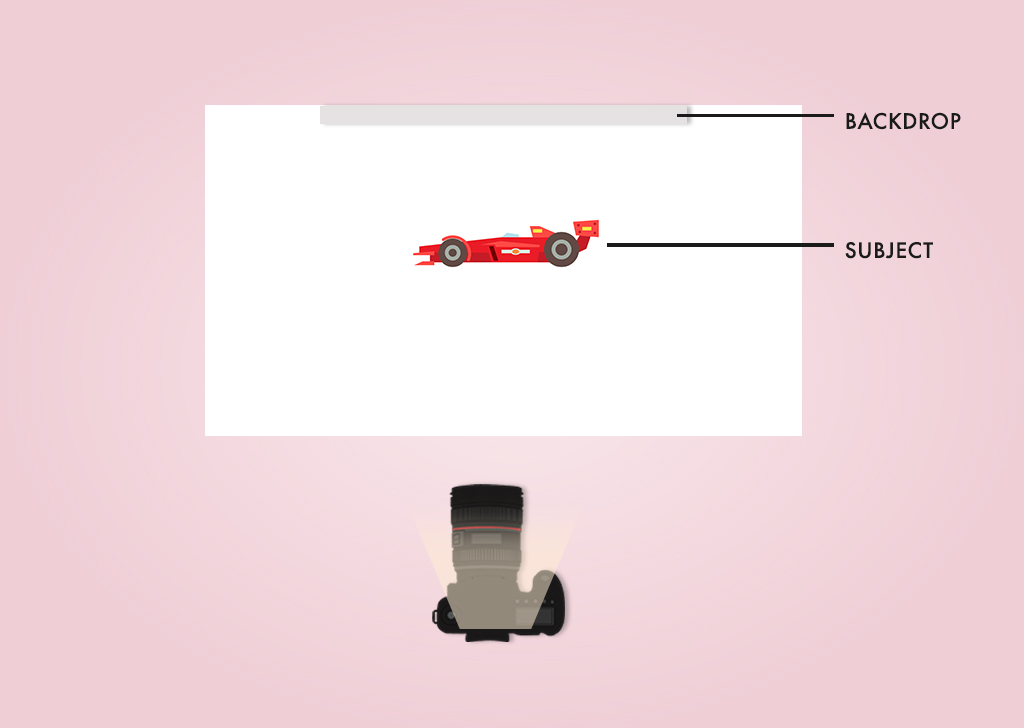
Setting up the shot
For light painting, you need to set your camera to Bulb Mode. Some cameras will allow you to set a pre-determined exposure time. If not, you will need to press the shutter button again to stop the exposure. Typically, an exposure time between 5-10 seconds is a good start. This should be sufficient time for you to complete your light painting. To prevent camera shakes caused by the pressing of the shutter button in Bulb Mode, you can use a remote trigger or the Canon Camera Connect App to start and end the exposure.
This aside, you will also want your surroundings to be as dark as possible. Shooting at night is an ideal option, or a room with blackout curtains to block out light from windows.
The Speedlite 580EX was mounted on the EOS 5D Mark IV for the shots in this article.
Set your camera on a tripod and position your subject within the frame. If you are using autofocus, switch your lens to manual focus and don’t shift the focusing ring once the focus is achieved. If you are using the flash off-camera, attach it to a light stand, or have a friend hold it for you.
Flashing it Right
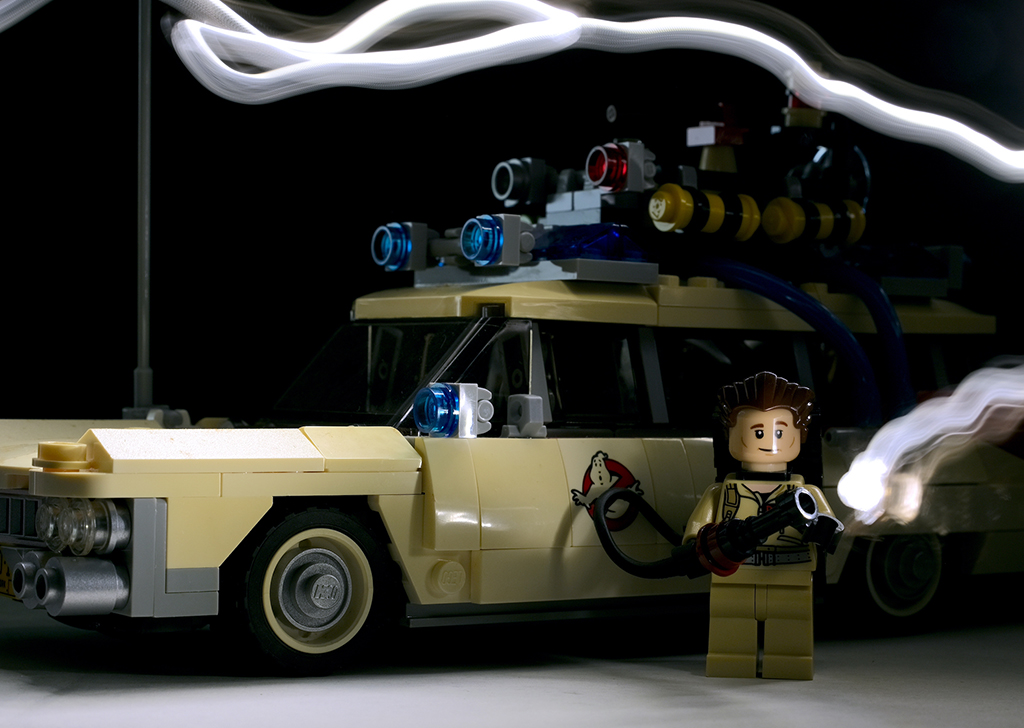
Same photo shot without a flash. EOS 5D Mark IV, EF24-70mm f/4L IS USM, f/8, ISO 160, 10s, 70mm
You might not know this, but selected Canon interchangeable lens cameras have wireless flash control built into the camera when you attach a compatible trigger such as the ST-E3-RT. This lets you control Speedlites such as the 270EX II, 430EX III-RT or the 600EX II-RT from the camera. But as a start, you can fit your Speedlite on the camera’s hot shoe and use it on-camera.
If you are unsure about the flash output setting, set it to E-TTL. This will give you the best possible flash exposure, as the Speedlite and camera will communicate with each other and will expose the subject in focus while leaving the background dark. If you are more advanced and familiar with flash settings, you can set it to manual mode at mid-power (1/32 for the 430EX II-RT). Take a shot in Bulb Mode and review the image. From there, you can increase or decrease the power output to your liking.
Once you are ready, start the exposure by means of a remote trigger or the Canon Camera Connect App.
To light paint, you can use a light tube or a glow stick. Remember to direct the light source toward the camera for maximum effect. Take note not to point the light at the subject, which may then cause blown-out highlights.
It’s alright if you don’t get the shot right the first time. But from your first attempt, you should be able to see what creative doors can be opened when combining the use of a flash with light painting.
If you are shooting with the flash off-camera, experiment with different positions of the flash, like lighting your subject from the side, or behind for a backlit effect. Throw in a simple homemade diffuser to get different light quality and see how that works.
With E-TTL, it’s easy for beginners to get the right flash exposure. As you gain more experience, try out manual mode on the flash and harness better control to get better results with your Speedlite.
For similar articles:


