


There’s always something mesmerising when watching a process that plays out over a long period of time and is sped up to fit into a couple of minutes or even seconds - a.k.a time-lapse photography. This style of photography is essentially a series of photographs strung together to create a video (or movie) where time appears to pass rapidly, for example, the blooming and wilting of a flower in a 15-second video.
If you’re up to the challenge and want to try producing your first time-lapse video, here are some tips for how you can do so with Canon’s time-lapse movie function.
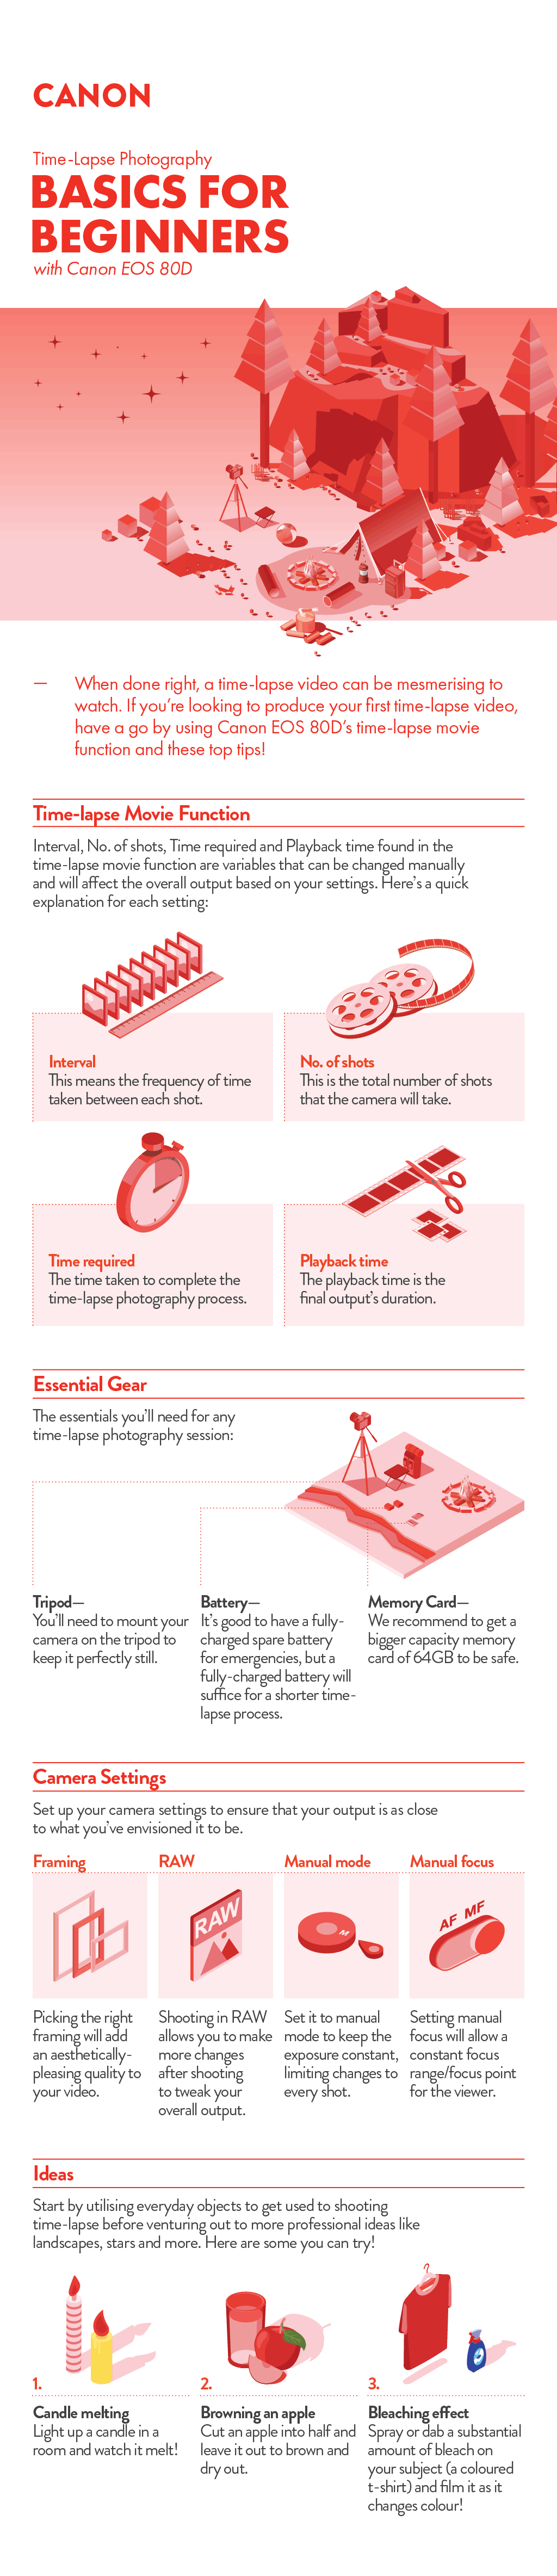
Time-lapse Movie Function
Prep your Canon camera by switching to Video mode and enabling the time-lapse movie function under the menu. This will bring you to a screen with settings like Interval, No. of shots, Time required and Playback time. These variables can be changed manually by you and will affect the overall output based on your settings. Here’s a quick explanation for each setting:
Interval: This means the frequency of time taken between each shot. You can set it to one second per shot or more depending on the chosen subject. A busy street with lots of traffic would require a shorter time interval to capture a smoother time-lapse as compared to a longer time interval when capturing the blooming of a flower.
No. of shots: This is the total number of shots that the camera will take. This will affect the time and how long it’ll need for the camera to complete the time-lapse (more shots = longer time taken). Note: Canon camera sets the frame-per-second as 24 FPS to follow a regular video's frame-per-second requirement.
Time required: This refers to the time taken to complete the time-lapse photography process. Time required setting cannot be changed and will be based on your Interval and No. of shots settings.
Playback time: The playback time is the final video’s duration. The Playback time setting cannot be changed and will be based on your No. of shots setting and the 24FPS (Frame per second). To increase your playback time, you will need to increase your number of shots (or vice versa). The equation to playback time is Playback time (in secs) = No. of shots/24FPS.
Essential Gear
Your essential gear is a tripod, battery and memory card. You don’t need an intervalometer when using Canon’s time-lapse movie setting!
Tripod: You’ll need to mount your camera on the tripod to keep it perfectly still so that the output will not have an undesirable movement-induced effect. Places with strong winds will require a heavier tripod. Find the right tripod here!
Battery: It’s always good practice to have a fully-charged spare battery for emergencies, but one fully-charged battery will suffice for a shorter time-lapse process.
Memory Card: Though it depends on the number of shots and your average RAW file size, we will still recommend for you to get a bigger capacity memory card of 64GB to be safe.
Camera Settings
Set up your camera settings to ensure that your output is as close to what you’ve envisioned it to be. These include Framing, shooting in RAW, Manual mode and Manual focus.
Framing: Like normal photography, picking the right framing will add an aesthetically-pleasing quality to your video. We also recommend having at least one still element against the moving subject to add depth and contrast.
RAW: Though shooting in RAW may take up more space in your memory card and restrict the overall number of shots you can take, the file type allows you to make more changes to better your overall output.
Manual mode: Never shoot in the Auto mode when doing time-lapse photography as the camera exposure settings would not be constant, and will result in a series of images with uneven exposure. Set it to manual mode to keep the exposure constant and only do slight tweaks if need be.
Manual focus: Setting manual focus will allow a constant focus range/focus point for the viewer as the subject moves through its phase during the time-lapse.
Camera
With Canon’s Time-lapse movie function, you can reduce the amount of post-processing needed for your final output. If you’re looking to get a Canon camera with the Time-lapse function, here are our recommendations: Canon EOS 80D, Canon 90D, Canon EOS 77D and Canon 800D for beginners and Canon EOS R for photography enthusiasts.
To start you off, here are a few everyday examples to practice taking your time-lapse photography. You can:
- Light up a candle in a room (make sure to close your windows and fan to avoid extinguishing the flame), and film the melting wax.
- Make a time-lapse video based on the browning and drying out process of apples left out in the open.
- Bleach removes the colouring on clothes and even fruits. Spray or dab a substantial amount of bleach on your subject (a coloured t-shirt) and film it as it changes colour! Remember to protect your hands by wearing gloves when handling bleach.
Download a copy of this infographic here. Have fun!


