


Ask any professional photographer the one thing they find hardest to capture, and chances are they will tell you it is jewellery. With a multitude of factors to consider, such as the reflective surfaces, curves of the jewellery pieces, intricate details to take into consideration and, last but not least, lighting, it is no wonder that jewellery photography can be such a challenge.
In this article, professional photographer Ray Chen of Hogo Image shares insights into how he tackles common issues while capturing these beautiful accessories.
How do you tackle reflections on the jewellery’s shiny surfaces?
Ambient light will affect the reflective surfaces and colour temperature of the jewellery, so the studio needs to be dark. This way, I can control the lighting, which in turn allows me to control the amount of reflection on the accessories. I usually position a black or white card in front of the light to control how much light reaches the jewellery, and this also helps me determine how much reflection there can be.
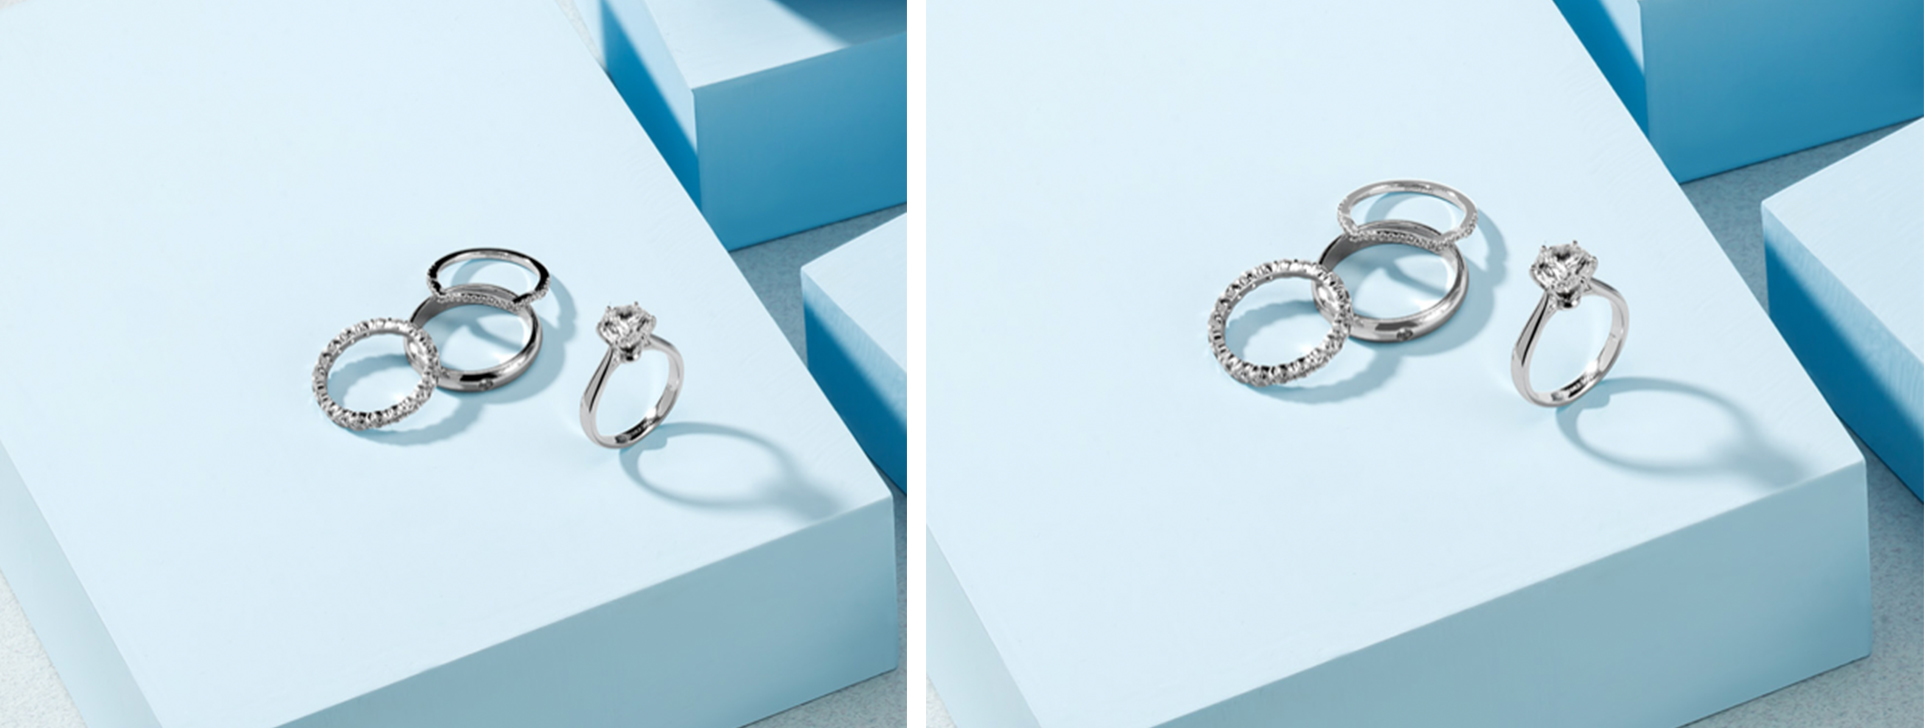
For example, the photo on the left shows some reflections around the edges of the ring. This is something we want to avoid. Hence, I used a white card to reflect light back to the ring, and at the same time help to block the surrounding from being shown in the photo. The result is shown in the photo on the right.
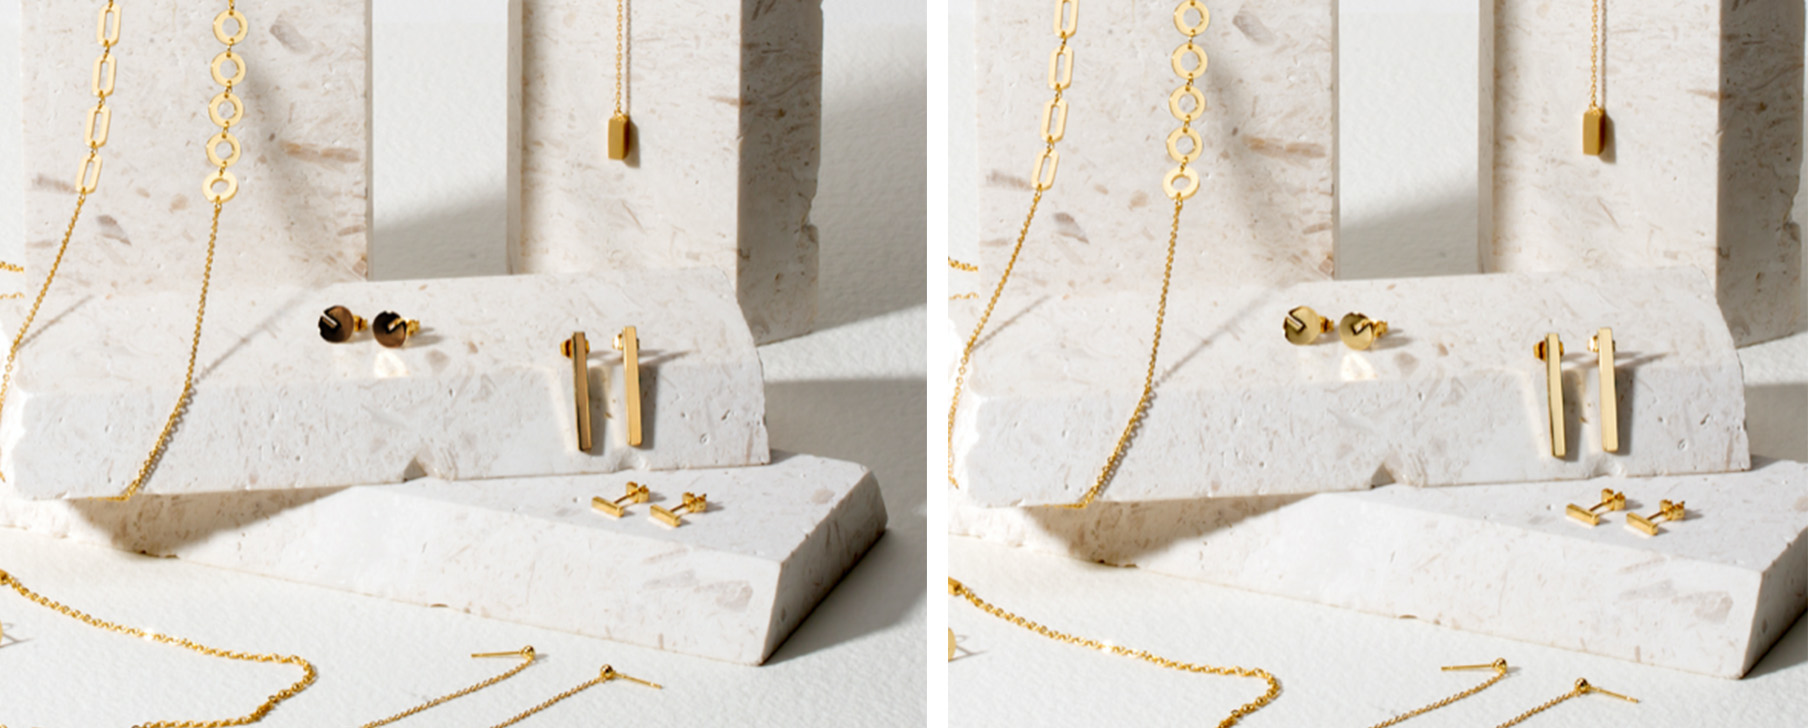
These 2 photos again show how important is it to know the placement of black or white cards. By placing them in precise positions, I am able to remove the reflection on the flat gold jewellery (left photo), allowing the gold sheen of the earring to be accurately depicted. This can be seen on the photo on the right, where a white card was used to reflect light to the flat surface of the earrings.
While it is not shown, I also use diffuser sheets to reduce the reflection on the metallic surfaces. The diffuser sheet may be positioned close to the set-up, but the light will be placed further away to create a softer light.
How do you stage and position the jewellery for the best picture?
EOS 5D Mark III, EF100mm f/2.8L MACRO IS USM, f/22, ISO 100, 1/100s, 100mm
When shooting accessories, I always talk with the clients to understand their requirements. For example, knowing the key focus of the accessory. From there, the look/mood of the image, as well as the posing portion of it, will be determined. Backgrounds and props are kept simple as I prefer to use lighting to showcase the elegance of the jewellery.
Regarding the use of colours, the jewellery’s tones and hues are taken into consideration and I will select accompanying shades for the background and props to create a more harmonious look. Alternatively, I may use cool colours to make the jewellery look more prominent.
What do you do to bring out the best in the jewellery pieces?
EOS 5D Mark III, EF100mm f/2.8L MACRO IS USM, f/11, ISO 100, 1/100s, 100mm
It is important to observe every angle of the jewellery before shooting. Shooting from some angles can make a diamond look bigger, whereas the lighting from some angles may not be appropriate. Therefore, photographers must learn to observe the angles of the gemstones or the jewellery.
What are your usual camera settings and equipment used?
I use a macro lens such as the EF100mm f/2.8L Macro IS USM or the RF100mm f/2.8L Macro IS USM. A macro lens is preferred because it helps to capture the details of the jewellery very well, and that also accentuates the designer’s creativity.
To get more of the shot in focus, I usually use a small aperture of f/22 to get more depth of field. Shutter speed is typically kept at 1/100, and my camera is mounted on a tripod. This is important to avoid blurry photos caused by shaky hands when hand-holding the camera.
Currently, I use the EOS R5, and before that I used the EOS 5D Mark III.
Can you share with us one of your favourite shots of jewellery?
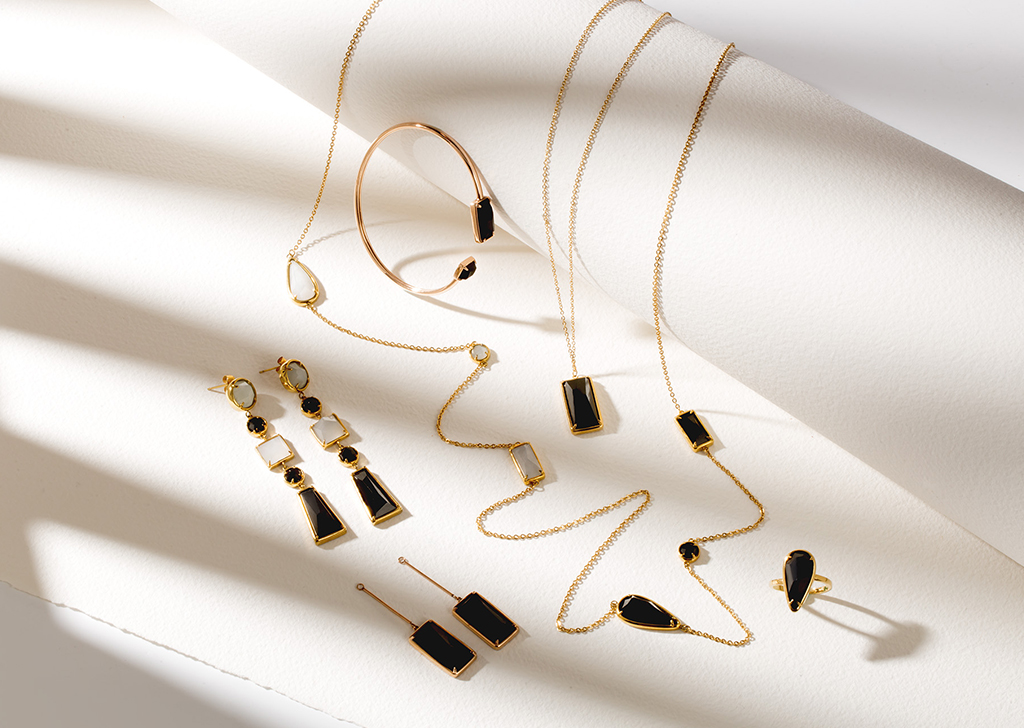
EOS 5D Mark III, EF100mm f/2.8L MACRO IS USM, f/32, ISO 100, 1/100s, 100mm
For this image of rare black gemstones, I used multiple lighting to create a layered look for the shot. I also used a mask on one of the lights to create a striped lighting pattern to make it look more interesting.
One great way to get started in shooting jewellery is to photograph what you have at home. It can be a ring, a simple necklace, or a bracelet. Look to magazines or social media for inspiration and try to emulate the shot. Of course, you may not get it right on the first try, but don’t give up! Look at the photo closely and try to figure out where the lights are positioned, and from which angle it was shot. From there, you can slowly build up the shot.
For similar articles:


