


How to Produce Bright and Vivid Shots
Armed with your trusty hot-shoe flash, you head out to your shooting venue, feeling fully-prepared. But even with the external flash, the images just don’t look as bright or vivid as you wanted. Here’s how to solve that and achieve your ideal image! (Reported by: Koji Ueda)

Scenario 1: You want a brighter shot of people on stage, but your flash doesn’t reach far enough
Tips
- Select the Shutter-priority AE mode to prevent subject blur.
- Use a higher ISO speed to make up for the weaker flash light.

EOS 600D/ EF70-300mm f/4-5.6L IS USM/ FL: 70mm (112mm equivalent)/ Shutter-priority AE (f/4,1/200 sec, EV +2)/ ISO 800/ WB: Auto/ Speedlite 580EX II/ E-TTL mode (Flash exposure compensation: EV+0.3)
The problem:
You are photographing an event, and are trying to get some shots of the people on stage. However, there is a barrier around the stage, and the closest you can get is 5 metres away.
You have your external flash with you, but with your ISO speed at 100, the light from it still doesn’t reach far enough. You want to make your shot brighter, but how?

Before: Not as bright as desired
How to fix it:
Light from a flash diffuses and gets weaker the further it travels from the flash head. To make the shot brighter, you need to increase the exposure.
One way to do so is to increase the ISO speed to make the camera sensor more sensitive to light. For the top image, I chose to use this method as I could not slow down my shutter speed (1/200 second)—I needed to ensure sharp shots of the models moving around on stage.
For this shot, I got the best results with ISO 800 and EV+2 exposure compensation. These settings not only gave me the bright shot I wanted, but also made the models’ skin looked radiant!
Remember: Watch out for noise!
Depending on the lighting conditions, images can become visibly grainy (“noisy”) at very high ISO speeds. Noise reduction technology is constantly improving, so if you have a newer camera, you can use a higher ISO speed with less noise compared to an older camera.
Position of the subject, camera and Speedlite

A: Approx. 5m
Scenario 2: You want a portrait with natural lighting, but all possible bounce surfaces are too far away
Tips
- Use a reflector to bounce your flash
- Use a high ISO speed. Supplement with exposure compensation and flash exposure compensation if necessary.

EOS 7D/ EF70-200mm f/4L IS USM/ FL: 97mm (155mm equivalent)/ Shutter-priority AE (f/4, 1/125 sec, EV +1.3)/ ISO 800/ WB: Auto/ Speedlite 580EX II/ E-TTL mode (Flash exposure compensation: EV+2)
The problem:
You are at an event held in a huge exhibition hall. You are keen on getting some portrait shots, but the stark ambient light at the venue, while perfect for showcasing products, is too harsh for portraiture. The walls and pillars of the nearby booths cast shadows on your subjects’ faces.
Bouncing the flash would give you the most natural results, but the closest bounce-friendly walls and ceilings are all too far away...

Before: Harsh shadows on the models’ faces
How to fix it:
Such scenarios are why it is handy to have a reflector around when you shoot in large, open spaces. I had one with me which I used to bounce the flash light.
For this shot, I once again used a fast shutter speed (1/125 second in Shutter-priority mode) to prevent subject blur. This left me with three exposure settings to adjust to achieve my ideal brightness: ISO speed, exposure compensation and flash compensation.
The exact values you use will depend on your scene and equipment. Here, I found that ISO 800 was the highest I could go before noise became visible. To further brighten the image, I set exposure compensation to EV+1.3 and flash compensation to EV+2.
Position of the subject, camera and Speedlite

A: Approx. 3m
B: Light from flash bounces off reflector
Check out the following articles for tips on taking attractive portraits:
3 Flattering Techniques to Learn from Professional Models
Techniques for Posing and Directing Portrait Subjects
Scenario 3: You want to capture a bird’s vivid colours from far away
Tips
- Reduce the flash intensity to prevent the colours from being drowned out by excessive light.
- Raise the ISO speed to ensure sufficient exposure.

EOS 50D/ EF100-400mm f/4.5-5.6L IS USM/ Aperture-priority AE (f/5, 1/200 sec, EV-0.7)/ ISO 1000/ WB: Auto/ Speedlite 580EX/ E-TTL mode (Flash exposure compensation: EV-0.3)
Photos by: Shogo Asao
The problem:
You are out in nature, looking for birds to photograph. Perhaps the rain just stopped, or perhaps you are in a dense forest. In any case, there is very little sunlight and lighting conditions are poor.
Finally, you see it—a brightly-coloured bird perched on a branch about 10 metres away from you. The shot is too dark with no flash, so you fire your Speedlite. But this time, the intense light from the flash makes the image look unnatural and the bird’s colours appear washed out.
How to fix it:
You certainly don’t want your flash to be too intense. For my shot, I dialed down the flash compensation to EV-0.3. However, with that alone, the bird would not be bright enough. You need to find some way to get more light into your shot.
Once again, this is where increasing the ISO speed helps. By making the camera’s image sensor more light-sensitive, it enables you to capture enough light in the image even with a lower flash output.
My ISO speed for this shot was 1000, which allowed me to successfully capture the vivid colours of the bird despite the poor lighting and the distance.
Position of the subject, camera and Speedlite

A: Approx. 10m
More tips on photographing wildlife in dim lighting here:
Wildlife Photography: 3 Techniques from Professional Photographers
How to adjust ISO speed

2. Set the shutter speed and/or aperture

Set the shutter speed and/or aperture that best suits your shooting intent.
*Note: When a Canon flash unit is attached, the maximum shutter speed you can set is usually between 1/200 to 1/300 second, depending on your camera model).
3. Set the ISO speed
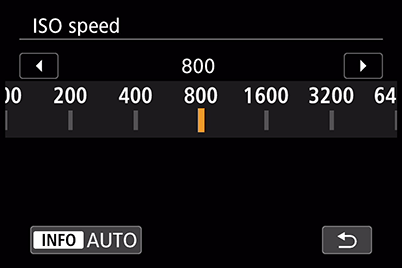
Take a few test shots to find the best ISO speed for your scene. Reminder: Watch out for noise!
4. Adjust the ISO speed as needed

If resulting image does not have the brightness you expected, adjust the ISO speed again.
For more tips and techniques on using external flash, check out:
In Focus: The Basics of External Flash Photography
Receive the latest update on photography news, tips and tricks.
Be part of the SNAPSHOT Community.
Sign Up Now!About the Author
Born in Hiroshima in 1982, Ueda started his career as an assistant for photographer Shinichi Hanawa. He later became a freelance photographer, and is now engaged in a wide range of work from magazines to commercials while shooting different cities and landscapes all around the world. He is also a writer and a lecturer at photography lectures and workshops.


