In the previous instalment, we took a close look at the in-camera Digital Lens Optimizer. Now, we shall do the same for the 4 other features of the EOS 5D Mark IV’s lens aberration correction function, which includes the new distortion correction feature, previously unavailable in-camera. (Reported by: Ryosuke Takahashi)

Feature 1: Diffraction correction
Diffraction happens when light waves entering the lens are blocked by the aperture diaphragm, causing them to bend and interfere with each other (or “diffract”) upon passing through the aperture. These diversions from the regular, straight path of travel results in the light rays being unable to reconverge correctly when they reach the image sensor, forming an image that lacks sharpness. The effects of diffraction are also commonly referred to as “diffraction”, and show up as a thin, veil-like blurriness in affected parts of an image, much like the effects of spherical aberration.
Diffraction occurs in all lenses. However, because light waves bend more to pass through smaller openings, diffraction is becomes more visible at narrow apertures. It used to be impossible to avoid the resulting loss of resolution. The only way around it was to avoid shooting at overly narrow apertures altogether—a countermeasure that was not very helpful when a photographer needs to increase depth of field beyond a certain degree.
A diffraction correction feature, therefore, is especially helpful in such scenes that require narrow apertures. Canon’s diffraction correction feature used to be a part of Digital Lens Optimizer, but is now an independent function accessible through the lens aberration correction menu.
The effects of diffraction correction are quite obvious, as you can see from the examples below, where we compare images shot at different apertures shot with and without diffraction correction. Note that the larger the f-number, the more visible the diffraction.
Enable diffraction correction in the following situations:
- When using a narrow aperture to increase the depth-of-field.
- When narrowing the aperture in order to achieve a slower shutter speed.
- When you want to achieve the best possible image resolution, regardless of aperture setting.

EOS 5D Mark IV/ EF70-200mm f/2.8L IS II USM/ FL: 145mm/ Aperture-priority AE (f/8, 1/1000 sec, EV±0)/ ISO 400/ WB: Daylight
f/8

Diffraction correction - OFF

Diffraction correction - ON
f/11

Diffraction correction - OFF

Diffraction correction - ON
f/16

Diffraction correction - OFF

Diffraction correction - ON
f/22

Diffraction correction - OFF

Diffraction correction - ON
Feature 2: Chromatic aberration correction
Chromatic aberrations occur because lenses refract different wavelengths of light differently, resulting in different colours being unable to converge to the same point on the image sensor.
There are two types of chromatic aberration. Axial aberration occurs when the different wavelengths of light are focused, at different points along the lens axis (at different distances from the image sensor). It manifests as different colours being out of focus on different parts of the image, and tends to be more obvious on telephoto lenses. Meanwhile, lateral aberration (also known as transverse aberration) occurs when the different wavelengths of light are focused onto the focal plane (the image sensor), but at different positions. It manifests as colour fringing, and wide angle lenses are especially prone to it.
As axial aberration is a result of the focusing distance of the wavelength with respect to the image sensor, it can often be minimized by using a smaller aperture, which ensures that the wavelengths will still be in acceptable focus. On the other hand, lateral aberration is an issue of the position on the image sensor where wavelength is focused, and therefore cannot be reduced by narrowing the aperture.
It is difficult to completely eradicate chromatic aberration through the use of optics, although there has been effort to solve it with skillful lens optical design. Axial aberration is also much more complex to solve because it causes a deterioration in image sharpness.
Having a chromatic aberration correction function in-camera allows you to reduce the effects of axial aberration without having to use a narrower aperture, and also the colour fringing from lateral aberration without having to change your focal length. Used appropriately, it is a powerful tool that enables you to use your lens to its full potential.
Enable chromatic aberration correction in the following situations:
- With a telephoto lens, when you have to shoot at maximum aperture in order to obtain a desired depth-of-field.
- When shooting at telephoto angles, when you want to avoid changing the aperture setting as it will affect the look of your image.
- When shooting at wide angles, when you are using an extreme angle of view in order to exaggerate perspectives.
Wide angle (FL: 24mm/ f/4)

Chromatic aberration correction - OFF

Chromatic aberration correction - ON
EOS 5D Mark IV/ EF16-35mm f/2.8L II USM/ FL: 16mm/ Aperture-priority AE (f/11, 1/320 sec, EV+0.3)/ ISO 100/ WB: Daylight
Notice how chromatic aberration correction has reduced the colour fringing around the edges of the building, resulting in cleaner outlines. The fringing around the clouds at the image periphery has also been eliminated, and the clouds look whiter than the uncorrected image. It is a good idea to enable chromatic aberration correction whenever you use a wide angle lens.
Telephoto (FL: 300mm/ f/5.6)

Chromatic aberration correction - OFF

Chromatic aberration correction - ON
EOS 5D Mark IV/ EF28-300mm f/3.5-5.6L IS USM/ FL: 300mm/ Aperture-priority AE (f/5.6, 1/800 sec, EV±0)/ ISO 100/ WB: Auto
On telephoto lenses, axial aberration is more likely to occur compared to lateral aberration. However, some instances of the latter may still be observed at the image edges. Axial aberration results in spots of colours that cause subjects to look poorly resolved and the overall image to lack sharpness. These are visible in the above examples, but you can also see how they are reduced by chromatic aberration correction.
Feature 3: Peripheral illumination correction
Peripheral illumination correction corrects peripheral light fall-off (more commonly known as optical vignetting). The latter occurs when light rays are partially blocked or shaded by the multiple elements within the lens barrel. This reduces the effective aperture that off-axis incident light can pass through, which results in progressively less light intensity towards the corners of an image.
Peripheral light fall-off is inherent in lenses due to their barrel shape, as there are still variants in the sizes of elements within the lens even if the layout of these elements is optimized. One way to get around it is to narrow the aperture so that the light entering the lens is narrower, but that means you have very restricted use of aperture settings.
The peripheral illumination correction function corrects peripheral light fall-off through the use of image post-processing technology, brightening the image corners without the need for you to change the aperture setting. The examples below show how much of a difference this function can achieve—corrected images have corner-to corner clarity and brightness throughout the entire focal range.
Use peripheral illumination correction in these situations:
- When your composition involves capturing a huge expanse of sky.
- When you are shooting a portrait shot, and want to use maximum aperture to create certain effects.
- During wide-angle macro photography, when you want to use maximum aperture.
Wide angle (FL: 16mm/ f/11)

Peripheral illumination correction - OFF

Peripheral illumination correction - ON
EOS 5D Mark IV/ EF24-105mm f/4L IS USM/ FL: 24mm/ Aperture-priority AE (f/4, 1/1600 sec, EV±0)/ ISO 100/ WB: Daylight
Peripheral light fall-off is a form of what is commonly known as “vignetting”, and is especially prone to occurring when shooting a wide angles with an aperture setting near the maximum, as these conditions result in more off-axis incident light. Enabling the peripheral illumination correction function allows more evenly-coloured image corners, so leave it on unless you aim to create an image with the vignetting effect.
Telephoto (FL: 300mm/ f/5.6)

Peripheral illumination correction - OFF

Peripheral illumination correction - ON
EOS 5D Mark IV/ EF24-105mm f/4L IS USM/ FL: 105mm/ Aperture-priority AE(f/4, 1/2000 sec, EV±0)/ ISO 100/ WB: Daylight
Peripheral light fall-off is still visible in images shot at telephoto range, even though this may not be as significant as what you see in wide angle images. Here, we once again observe the discernable effects of the peripheral illumination correction function—it is as though light was directed at the four corners of the image. This is one useful function for capturing images of birds and aeroplanes against the sky.
Feature 4: Distortion correction
A common cause of distortion is when light rays do not fall onto the correct point on the image plane (image sensor). As it cannot be prevented by manipulating aperture setting, the only way of solving it was to use expensive high-end lenses, where less distortion occurs.
Canon’s in-camera distortion correction function corrects based on lens data, ensuring appropriate corrections for barrel distortions (common at wide angles) and pincushion distortions (common at telephoto angles). Take a look at the examples below, and notice how the horizontal lines in the subjects are straighter in the corrected images.
Wide-angle photos tend to appear to pop out near the centre as a result of barrel distortion. Distortion correction tones down this effect, too, because it is carried out evenly across the entire image instead of just to the edges. However, do note that regardless of the type of distortion, part of the image will be cropped off in the process, so when you compose your images, it is advisable to leave some allowance in the edges.
If you shoot in Live View, you can preview how the corrected image will look. Once the distortions have been corrected, tilts and imbalances in the image become more noticeable, and hence easier to correct, putting you on your way to a well-composed image.
Use distortion correction in the following situations:
- In landscape photographs with a visible horizon.
- When photographing buildings with straight lines that are ideally depicted cleanly.
- In still life photography, so that the shapes of subjects can be depicted accurately.
Wide angle (FL: 16mm/ f/8)

Distortion correction - OFF

Distortion correction - ON
EOS 5D Mark IV/ EF16-35mm f/4L IS USM/ FL: 16mm/ Aperture-priority AE (f/8, 1/15 sec, EV-1.0)/ ISO 800/ WB: Auto
The barrel distortion unique to wide-angle lenses has been corrected—note how the lines in the table and tatami mat are straighter in the corrected image compared to the uncorrected one. Sometimes, you don’t realize how big the distortion actually is. This function is good not just for indoor shots, but also outdoor shots, landscapes and a whole variety of scenes.
Telephoto (FL: 105mm/ f/8)

Distortion correction - OFF

Distortion correction - ON
EOS 5D Mark IV/ EF24-105mm f/4L IS USM/ FL: 105mm/ Aperture-priority AE (f/8, 1/125 sec, EV+0.7)/ ISO 100/ WB: Daylight
It may not be as obvious as the barrel distortion in wide angle shots, but images shot at telephoto angles will have pincushion distortion, visible in the above example. Correcting this depicts the building shape more accurately—observe how the lines in the roof are straighter. This is easier to shoot when you display the grid in the viewfinder/LCD screen.
For more about the Digital Lens Optimizer, check out the following:
EOS 5D Mark IV: Lens Aberration Correction—A Close-up Look (Part 1)
Receive the latest updates on photography news, tips and tricks by signing up with us!

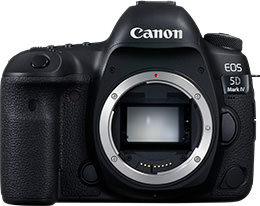
EOS 5D Mark IV (Body)

EF70-200mm f/2.8L IS II USM

EF16-35mm f/2.8L II USM

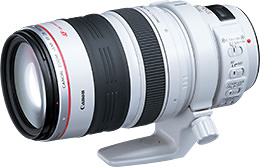
EF28-300mm f/3.5-5.6L IS USM

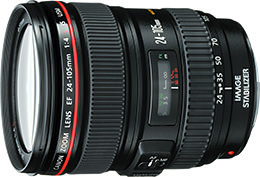
EF24-105mm f/4L IS USM

EF16-35mm f/4L IS USM

Born in Aichi in 1960, Takahashi started his freelance career in 1987 after working with an advertising photo studio and a publishing house. Photographing for major magazines, he has travelled to many parts of the world from his bases in Japan and China. Takahashi is a member of the Japan Professional Photographers Society (JPS).

A monthly magazine that believes that enjoyment of photography will increase the more one learns about camera functions. It delivers news on the latest cameras and features and regularly introduces various photography techniques.
Published by Impress Corporation


