


.jpg )
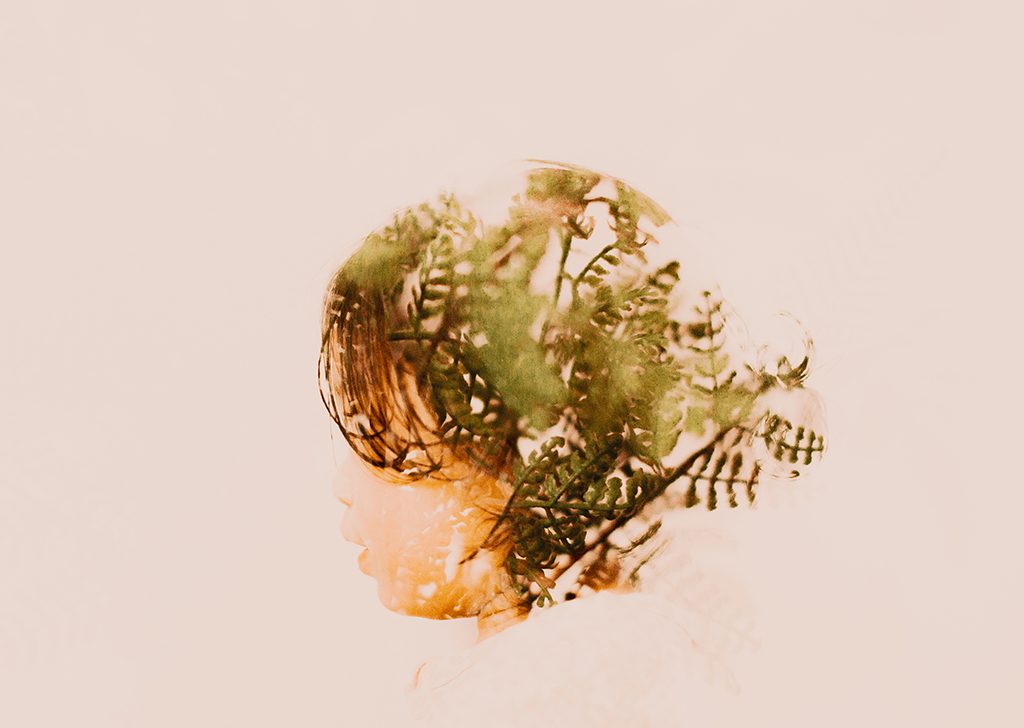
EOS 6D, EF50mm f/1.4 USM, f/1.8, ISO 1600, 1/250s, 50mm
One feature that many photographers can often be unaware of, and found in most digital interchangeable lens cameras, is being able to create multiple exposure in-camera. This feature is also in mirrorless cameras. For the uninitiated, multiple exposure means to superimpose a scene you are taking onto another image within the same frame. But you must be wondering: “Why would I want to do this in-camera when I can do it in post-processing on the computer?”.
Well, when you do it in-camera, you can stay at the scene and check if the combination of the frames worked well with each other. What’s more, in your Canon cameras, you can expose up to nine pictures within a frame, allowing for maximum creativity to juxtapose a unique piece of photographic work. In this article, you will see a myriad of images from Rosamond Dela Cruz, who created all her multiple exposure works in-camera.
EOS 6D, EF50mm f/1.4 USM, f/2, ISO 1600, 1/250s, 50mm
Setting up Your Camera for Multiple Exposure
Depending on your camera model, the Multiple Exposure mode might be located in different tabs under the Shooting Menu. If you are unsure, you can always refer to the instruction manual.
Once you find the Multiple Exposure option, activate it by turning on either Func/Ctrl or ContShtng.
After choosing the desired exposure mode, you will next decide how many frames you want to capture. Experiment by selecting two frames and the next two sequential shots will be superimposed as one image.
EOS 6D, EF24-105mm f/4L IS USM, f/4.5, ISO 3200, 1/500s, 90mm
Exposure Control for Multiple Exposure
There are four ways you can control the exposure in Multiple Exposure mode, and each way offers varying degrees of control.
If you are trying out multiple exposure in-camera for the first time, try to use Average mode to see how the results turn out. After which, you can experiment with the other modes.
.jpg )
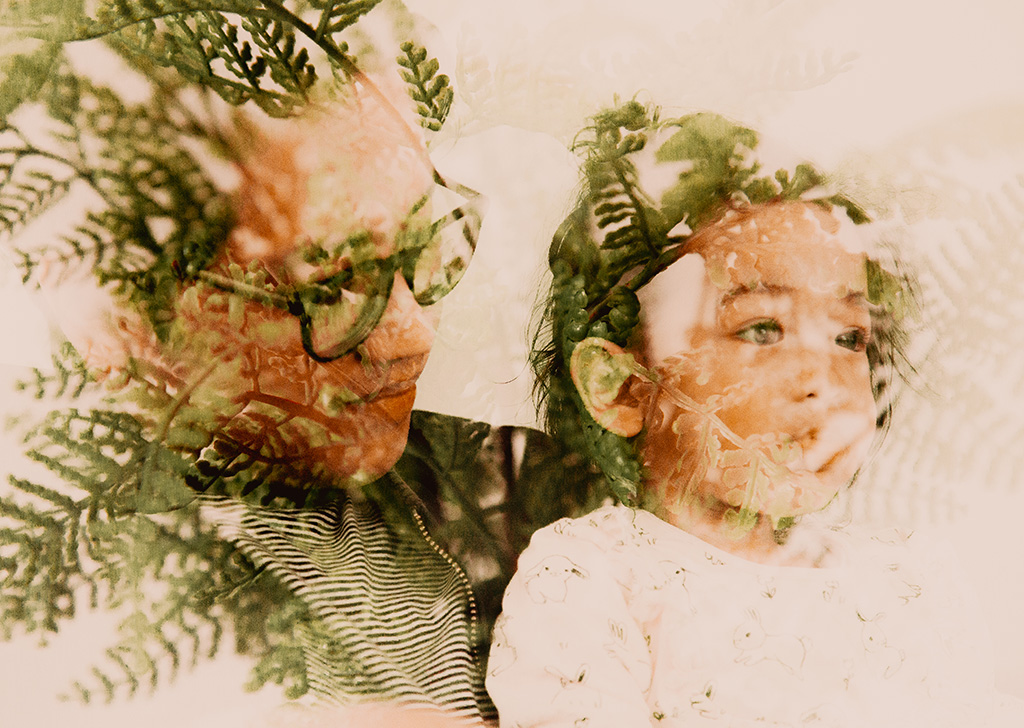
EOS 6D, EF50mm f/1.4 USM, f/2, ISO 500, 1/200s, 50mm
Composition Tips from Rosamond
One of the most common mistakes that newbies make when creating a multiple exposed image is that they don’t plan for their shots. This results in not having sufficient space for the next subject or scene within the frame. The final photo may look messy without a focal point. So, try to plan ahead. Make simple notes on which frame you are going to use as your base image and how you will position and compose for the subsequent photos.
Once you gain confidence and want to try to use Bright/Dark mode, you can also look to frame the sequential frames within the highlight or shadow regions of the base photo. This works immensely well with silhouettes.
Another tip is to use colours and contrast to your advantage when creating multiple exposure images. For example, the base image may have dull or muted tones, and you can complement the subsequent images to be colourful, helping to create a nice contrast.
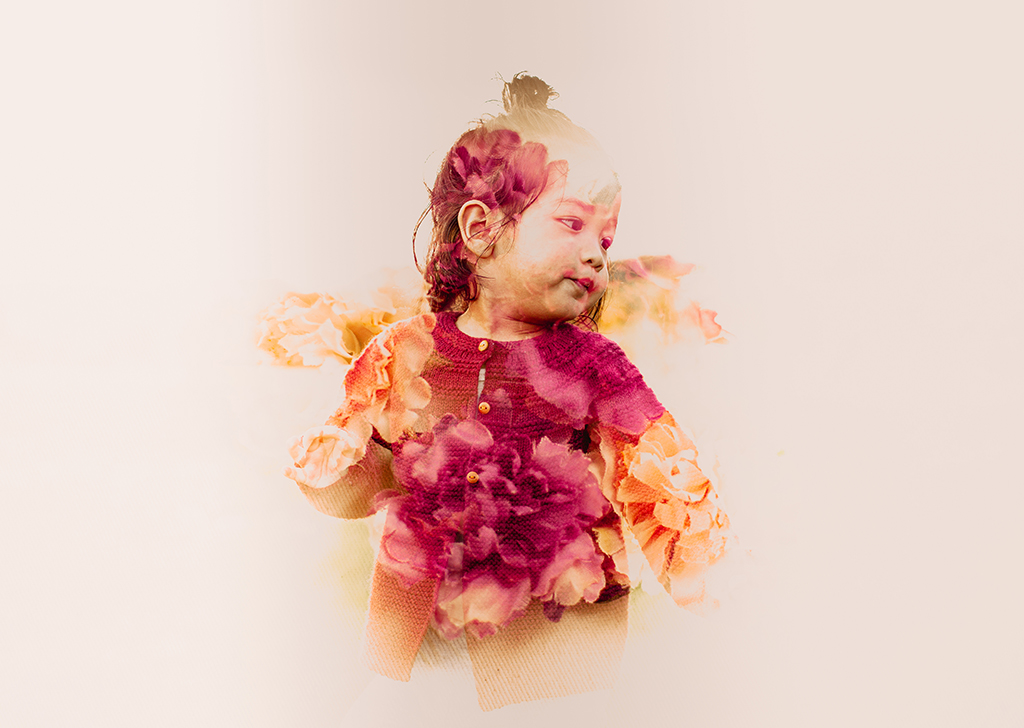
EOS 6D, EF50mm f/1.4 USM, f/2, ISO 250, 1/200s, 50mm
Did You Know?
All the photos shot will be recorded as individual images on your memory card. This helps to blend the images on a computer in post-processing while using the multiple exposed image created in-camera as a reference.
If you are shooting in RAW format, you can select one of the RAW photos as the base image at any time and superimpose subsequent photos on it. This is great if you already took a picture some time ago and want to experiment with stacking other photos onto it.
The Multiple Exposure mode opens a whole new avenue of creativity for photographers to create more interesting shots in-camera, without having to rely on a computer. Give it a spin and share your photos with us on Instagram by tagging #canonasia.
For similar articles:


