


Creating Backdrops: Introduction to Cosplay Photography with a Projector
Capable of creating a wide variety of photoshoot backdrops, projectors provide great support for cosplay photography. In the following, let us take a look at the basics and the points to note when using a projector. (Reported by: Suna, Model: Yu)
Projectors: A simple way to produce backdrops of a fantasy world
A projector is capable of producing backdrops with any image you like onto a wall or screen. It thus works extremely well with cosplay photography, where an imaginary world is often created. While you can choose to carry out the shoot using a home projector that you have, photo studios suited for projector photography are recommended if you want better quality results. Some photo studios simply require you to bring along the images to be used for the shoot in a USB flash drive.
Types of projectors available
There are three main types of projectors – LCD, DLP and LCOS.
LCOS (liquid crystal on silicon) projectors deliver the highest image quality, but they are also very costly and thus unrealistic for personal use.
LCD (liquid-crystal display) and DLP (digital light processing) projectors differ from each other in terms of how they are constructed. However, you can find a wide variety of both types of projectors on the market, with different price ranges, features and capabilities. In fact, there are many very affordably-priced projectors available nowadays.
That being said, from experience, I find it difficult to achieve high-quality shoots using low-cost projectors, be it in terms of image quality or the size of the projected image. While investing in a mid-range projector is an option, it might be more practical to rent a high-performance unit at a photo studio.

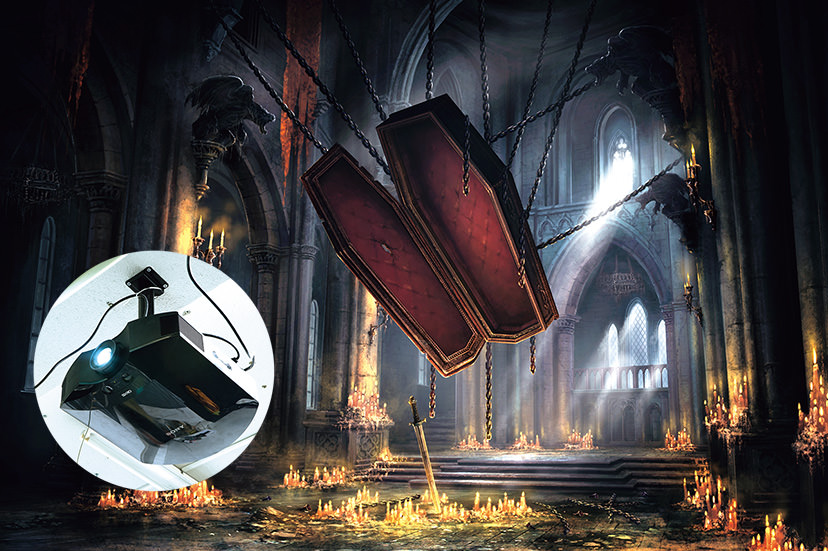
The projector employed for this shoot was mounted to the ceiling of the photo studio. It is used to project an image onto a large 200-inch screen.
Projectors work best in low light
Images created by a projector tend to appear washed out under brighter conditions, so do remember to darken the room as much as possible. If a photo studio is installed with a projector, it should also be equipped with the right environment for using the device. Since the photoshoot location will be dimly lit, do be careful not to bump into or trip over objects or people!
If you are carrying out the shoot at home, you could also try using black cloth or shading curtains to darken the room.

For photoshoots at a photo studio, there should be no problem darkening the room. If you are shooting at home, try using a black cloth or shading curtain to prevent light from leaking.
Ideas for backdrop images
Here are some images that are commonly used in cosplay photography.
Outer space
A very typical example of a location not easily accessible in reality. There is an increasing number of cosplayers who use outer space as the setting for their photoshoots.

Dark forest
This setting fits perfectly well with cosplay photography because it is able to effectively create a fantasy-like atmosphere.

Abandoned building
It is dangerous to carry out photoshoots in actual abandoned buildings, but you can use a projector to simulate the setting.

Tips for selecting a backdrop image
You will need to prepare the image to be used for the backdrop. Here are some tips to take note of:
1. Use an image with as high a resolution as possible.
If you use a low-resolution image for the shoot, the backdrop might appear grainy, and the atmosphere will be less convincing.
2. Choose an image with darker colours.
Images with bright colours might look washed out and give unnatural results.
3. Try to choose a scene that is as dark and unreal as possible.
The beauty of using a projected backdrop is that the scene can be literally something out-of-this world. Why not make the best of it?
4. Make sure the projector supports your image file format.
This is especially so if you are shooting at a photo studio and using the studio’s projector. You don't want to go all the way to the studio only to find that your files cannot be used! Check in advance the image formats supported by the projector.
Project the backdrop image onto a white wall
The backdrop image will appear dim if it is projected onto a black or coloured wall. For best results, project it onto a white wall or projector screen.
However, also note that if the surroundings are all white in colour, light will reflect off them onto the projection area and wash out the image. One way to avoid this is to cover all areas outside the projection area with a black cloth.

The walls and floor around the screen in this photo studio are black in colour, which enable the projector to perform optimally.
Where to place the projector
How you position the projector and model depends on whether the projector is a standing or ceiling mount type.
For ceiling mount projectors, it is of course impossible to move the projector. You will thus need to place the model at a position that does not stand in the way of the projection light.
For standing projectors, it is best to place the projector behind the model as illustrated in Fig. 1. Doing so allows you to ensure sufficient distance from the screen to the model, thus reducing the impact of the photography lighting on the projection light.
If the projector cannot be placed behind the model due to space constraints, an alternative way is to project the image from an angle, as shown in Fig. 2. Needless to say, the projector must not be placed in a position such that the model comes in the way of the projection light (see Fig. 3).
Fig. 1: Projector placed behind the model

A: Screen
B: Projector
C: Model
If it is possible to ensure sufficient distance from the screen to the model, you could place the projector behind the model. Doing so helps to prevent the photography lighting from interfering with the image projected onto the screen. While some may wonder if the projector would be captured in the photo, this is not a cause for concern since the projector is placed on the floor just behind the model.
Fig. 2: Projector placed at an angle from the model

A: Screen
B: Projector
C: Model
If there is insufficient space to place the projector behind the model, position it at an angle from the model. With the keystone correction feature of the projector, the projected image will not appear distorted.
Fig. 3: Example of poor positioning

A: Screen
B: Projector
C: Model
D: Shadow of model
Projecting the backdrop image from directly in front of the model will cast a shadow of the model onto the screen.
For more articles on cosplay and photography, check out the following articles:
Cosplay Photography Techniques (1): Lighting Gear
Cosplay Photography Techniques (2): Fundamentals of Lighting
Cosplay Photography Techniques (3): Examples of Different Lighting Setups
Cosplay Photography Techniques (4): How to Shoot with Coloured Light
Cosplay Photography Techniques (5): Add “Fairies” to Your Images Using Long Exposure
Receive the latest update on photography news, tips and tricks.
Be part of the SNAPSHOT Community.
Sign Up Now!
About the Author
Working as a photographer mostly on weekdays, Suna always incorporates new photography techniques and provides very well-organised and easy-to-understand explanations on social media such as Twitter.
Cosplayer who is currently involved in cosplay projects such as Fate, Danganronpa and Hatsune Miku. She has won a very good reputation for her scenario-specific photos.
Kanata is a cosplayer as well as a modern artist who specialises in plastic arts. He is famous for the detailed texture of his weapons and protective gear. Kanata is also the official cosplayer for “Kabaneri of the Iron Fortress”.
A publisher that specializes in books and magazines about video, photography and illustrations.

