Flip it or tilt it, the Vari-angle LCD screen is designed to help photographers overcome certain limitations and achieve better flexibility for composing one’s shot. In this article, we explain where this feature comes in handy, and show examples of screen positioning as angled or positioned correctly for each photography scenario.
Frontal Perspective
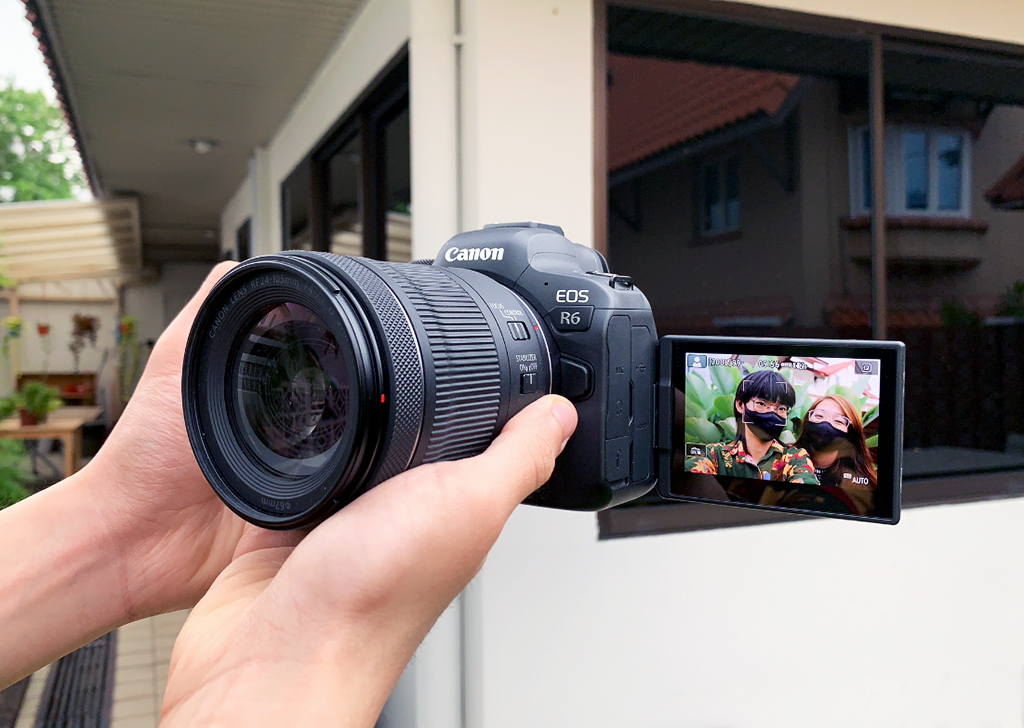
Whether vlogging, taking a selfie or even using the camera with the Canon EOS Webcam Utility for online conferencing calls, you can position the Vari-angle LCD screen to help you see what you’re shooting. Additionally, you can benefit from the Canon camera with the smooth motion, crisp details and high-resolution output suitable even in low-light conditions. To add, you can utilise the Eye Detection AF to keep your eye and face in focus at all times.
Low-angle Perspective
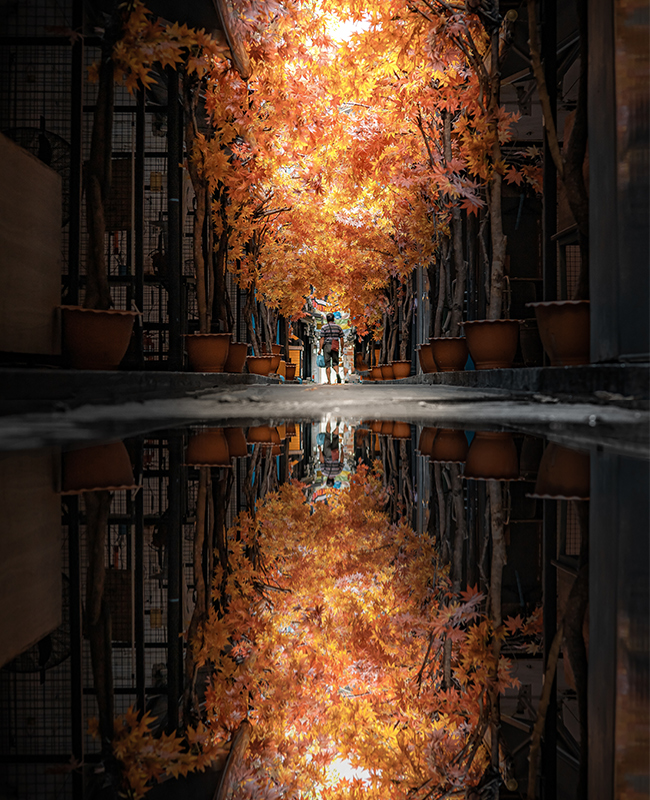
EOS RP, RF50mm f/1.8 STM, f/3.2, ISO 200, 1/40s, 50mm
by @donamtykl
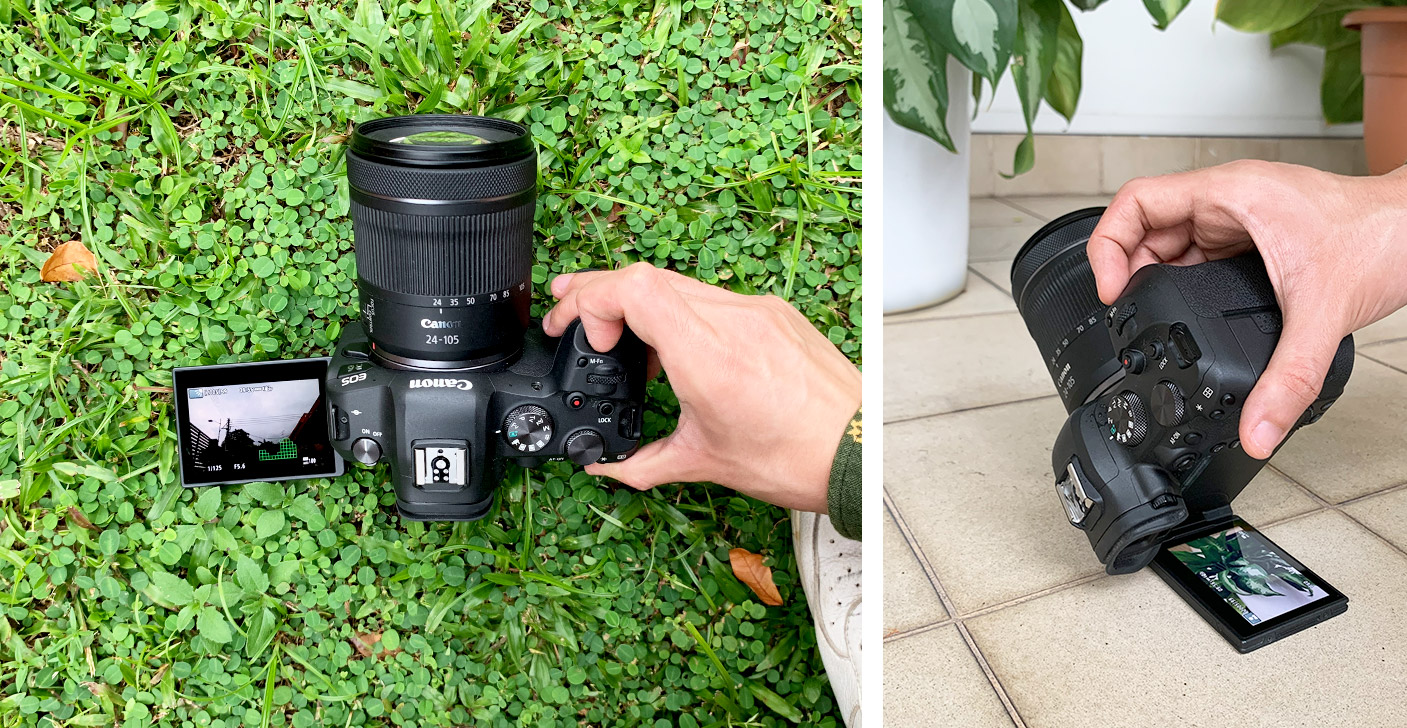
When it comes to a low-angle perspective shot, one will usually have to position the camera to the ground. For cameras without the Vari-angle LCD screen, it can be difficult to view the scene you’re shooting through the display screen or viewfinder. However, with the Vari-angle LCD screen, all you need to do is flip it out and turn it so it’s parallel to the ground (check out the positioning below!). This way, you can view the screen easier just by looking down at the camera. On the right image below, we're showing you how you can shoot vertically with a low-angle perspective by flipping the screen out to face you. This is only achievable using a camera with a flip-out screen. You can tilt it towards you for vertical orientation as compared to other cameras that have a tilt-up only screen suited only for horizontal shots.
You can use this low-angle perspective to photograph reflection from a puddle of water on the ground, for smaller-sized subjects like a puppy or a macro shot of a wildflower, vehicle light trails and accompanying architecture, or even OOTD shots angled from the ground up.
Check out these examples:

EOS R6, EF16-35mm f/2.8L II USM, f/5, ISO 800, 1/125s, 16mm
by @allenlo0809
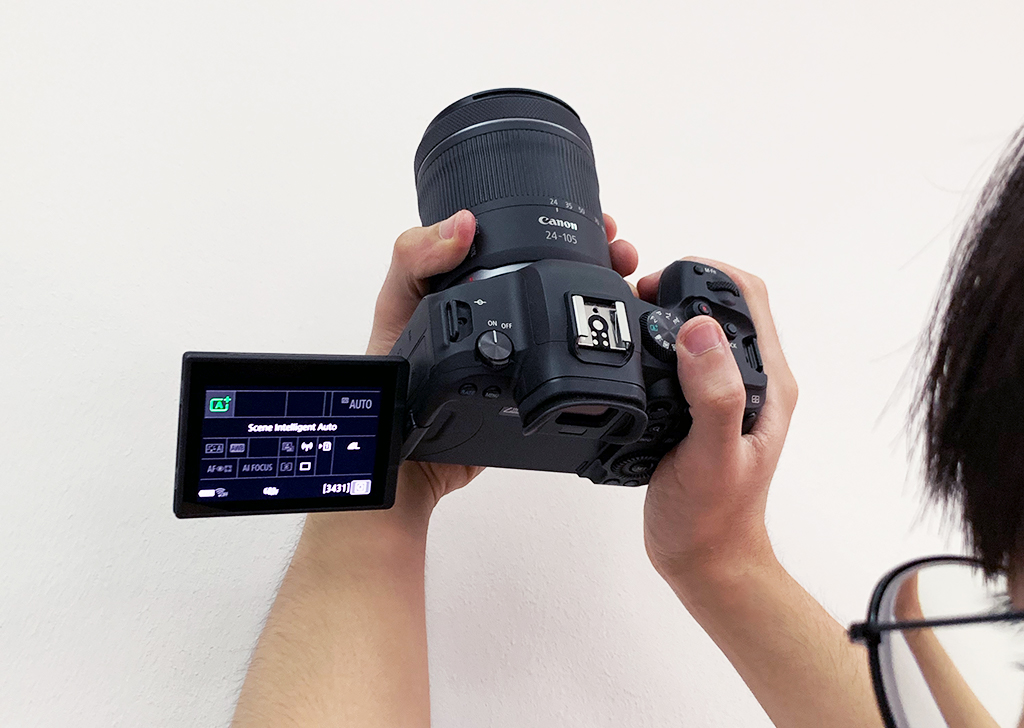
If you’re not shooting the building from low ground but at a height above your eye level, you can utilise the Vari-angle LCD screen (as portrayed below) to tilt the screen to a comfortable eye level, so you won’t have to strain your neck too much.
Bottom-Up Perspective
To put bottom-up perspective in layman’s terms means to lie down on the floor and look up. This unique viewpoint is often used to capture tall architectural buildings (both internal and external) to create more interest. You can also use it to capture a subject that shows a more interesting side when seen from the bottom up, like the underside gills of a mushroom or the underside of leaves!
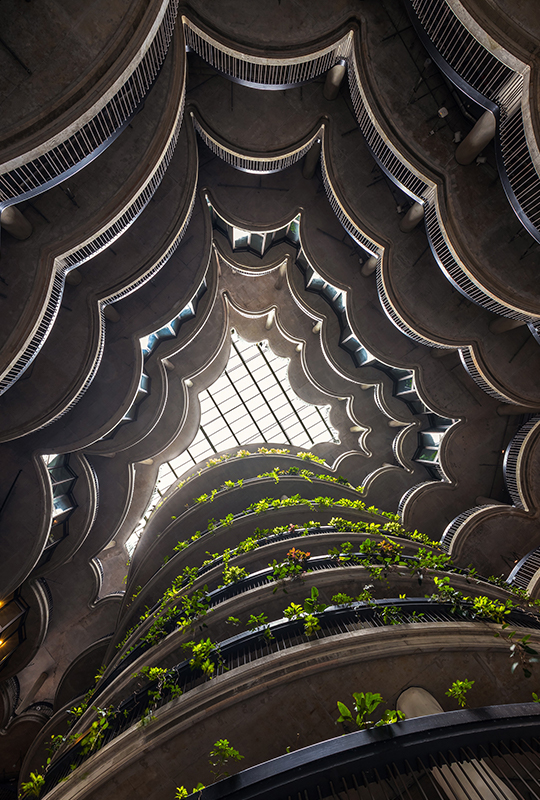
EOS 6D Mark II, EF16-35mm f/4L IS USM, f/16, ISO 400, 1/30s, 16mm
by @lemjaylucas
For this, the camera is usually placed low near the ground (or on the ground itself) with the lens pointed towards the sky. This limits traditional cameras without the Vari-angle LCD screen as there is no way for the photographer to check the scene being captured unless lying on the ground too. With the Vari-angle LCD screen, you can just flip it out, turn the screen and see what you’re capturing immediately (see below).
Tip: if you’re using an ultra-wide angle lens, check the screen to make sure that you’re not accidentally captured in it!

Top-Down Perspective

EOS 6D Mark II, EF 50mm f/1.8 STM, f/5.6, ISO 100, 1/125s, 50mm
by @joyceleongstudio
Opposite to Bottom-Up, Top-Down Perspective positions the lens to face the floor. Of course, the camera will be situated on a tripod and adjusted to the preferred height. This perspective is used for flatlays of food, products or even fashion/portrait photography.
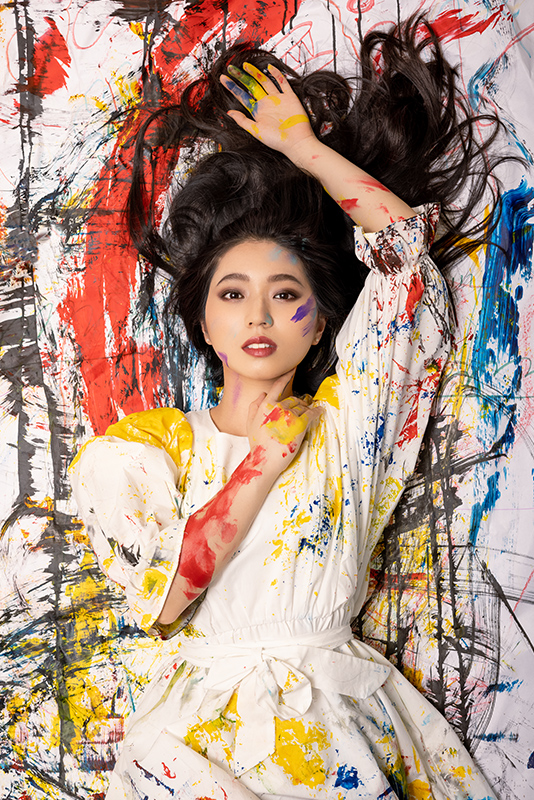
EOS R5, RF50mm f/1.8 STM, f/7.1, ISO 100, 1/250s, 50mm
by @keilo_photography
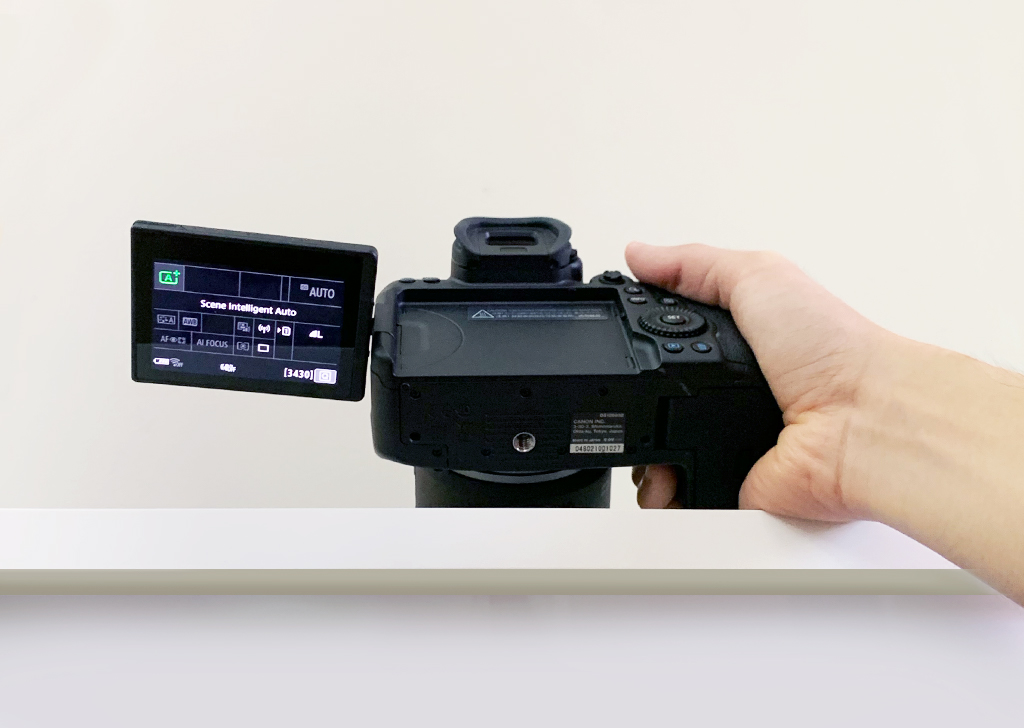
The benefit of the Vari-angle LCD screen is that you don’t have to strain yourself to look through the viewfinder to see what you’re shooting. It also allows you to adjust your composition or the subject/products within the frame. Check out the positioning of the Vari-angle LCD screen in the example below.
.jpg)
If the tripod is too high, you can tilt the screen to a comfortable angle for your viewing (right image).
Over or Under a Barricade
Say you’re trying to capture what’s happening behind a barricade at a concert. The screen can be tilted down or up to your eye level to see what you’re shooting and reduce screen glare. This can be useful in instances such as wildlife photography, where you’re concealing yourself behind a structure to avoid spooking the animal or shooting over the ledge of a building!
Around a Bend
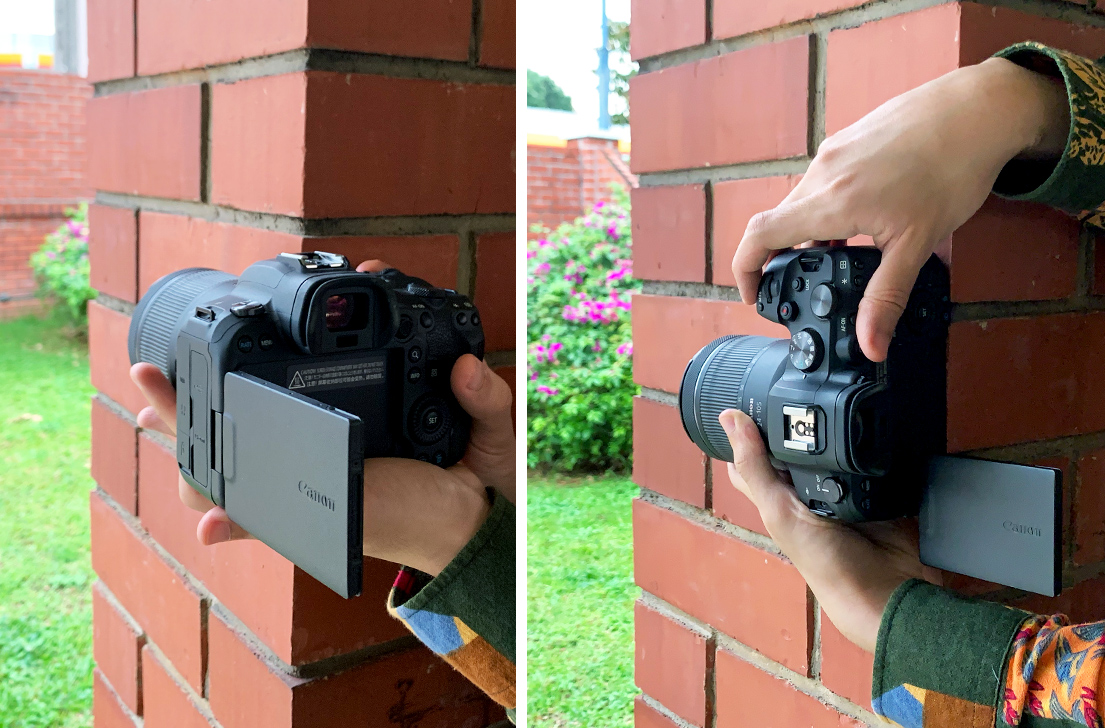
Not the most common, but if you’re shooting through a small gap or trying to reach far out (or from an angle that you couldn’t reach in person), you can position the Vari-angle this way (see above) to check the scene before photographing. This works when you’re on a ledge too. If you’re shooting vertically, the right image shows how you can do it! P.S. if you keep the screen horizontal you will need to tilt your head a little to figure out the scene.
The above scenarios are just some examples you may encounter and how the Vari-angle LCD screen can help solve these limitations. You may experience unique obstacles not covered in the article regarding extreme angles or composition, but we hope this article serves as a reference point when solving similar challenges.
For similar articles:
How to Make Use of Low Angles and Macro Mode for a Miniature Shoot
3 Deceptively Simple Challenges to Level Up Your Photography Skills
3 Types of Dog Portraits to Capture with Animal Detection AF


.jpg)


