


A potful of vegetables, chopped and ready to be ingredients in your next culinary adventure. Here’s an efficient way to capture their textures quickly using natural light! (Reported by: Maiko Fukui, Digital Camera Magazine)

EOS 5D Mark III/ EF50mm f/2.5 Compact Macro/ Manual exposure (f/7.1, 1/80 sec)/ ISO 3200
Step 1: Get up close
You don’t need a true macro lens (1:1 magnification) for this, but you need to capture the vegetables close-up enough to see the textures. It depends on the size of your subject and how close you want to get.
A wider macro lens (like the RF35mm f/1.8 Macro IS STM) shows more context while allowing you to shoot closer. A longer lens (like the RF85mm f/2 Macro IS STM) lets you take closer crops, or achieve a similar angle of view as a wider lens by shooting from further away. For this shot, I used my old 50mm standard macro lens, which provided up to 0.5x magnification with closest focusing distance of 23cm.
As I wanted to show more context, I included the edges of the pot and part of the tablecloth in the composition.
Explore food photography with a true macro lens in:
Mouth-watering Macro: The Art of Close-up Food Photography
Step 2: Shoot with side light or semi-backlight
The key to emphasising the textures in this shot is dimensionality, which can be created by using the shadows cast by side light or semi-backlight. (It’s also why strong side lighting isn’t the most flattering choice if you want to make someone look like they have smooth skin.)

For this shot, I placed the pot of vegetables diagonally below a window so that it was semi-backlit. The dimensionality can change depending on your camera angle, so move around and see what works best for you.
Learn another way to play with light and shadow in:
Taking Dramatic Food Photos in Chiaroscuro Style
Step 3: Settings and camera angle—why f/7.1?
I wanted all the vegetables in the pot to be the main interest, so I set the aperture at f/7.1. It achieves enough depth of field so that even the vegetable items deeper in the bowl are relatively sharp, and yet, blurred just enough for the image to look natural instead of too hard.
The camera angle is also important: I made sure not to tilt the camera too much, as that could cause the vegetables deeper in the bowl to become too out of focus and look indistinct. However, a slight tilt enhances the point-of-view feel, like you are all ready to cook the ingredients right in front of you.
Also see:
3 Composition & Styling Techniques for Food Photography
Bonus tip: Backlight or semi backlight enhances transparent objects
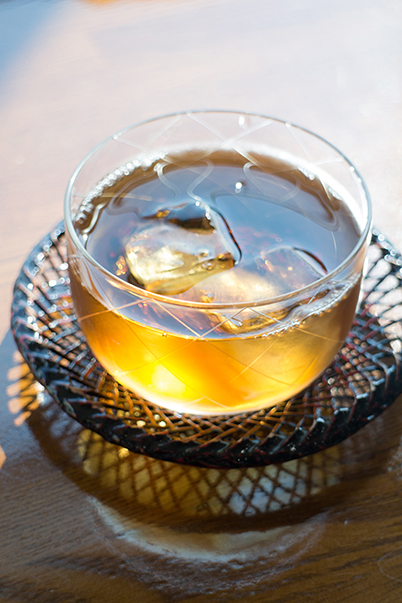
If you are shooting transparent objects such as a clear drink in a glass, position it so that the light source shines from either directly or diagonally behind. This emphasises the subject’s clarity.
For more food photography tips and tutorials, check out:
Tips To Photograph Commercially Appetising Pizza Cheese Pull
A Guide to Photographing Moody and Dramatic Food Shots
Receive the latest update on photography news, tips and tricks.
Be part of the SNAPSHOT Community.
Sign Up Now!About the Author
A monthly magazine that believes that enjoyment of photography will increase the more one learns about camera functions. It delivers news on the latest cameras and features and regularly introduces various photography techniques.
Published by Impress Corporation
Born in 1983 in Osaka. Photographer. Actively involved in magazine and advertising photography, book writing, photography workshops and so on.

