


There are many benefits to DIY-ing your photography essentials, and these creations make an affordable alternative to the actual products while being able to customise them specifically to your needs. For the in-built diffuser softbox, you can customise the size to fit your camera body, while you decide on the size of your reflector to fit the subject. Whichever changes you make, here are the steps to DIY-ing these 3 easy photography essentials at home.
DIY Diffuser for In-Built Camera Flash
Materials: Tracing paper
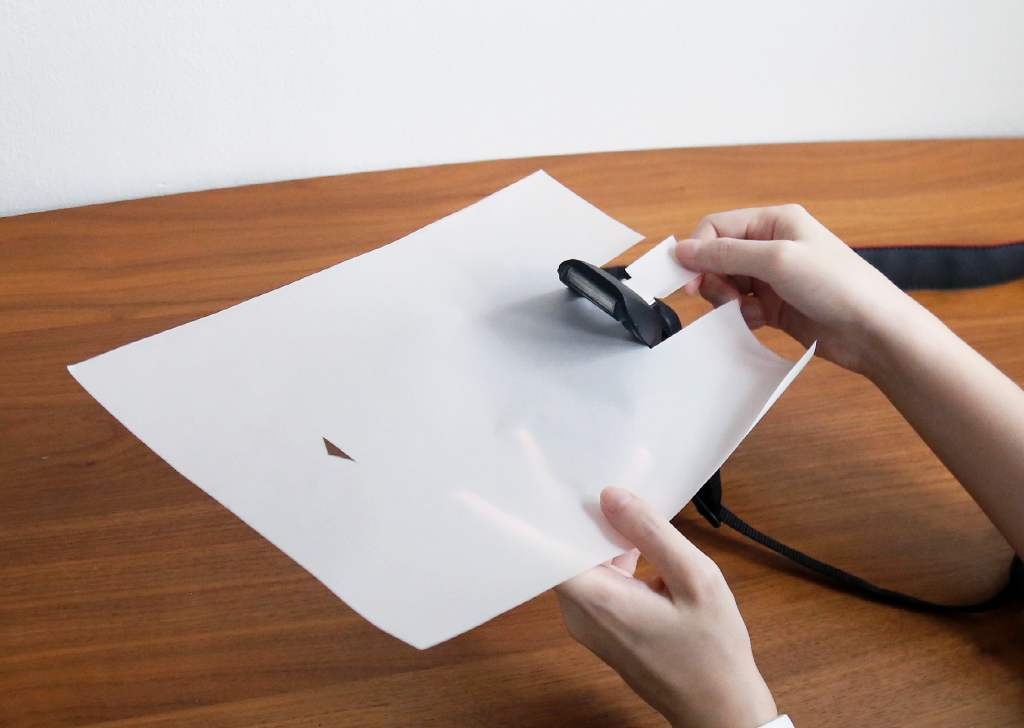
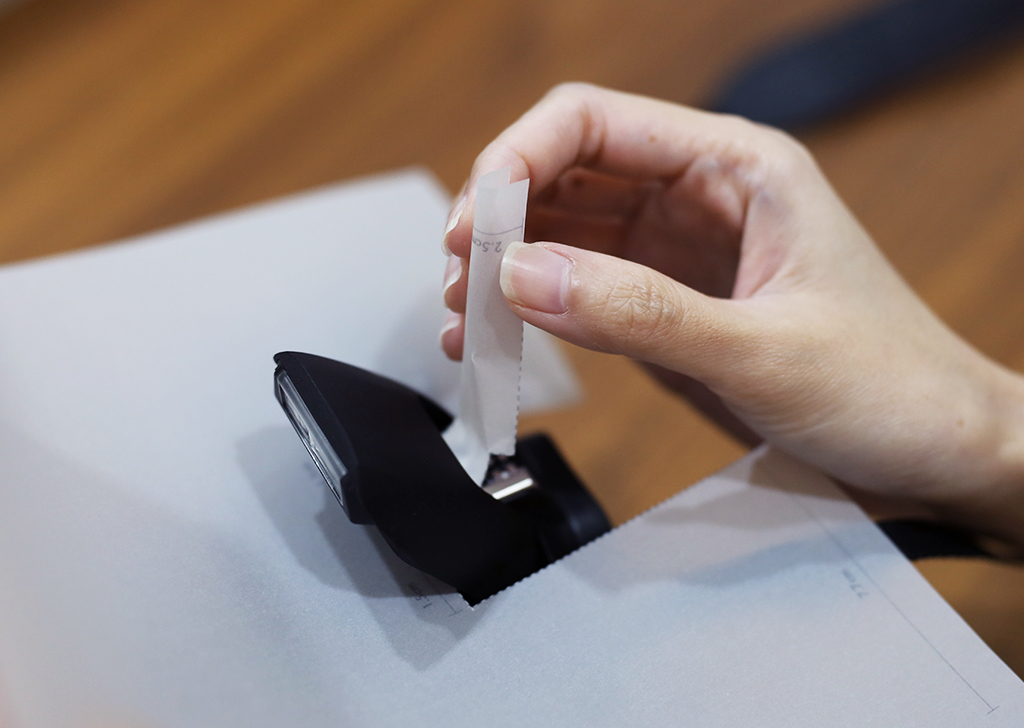
Step 1: Outline

Pick any A4-sized diffuser sheets of your choice (tracing paper, printing paper etc). Do note that a more translucent material will allow more light to travel through, thus making it more concentrated and less diffused. This will coat a smaller area with a more concentrated light.
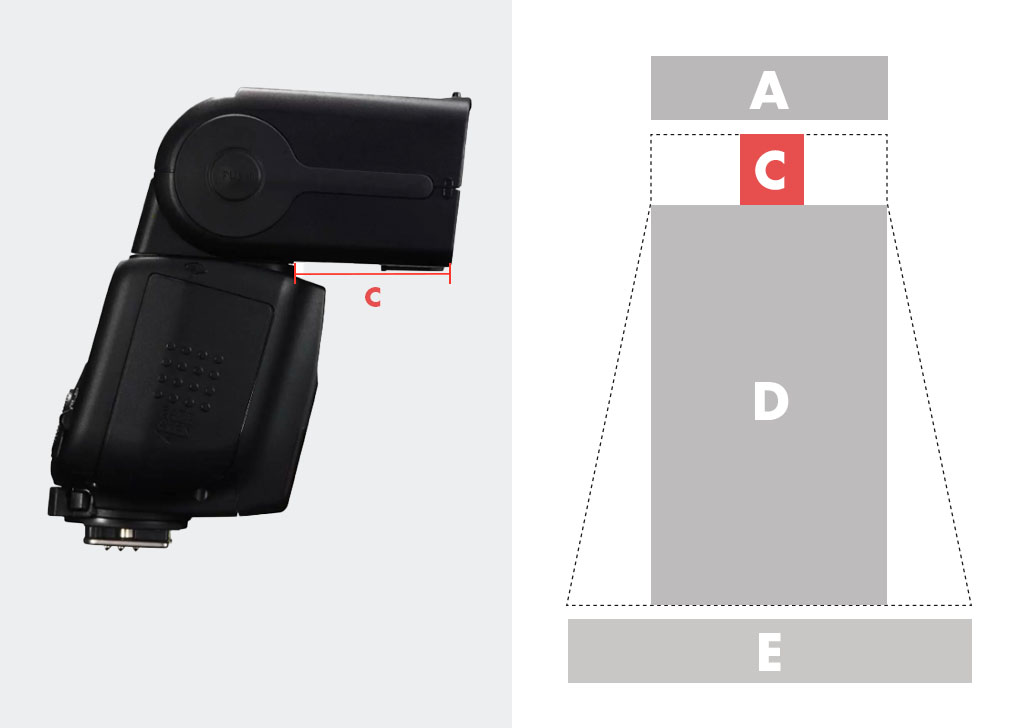
Refer to the sample template (we’ve used the Canon EOS 850D) here. If you’re not using Canon EOS 850D, you can follow the below measurement instructions to draw/mark out a more-fitting template before cutting out the patterns with scissors or a penknife.
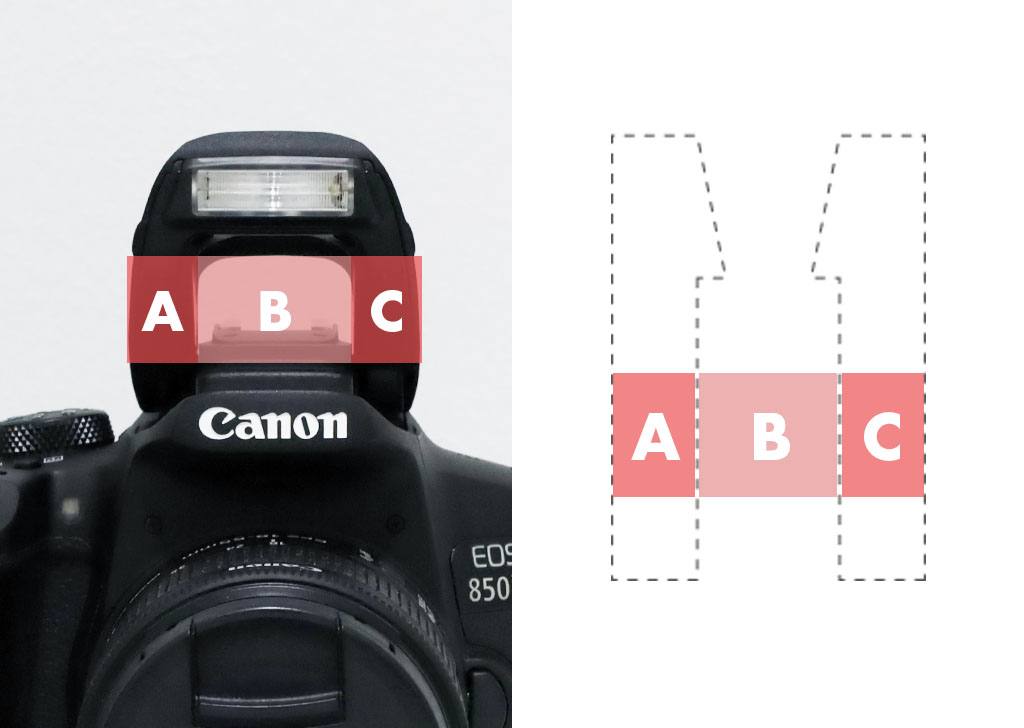
Adapt the in-built DIY diffuser pattern to your camera body’s specification of (measurement A, B and C) by measuring the length of the built-in flash stand and the spacing in between the stands (refer to the diagram above). You can enlarge the triangle slightly to fit a bigger measurement B.
Step 2: Assembling the patterns
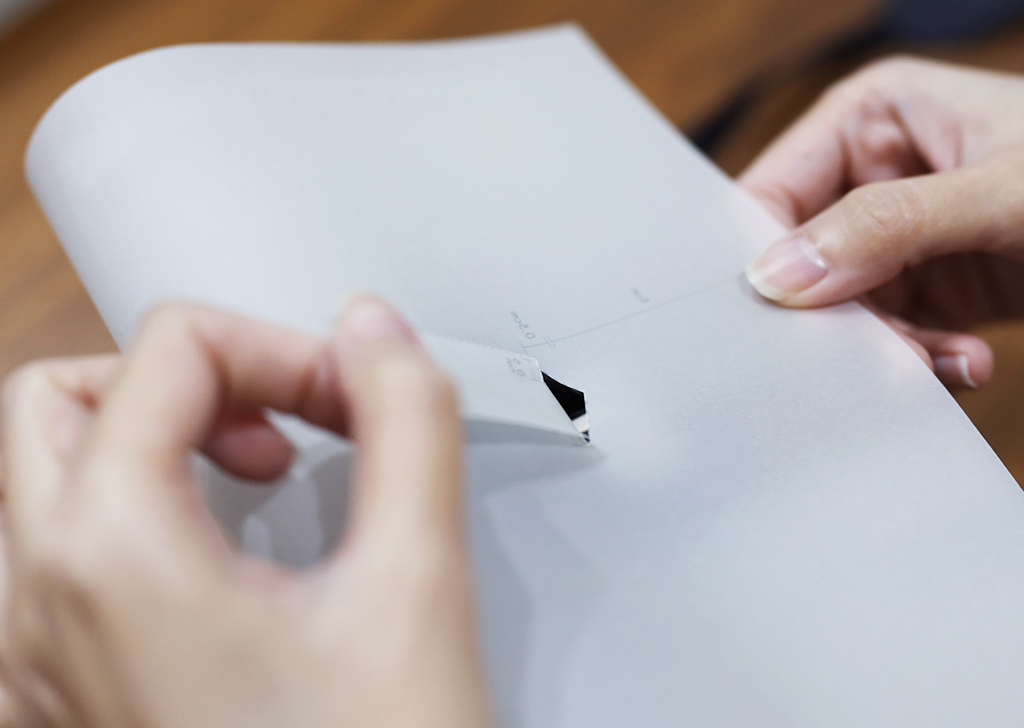
Slot the ‘tail’-like pattern into the spacing between your camera body and the in-built flash, then fold the ‘tail’ pattern in half horizontally before slotting it into the cut out triangular pattern. Be sure not to create any accidental creases in areas where the light will be projected onto, as you want the diffuser to sit upright on the camera for an even lighting.
Step 3: Final look
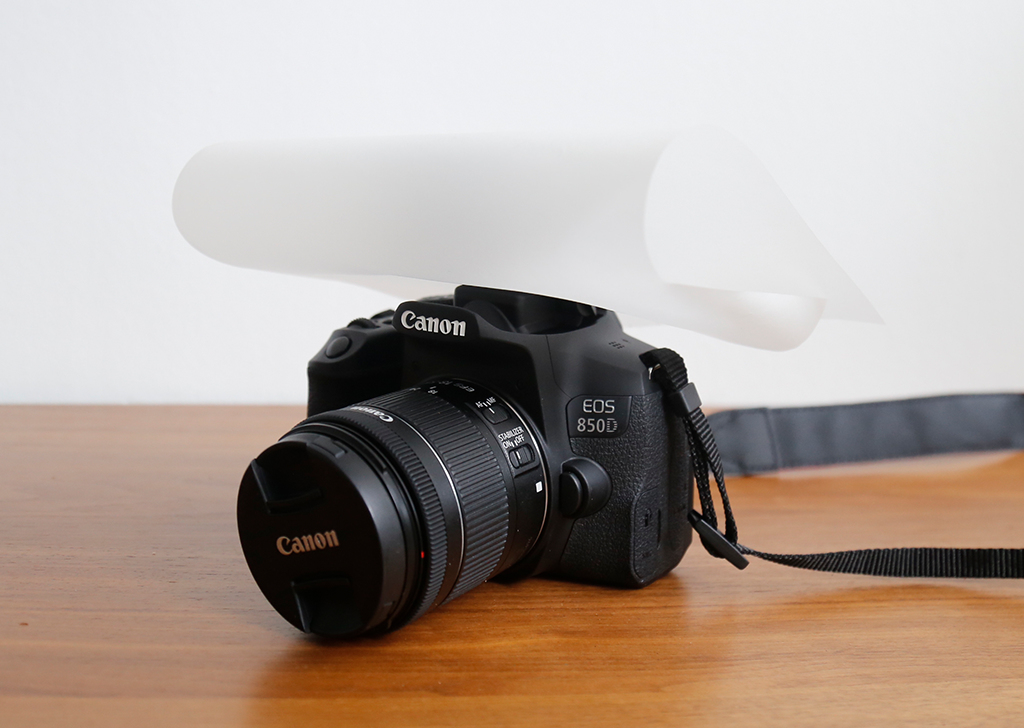
When assembled right, the diffuser should look like the above image!
DIY Softbox Diffuser for Speedlite Flash
Materials: Cardboard, aluminium foil, white paper, double-sided tape and duct tape
Step 1: Outline
For this DIY softbox template, we used Canon Speedlite 430EX III-RT. If you’re using another Speedlite model, do follow the step-by-step explanatory below to draw out your patterns (with exact measurement) on material like an art card or cardboard. You will need to cut 2 pieces for each pattern.
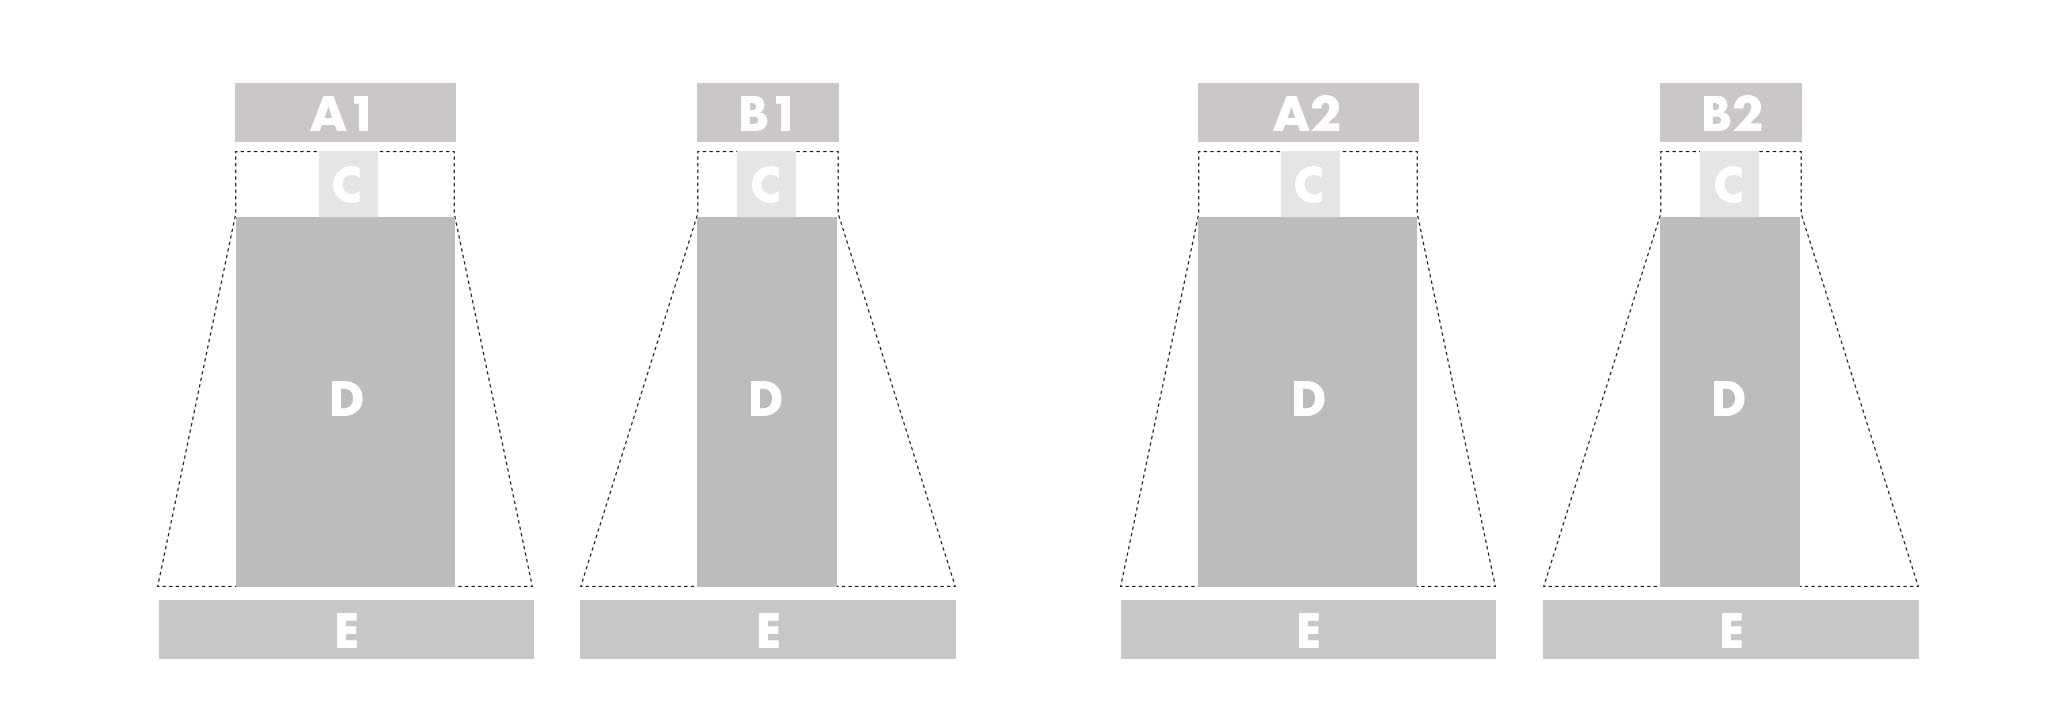
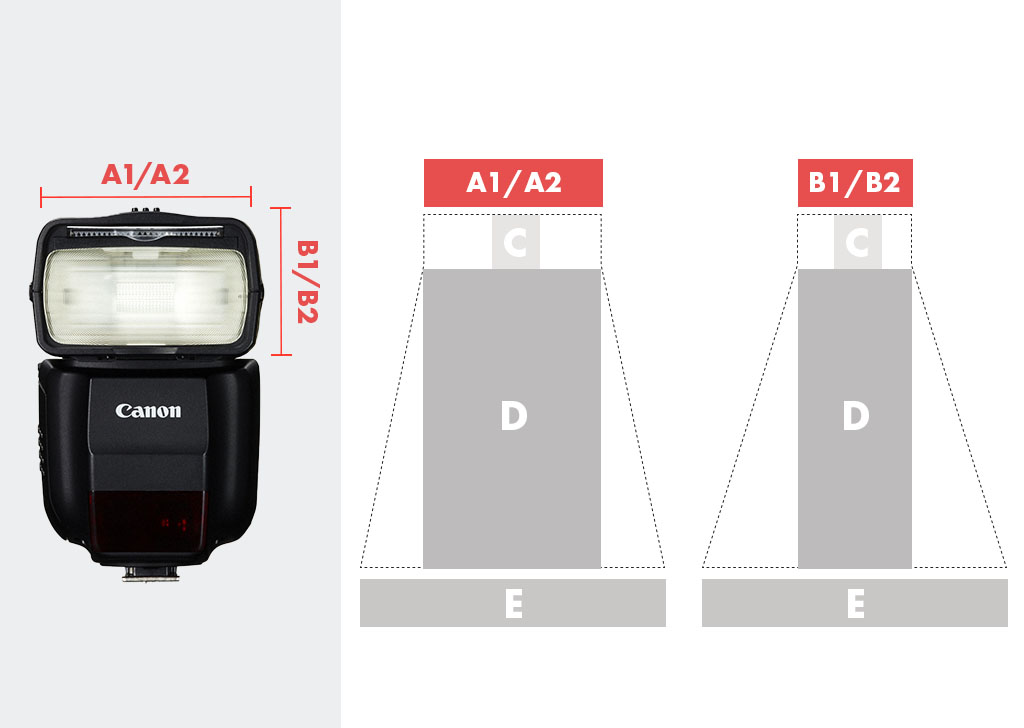
The left pattern makes up the horizontal base of the softbox (the top and bottom rim of the Speedlite), while the right pattern makes up the vertical sides (the left and right of the Speedlite). You can adjust the above pattern based on the measurements of the Speedlite you own.
Measurement C refers to the depth of your Speedlite's flash head when titled down to a 90° angle.

Measurement D can be adjusted to how close the distance is between the flash head and the diffuser panel. The closer the flash head is, the narrower and stronger the light output it will produce.
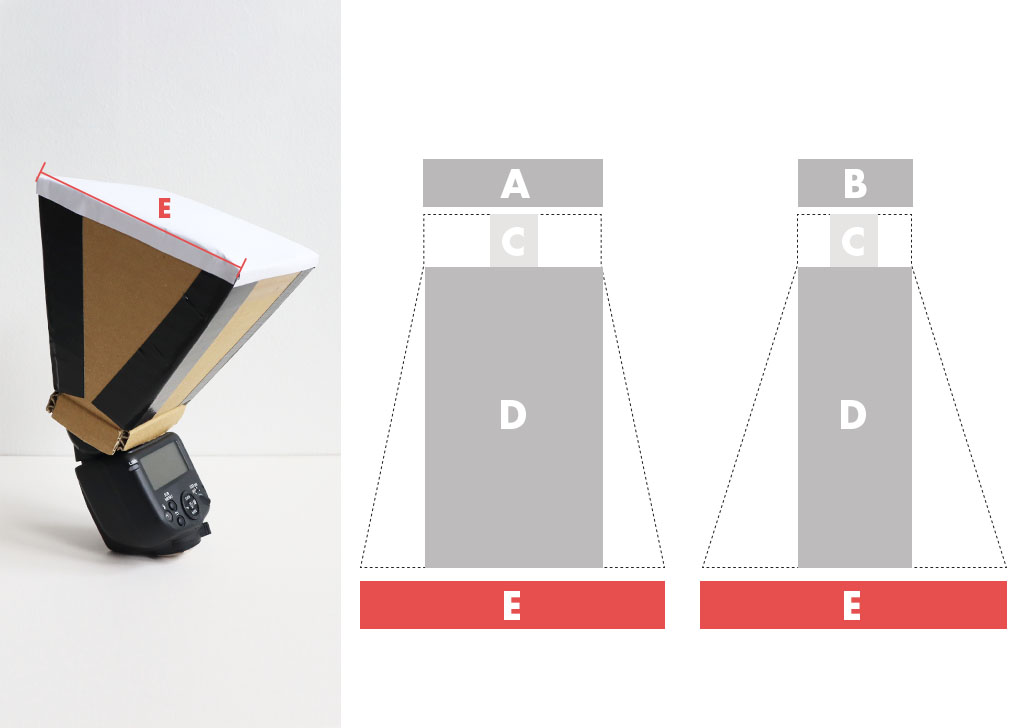
Measurement E refers to how big you want your softbox diffuser end to be. If you opt to have a bigger softbox diffuser panel along with a longer measurement D, it will result in a more diffused (but weaker) light that will spread out to more surface areas on your subject.
Step 2: Taping aluminium foil on the patterns

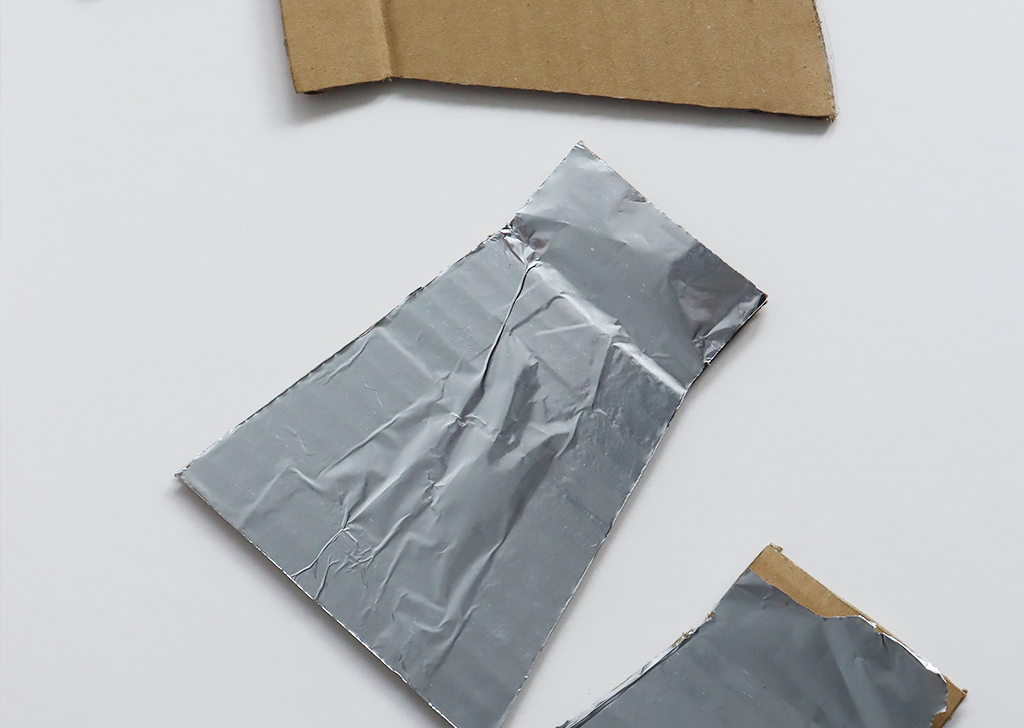
Plaster one side of the shapes with double-sided tape. Next, apply the aluminium foil above it and press down.
Step 3: Assembling the patterns
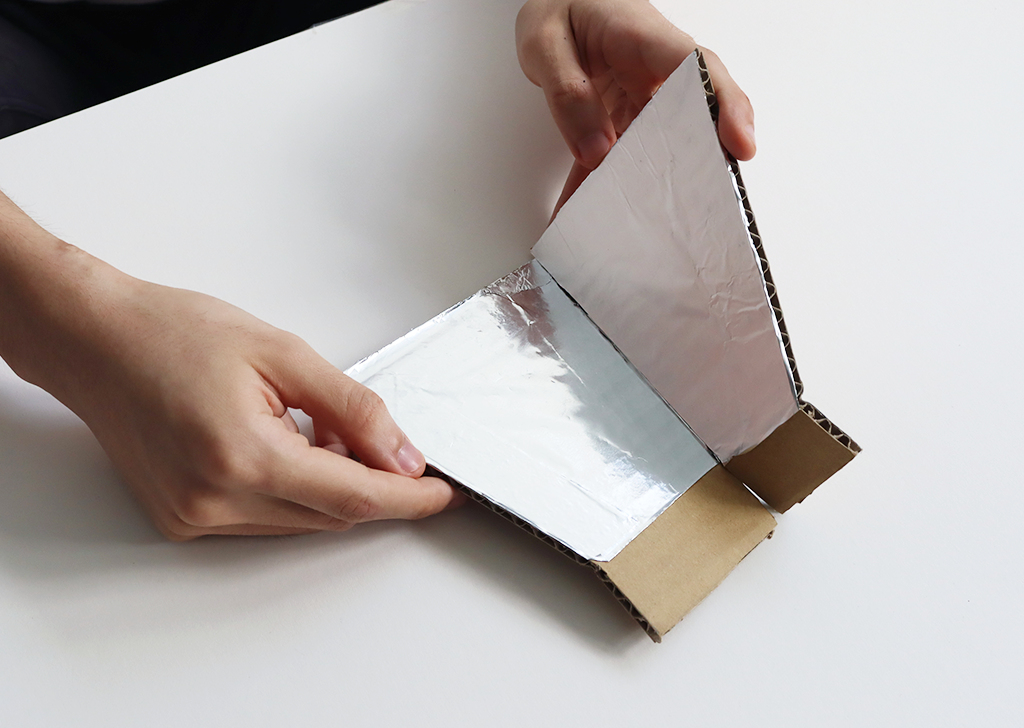

Identify your horizontal and vertical pieces before joining the sides with duct tape (refer to the middle image above). They should form a rectangular shape.
Tape down the bigger opening with any diffuser sheet that you like. It can be any translucent material, but we would suggest going for the fundamental tracing paper or printing paper.
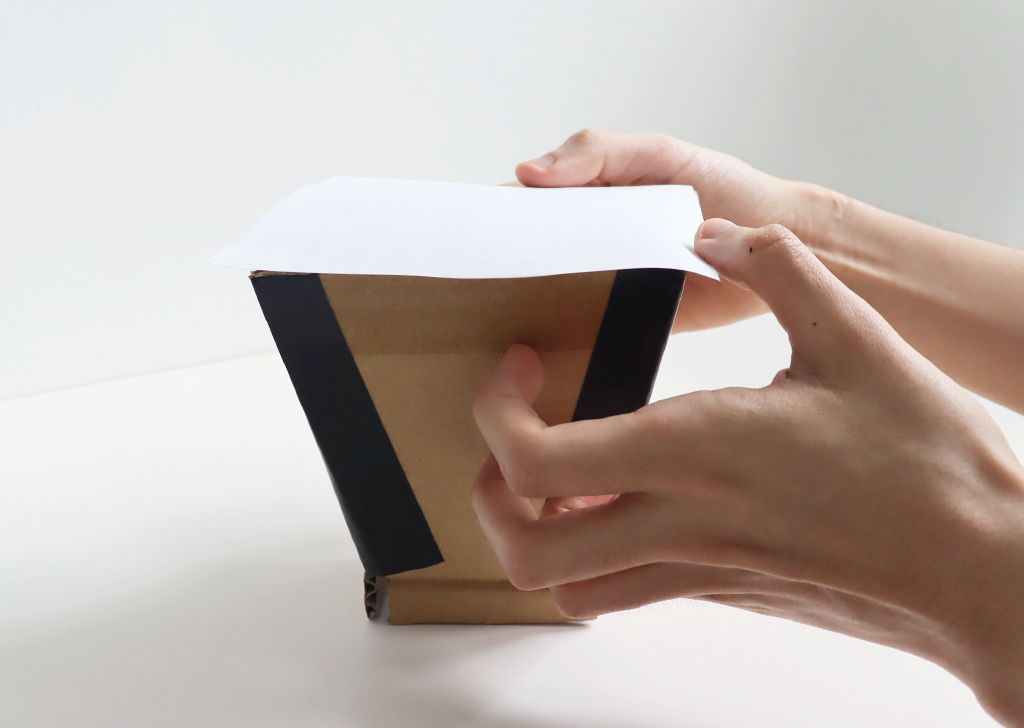
Step 4: Final look
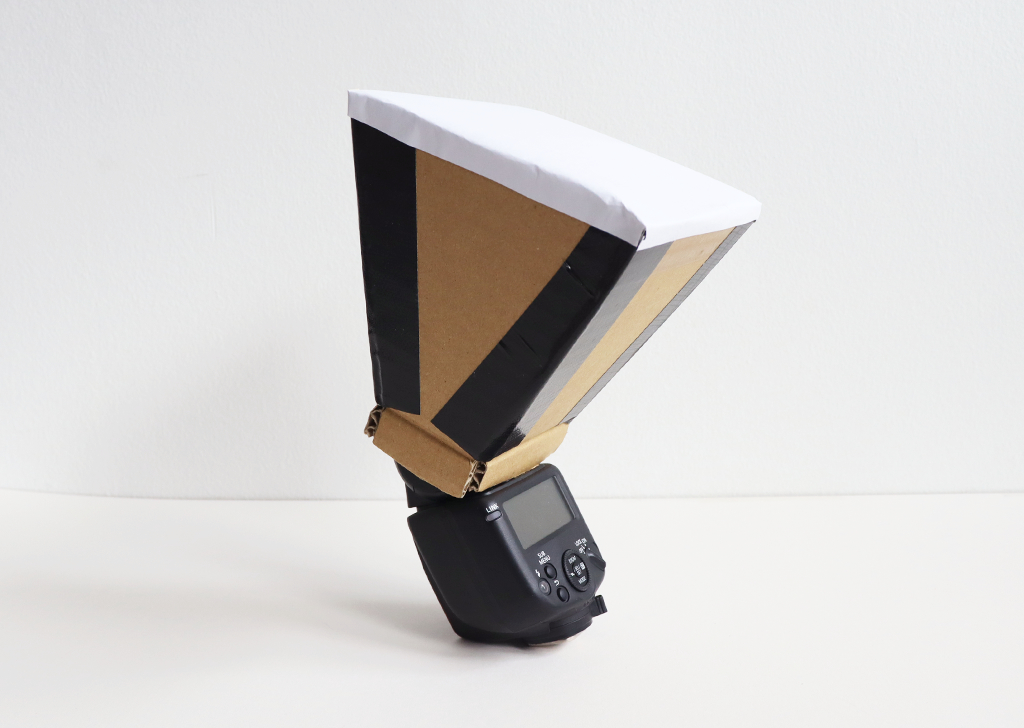
The results should look like this! The DIY softbox should fit your speedlite Flash firmly and well. You can also tape Measurement C all around with duct tape to secure it further and to prevent any light leaks.
If you’re using the Canon Speedlite 430EX III-RT, you can save time by downloading our standard template here.
DIY Reflector
Materials: cardboard, duct tape, aluminium foil and double-sided tape
Step 1: Patterns
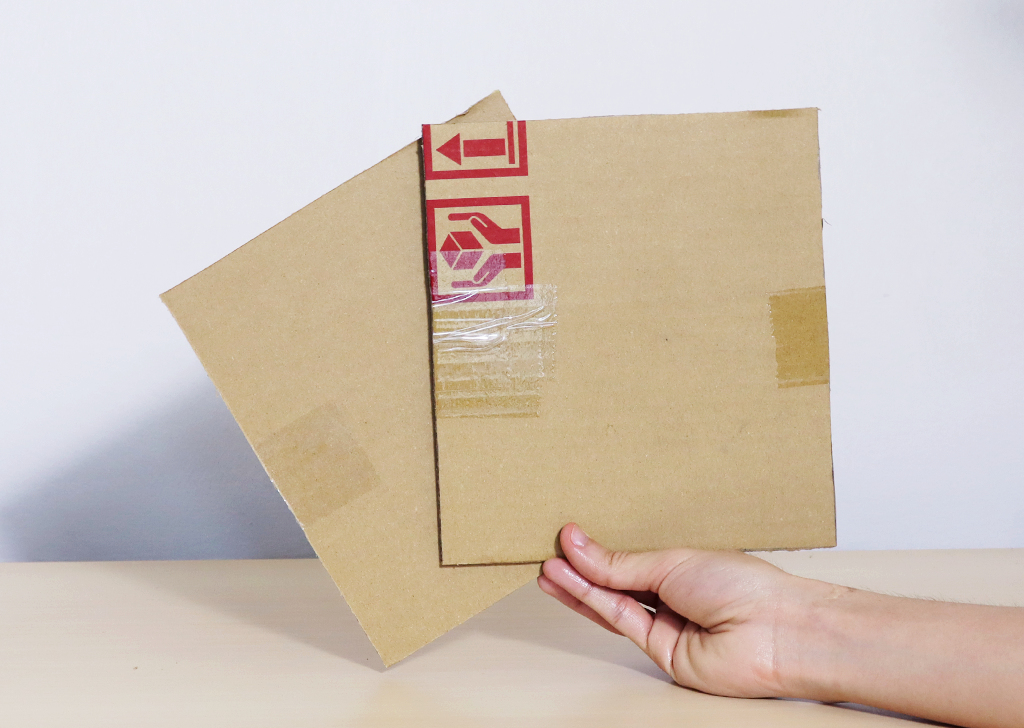
Cut out 2 squares or rectangles of cardboard.
You can decide the size of your reflector based on the dimension of your subjects. The bigger the surface area of your subject, the bigger the reflector you’ll need.
Step 2: Assembling the patterns
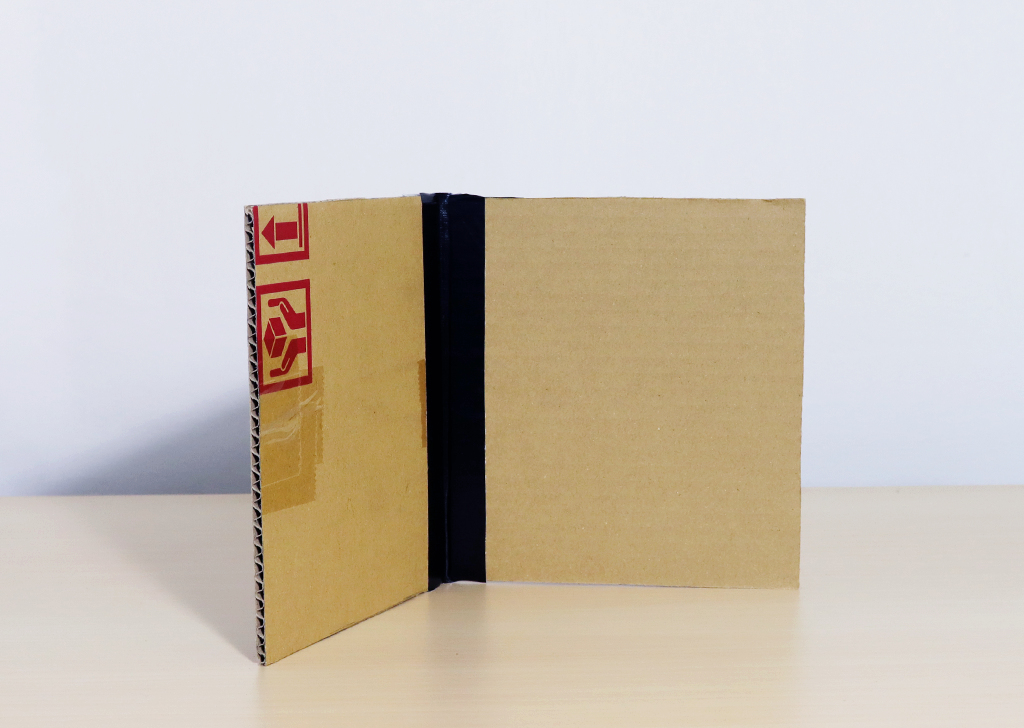
Leave a slight spacing of 1-2cm between the 2 pieces before joining them up with gaffer tape or duct tape. We strongly recommend the use of either tape due to their flexibility and hardiness.
Step 3: Tape down aluminium foil
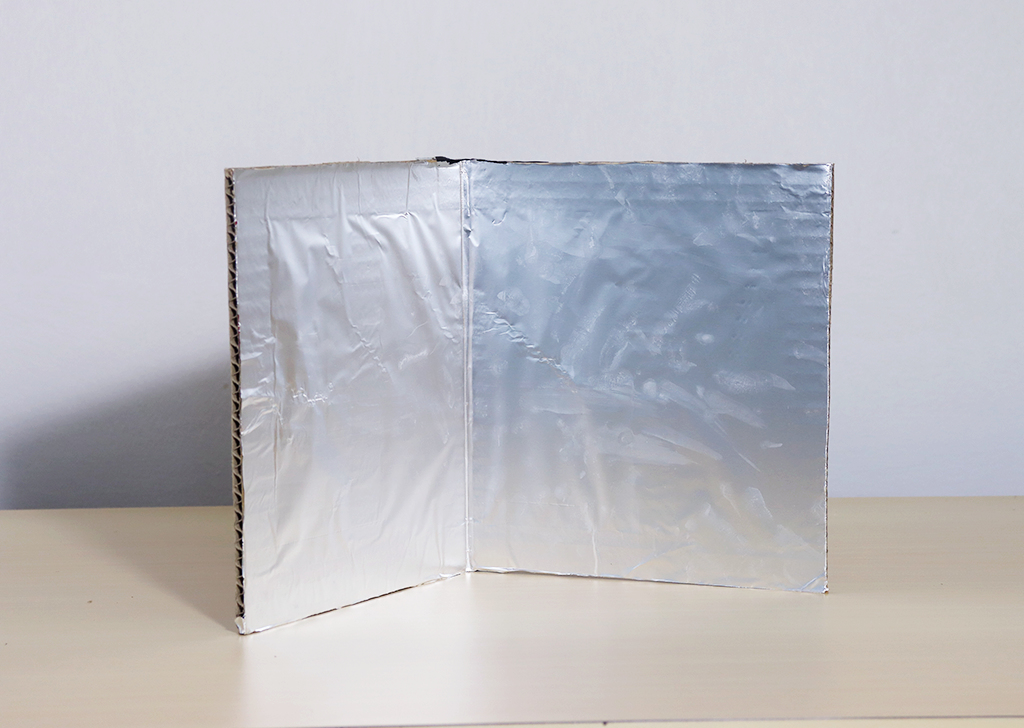
Tape down the aluminium foil on one side with double-sided tape and there you have it - a DIY reflector ready for use!
Here are the links to download the outlines shared:
- DIY Diffuser for In-Built Camera Flash
- DIY Softbox Diffuser for Speedlite Flash
Stay tuned for upcoming articles where we utilise these 3 DIY photography essentials for a creative at-home photoshoot.
For similar articles:
How To Create an Inexpensive Light Box From Scratch
Simple Product Photography: Accessories


