


Homemade Light Diffusers: Different Materials, Different Output
You don’t need the most expensive gear or products to capture a great shot. There are many simple alternatives that exist around you - particularly in your home - that can help achieve the result that you want.
We embarked on this DIY photography journey by showing you how to DIY an inexpensive light box, diffusers, reflectors, and the usability of each product. This time we’ll show you how you can utilise regular items found in your home as the diffuser panels for your DIY diffusers and light box and the different outputs with each differing material.
Tracing Paper
Keeping the lighting setup and exposure triangle constant, we’ve decided to experiment with different layers of tracing paper to test out it will affect the outputs.


 Findings: The light becomes more diffused and thus achieving a duller output when additional layers are added to the diffuser panels.
White Paper
As compared to tracing paper, the white paper has less translucency and thus will require either a slower shutter speed, a higher ISO, or a larger aperture to achieve a brighter output. We used a slower shutter speed for the example below.
A tip when working with a slower shutter speed is to utilise a tripod to eliminate any blur caused by handheld movements.

White Plastic Bags
Similar to tracing paper, a translucent garbage bag works well as a diffuser sheet. However, they are quite fragile and not as easy to handle when cutting into regular sizes to fit the frames of your DIY photography products.

Baking Sheets

Translucent Coloured Paper
If you're thinking of adding a fancy colour overlay to your product shoot, opt for translucent coloured paper. We used colour printed cellophane wrapping paper to achieve the below effect.
Tip: You can also use coloured translucent plastic bags.


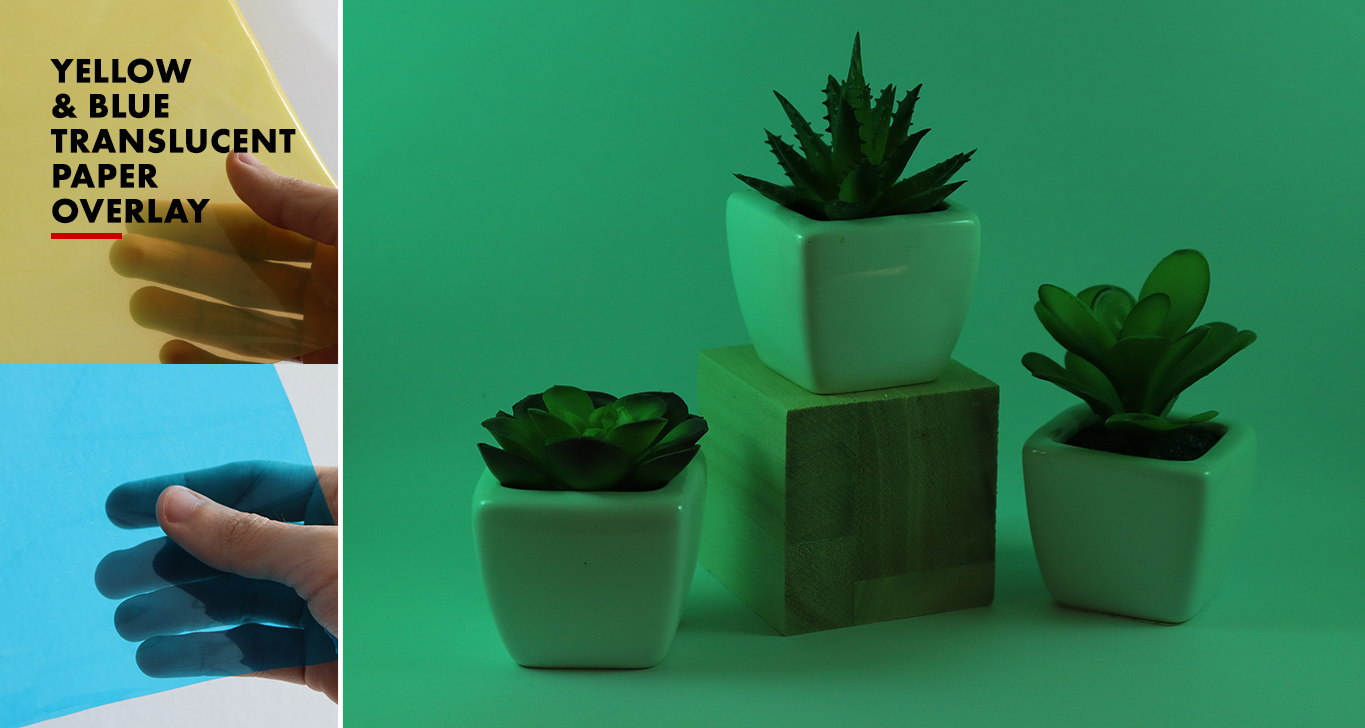
The above effect was achieved by placing the left light box panel with yellow translucent paper and the right with blue translucent paper.
Colour theories work when you layer different translucent papers together. Yellow and blue create a green overlay!
Bubble Wrap
Our last experiment is with textured material like this bubble wrap. For this shot, we opted to use the flashlight from two cellphones instead of the regular studio light (as the studio light is too strong and will diminish the shadows formed by each plastic bubble). Overall, we feel that the effect gave a cool touch to the overall photo.

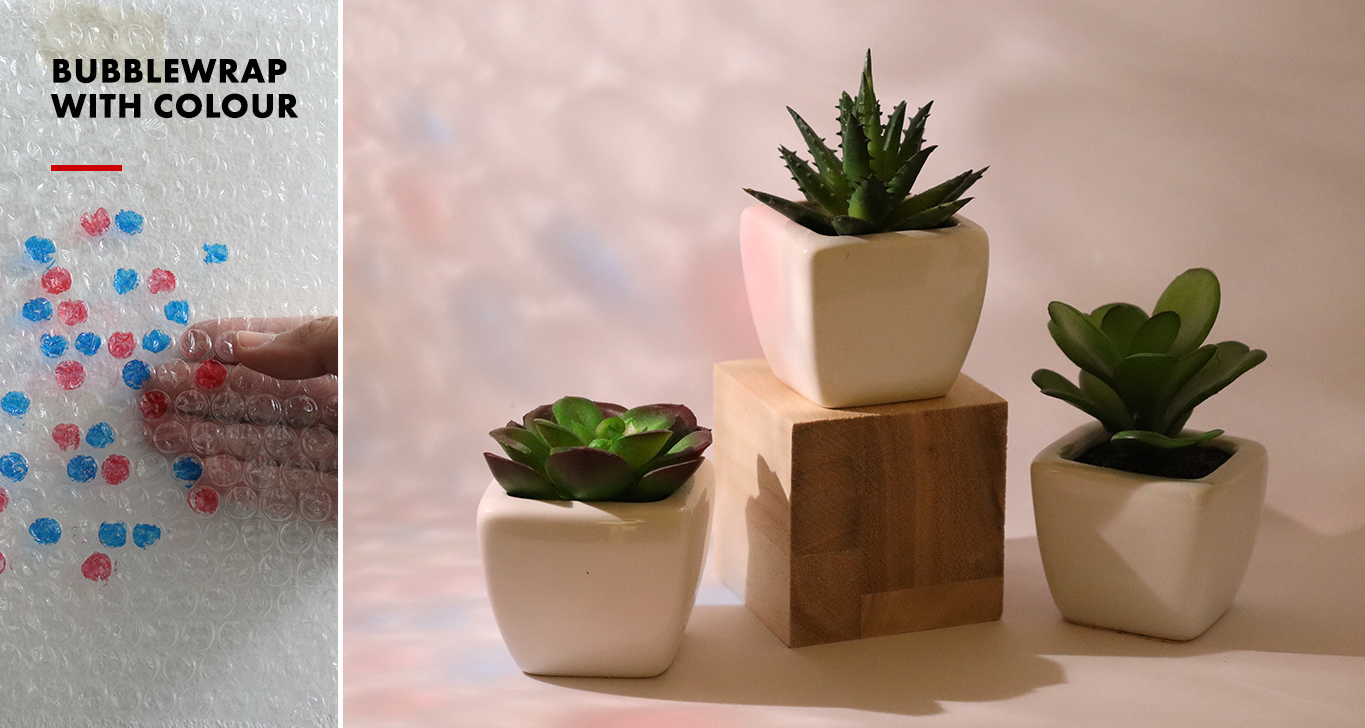
Next, we coloured some parts of the bubble wrap with permanent markers and the colours showed! Doesn’t it come off a little kaleidoscopic-ish?
The list doesn’t stop here! Be crafty and experiment with items you have at home like textured materials, plastic bags with patterns and much more. Find something that works well for you or a material that gives you the edge over others, and don’t forget to share or inspire your photography community to try it too!
For similar articles:
3 Product Photography Essentials You Can DIY
How To Create an Inexpensive Light Box From Scratch

