


Techniques for Capturing Nightscapes Using the Clear and Pleasant Live View Image
When shooting nightscapes, while the use of a tripod is a must to prevent camera shake, it is also important to ensure that focus is properly established. By combining the use of a bright prime lens having a small maximum aperture with the Live View function, it will be easy to produce night shots in sharp focus. In the following, I will explain techniques to achieve precise focus using the magnified view, an indispensable function in night photography. (Reported by: Ryosuke Takahashi)
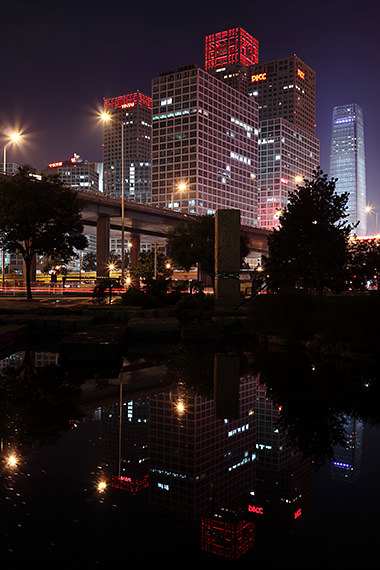
EOS 5D Mark II/ EF35mm f/2/ Aperture-priority AE (f/8.0, 13 sec.)/ Exposure compensation: -1.0EV/ ISO 100/ WB: Auto
Moderate angle of view and perspective of 35mm focal length suitable for night shots
The forest of buildings across the pond was captured in sharp focus with the EF35mm f/2. Here, I used the Live View function in the manual focus (MF) mode. By ensuring precise focusing, it is possible to bring out the most in the resolving power of the image sensor. The lens focal length of 35mm is ideal for both snaps as well as night photography, as it provides a moderate degree of wide angle and perspective, which makes it easy to compose a shot. Additionally, by using the EF35mm f/2 IS USM, the successor model of the EF35mm f/2 that employs an aspherical lens element, you can enjoy depictions with an even higher image quality.

Achieving Precise Focus Using the Live View Function
Step 1: Mount the camera securely on a tripod
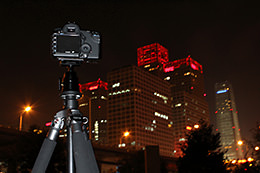
Secure the camera on a tripod in order to ensure more precise focusing as well as to draw out the full potential of the image sensor's resolving power. For night shots taken at a low ISO speed, handheld shooting would be a great challenge regardless of how bright the lens is. To prevent camera shake from lowering the resolving power, choose a sturdy tripod.
Step 2: Set the focus mode switch to MF
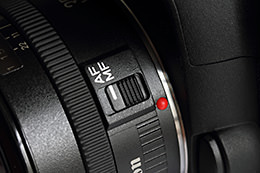
Set the focus mode switch on the lens to MF (for the EF-M lens, which is designed for the EOS M, operate using the menu screen on the camera). The surest way to achieve sharp focus in night photography is to combine the use of the Live View function with MF, if your camera is a model that supports Live View shooting. Focusing accuracy is very high in this case, as focus is established while the image projected onto the image sensor surface is enlarged on the rear LCD monitor. Yet another advantage, among many others, is that you can set focus on any point of the image.
Step 3: Start up the Live View function
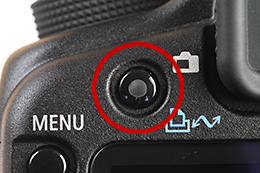
On the EOS 5D Mark II, a Live View shooting button can be found at the bottom left of the viewfinder on the rear face of the camera. Press this button to start Live View shooting. As the mirror is always flipped up during Live View shooting (except during Quick AF), there is minimal mirror shock when you release the shutter. This is also perfect for capturing night photos at a slow shutter speed, where camera shake is likely to occur.
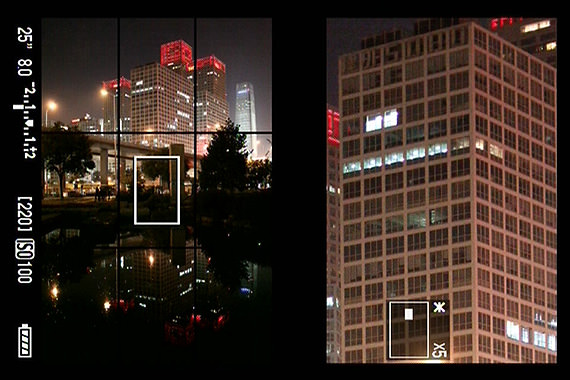
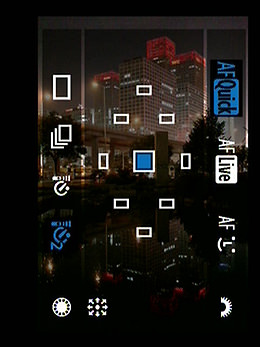
Step 4: Adjust the horizontality with the grid display
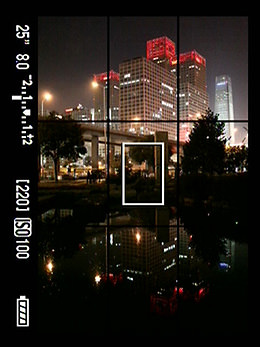
Display the grid lines on the screen from the Live View function menu, and compose the shot while adjusting the horizontality of the camera. For example, you can do so by referring to the straight lines of the buildings, and overlap the grid lines with them. Also, check to avoid any shadow areas or unwanted objects from being included in the composition.
Step 5: Magnify the display for precise focusing
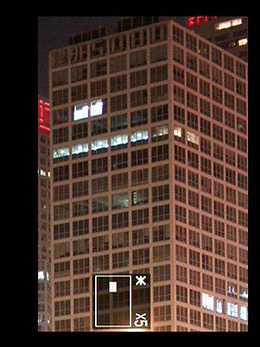
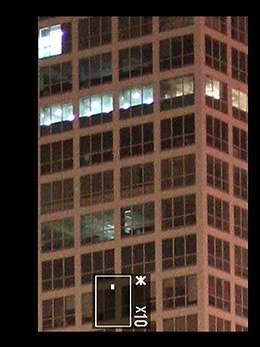
While composing the shot, you can move the magnifying frame and enlarge any point on the image by pressing the Magnify button at the top right of the camera's rear face. Doing so allows you to achieve focus more accurately. There are no fixed steps for focusing, but an easy way would be to select the point to focus in the 5x magnification, followed by more precise focusing in the 10x magnification. By combining the use of a bright lens with a small maximum aperture, the Live View image would turn out clear with minimal noise when you magnify the display, thus making focusing work easier.
Step 6: Prevent camera shake with the 2-sec. self-timer
After focusing work is complete, select the "Self-timer: 2 sec." drive mode. In this setting, the shutter is released automatically two seconds after you have pressed the shutter button, thus helping to effectively reduce camera shake as a result of pressing the button. Another way to prevent camera shake is to release the shutter with the use of a remote control.
Column: Live View shooting made much easier with a Vari-angle LCD monitor
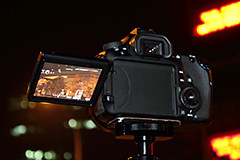
If you are using the EOS 60D, which comes with a Vari-angle LCD monitor, you can adjust the monitor angle according to your viewing position, thus making Live View shooting even more convenient. If you are shooting from a higher position with the camera mounted on a tripod, tilt the Vari-angle LCD monitor downward and identify the image from the front. Conversely, if you are shooting with the camera placed at a low position, simply tilt the LCD monitor upward. Not only so, at scenes where the reflection of street lamps and other light sources affects the visibility of the LCD monitor, you can also adjust the angle to ease focus checking on a clear display.

Born in Aichi in 1960, Takahashi started his freelance career in 1987 after working with an advertising photo studio and a publishing house. Photographing for major magazines, he has travelled to many parts of the world from his bases in Japan and China. Takahashi is a member of the Japan Professional Photographers Society (JPS).

