


5 Essential Adjustments to Do with Digital Photo Professional
Shooting in RAW allows more flexibility to shape your images, and if you are a Canon user, you have one feature-rich, RAW post-processing software available free of charge. Canon’s native Digital Photo Professional (DPP) software is designed to work seamlessly with your Canon camera, making the fullest of Canon-patented algorithms embedded in RAW files and letting you non-destructively bring out the best in your images. Here are five essential adjustments to do in DPP to ensure the most natural-looking results. (Reported by: Kazuyuki Okajima, Digital Camera Magazine)

1. Correct optical aberrations with Digital Lens Optimizer
Optical factors such as lens aberrations, diffraction, and the presence of a low pass filter can cause image quality to deteriorate. Besides compensating for them in optical design, these factors can also be corrected with the Digital Lens Optimizer (DLO) feature.
On some cameras such as the EOS R system, DLO is enabled by default. But it wasn’t enabled when you shot, don’t fret. You still can apply DLO when you post-process the RAW image in DPP.
Step 1: Open your RAW file with DPP, and go to the tab with the lens icon on the Tool Palette.

Step 2: Check that the correction data for the lens you used is available.

If it says “Lens data: No”, click on the refresh icon to download the lens data.
If it says “Lens data: Not available”, your image is either in an unsupported format (such as JPEG), or shot on a non-compatible camera or lens.
DLO effect levels
On DPP, you can adjust the DLO effect level on a scale from 0-100, where ‘100’ has the strongest correction effect. To see the correction effect more clearly, you might want to uncheck the ‘Sharpness’ item further down the list.
Effect level: 0
Effect level: 100
Tip: Make sure that these are checked, too!

When the box next to ‘Digital Lens Optimizer’ is checked, the items for ‘Diffraction correction’ and ‘Chromatic aberration’ become unavailable. However, for best results, make sure that ‘Color blur’, ‘Peripheral illumination’, and ‘Distortion’ are checked, too. You can adjust the effect level for ‘Peripheral illumination’ and ‘Distortion’.
2. Correct colour tones with White Balance Adjustment’
By default, DPP applies the white balance settings as shot.

However, you can change the white balance setting without causing the image file to deteriorate:

Explore the presets and see what suits your vision the most. Here are some examples of how a different white balance setting changed my shot:
Auto: Ambience priority
Auto: White priority
Daylight
Color temperature (4,500K)

‘Click white balance’ calls up an eyedropper tool that you can use to select a neutral-coloured element in the shot as your reference point.
‘Color temperature’ allows you to manually adjust the colour temperature in steps of 10K.
Fine-tune the colours further

Similar to the in-camera white balance correction function, the ‘Fine-tune’ pane lets you adjust the blue (B) versus amber (A) and magenta (M) versus green (G) tones in your shot. But if you are printing your image, do note that the tones could still differ depending on the paper!
Also see:
4 Ways To Capture Colours More Accurately in Photography
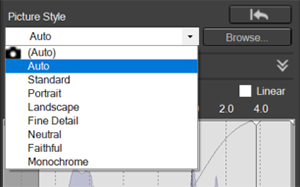
3. Further refine your shot with a Picture Style
Picture Style profiles affect how your image is rendered, i.e. the colour tones, contrast, saturation, and sharpening. There are 7 different pre-installed presets on your camera and in DPP.
By default, DPP opens the RAW file with the Picture Style as shot. When you shoot in JPEG, the Picture Style is “baked” into your image, but if you shot in RAW and post-process the file in DPP, you can modify the Picture Style or apply a different one.
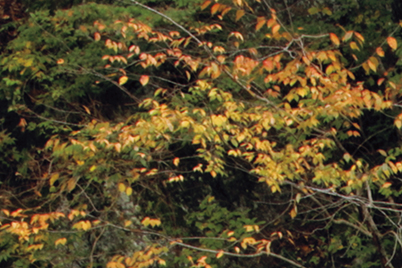
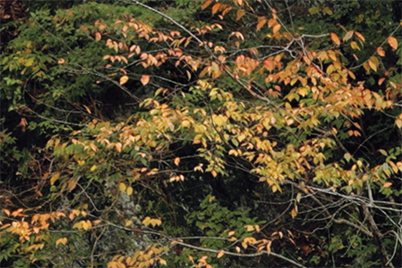
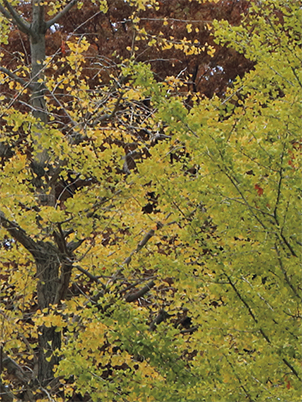
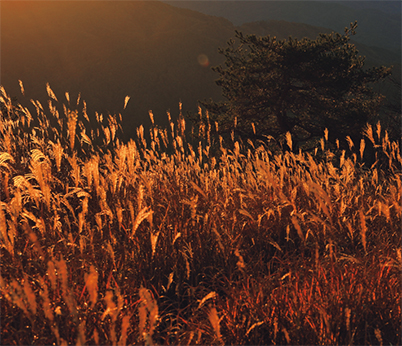
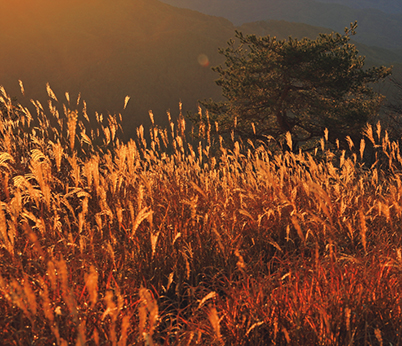
Picture Style: Standard
Picture Style: Landscape
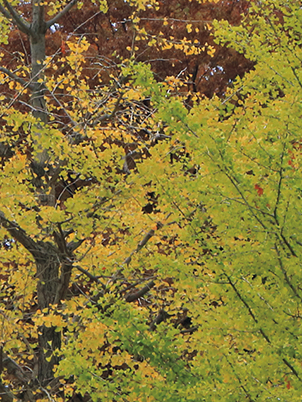
‘Picture Style: Landscape’ makes blues and greens more vivid, and also has a stronger sharpness setting than ‘Picture Style: Standard’.
You can refine the finish even further by adjusting other Picture Style parameters, just like on your camera.

For more detailed adjustment, you can also use the gamma adjustment curve.
Know this: You can add to the pre-installed Picture Styles
There are as many as nine more Picture Styles available for download on the Canon official site: follow the instructions on the site to load them into DPP and your camera. You can also create your own custom Picture Style file with the free Picture Style Editor software!
4. Adjust brightness and contrast with Auto Lighting Optimizer
The Auto Lighting Optimizer (ALO) selectively adjusts brightness and contrast to make your image look more natural, especially for high-contrast images. A powerful in-camera tool when shooting JPEGs, it is also available for RAW image processing in DPP, offering an effective and efficient way to correct images that look too dark or have contrast that is too low or high.

There are three levels of ALO effects to choose from.
No ALO
Strong
You can even adjust the lighting on people's faces!
If your image is of a person and shot on a supported camera model such as the EOS R5 and EOS R6, the ‘Adj. face lighting’ option will become available, allowing you to change the brightness of the subject’s face.

Find out more in:
Portrait Relighting: Your In-Camera Lighting Crew
5. Change overall exposure with the Brightness adjustment slider

The Brightness adjustment slider allows you to adjust overall exposure in increments of 0.01 stops—finer than exposure compensation in-camera.
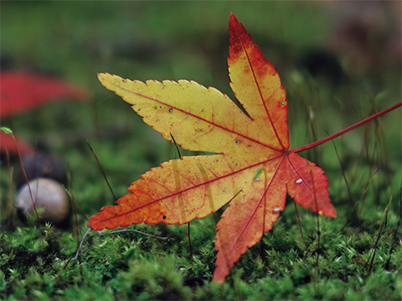
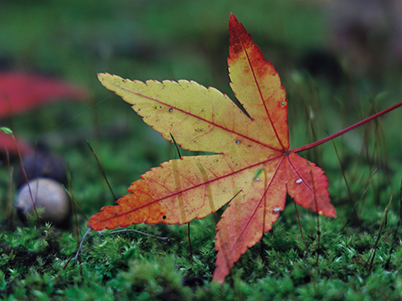
-0.7EV

0EV

+0.7EV

Pro tip: Don’t go overboard with the adjustment—watch the light-shadow balance!
It’s easy to over-adjust the exposure especially if your monitor screen brightness is not properly calibrated. For best accuracy, refer to the histogram and other indicators as you tweak the brightness settings.
This also applies to when you make fine adjustments to shadows and highlights via ‘Shadow’ and ‘Highlight’ sliders or the gamma adjustment curve in the ’Basic adjustments’ tab, or to the tone curves in the ‘Adjust image tone curves’ tab.

The tone curve adjustment tool in DPP lets you make more specific adjustments to brightness and contrast. However, over-adjusting them can disrupt the light-shadow balance in your image. Be careful!
Download the latest version of Digital Photo Professional here.
Click here to learn about the DPP Express app*, available for compatible iPads and iPhones
*With monthly subscription fee
Some DPP tutorials:
How to Enhance Fireworks with Digital Photo Professional
RAW Image Processing: How to Bring Out the Blue in Blue Hour Photos
Other things that you can correct in DPP:
EOS 5D Mark IV Tips: 3 Handy New DPP Features for Correcting DPRAW Images
Receive the latest update on photography news, tips and tricks.
Be part of the SNAPSHOT Community.
Sign Up Now!About the Author
A monthly magazine that believes that enjoyment of photography will increase the more one learns about camera functions. It delivers news on the latest cameras and features and regularly introduces various photography techniques.
Published by Impress Corporation
Born in Fukuoka City in 1967, Kazuyuki Okajima graduated from the Tokyo School of Photography (current name: Tokyo Visual Arts). After working as a studio assistant and photographer’s assistant, he became a freelance photographer. In addition to working as an advertising and magazine photographer, he travels the world shooting images imbued with a strong poetic sentiment. His many publications include the photo collection Dingle. Exhibitions of his work include “The Light and Wind of Dingle,” “Shio-sai” (Tidal Tints), and “Let’s Go to School.”

