


Before it Melts: Secrets to Photographing Ice Cream Commercially
EOS 5D Mark III, EF 24-70mm f/2.8 L USM, f/4, ISO 100, 1/160s, 70mm
Continuing our series on clever food substitutions (like the Commercial Cheese Pull Photography Guide here), discover how ice cream is cleverly substituted and photographed without the mess! Nevena Gulic of @everybiteyoutake takes us through her process for shooting this favourite dessert under warm lights.
Tools required

Equipment required for the ice cream shoot includes:
Food material and food substitution requirements:
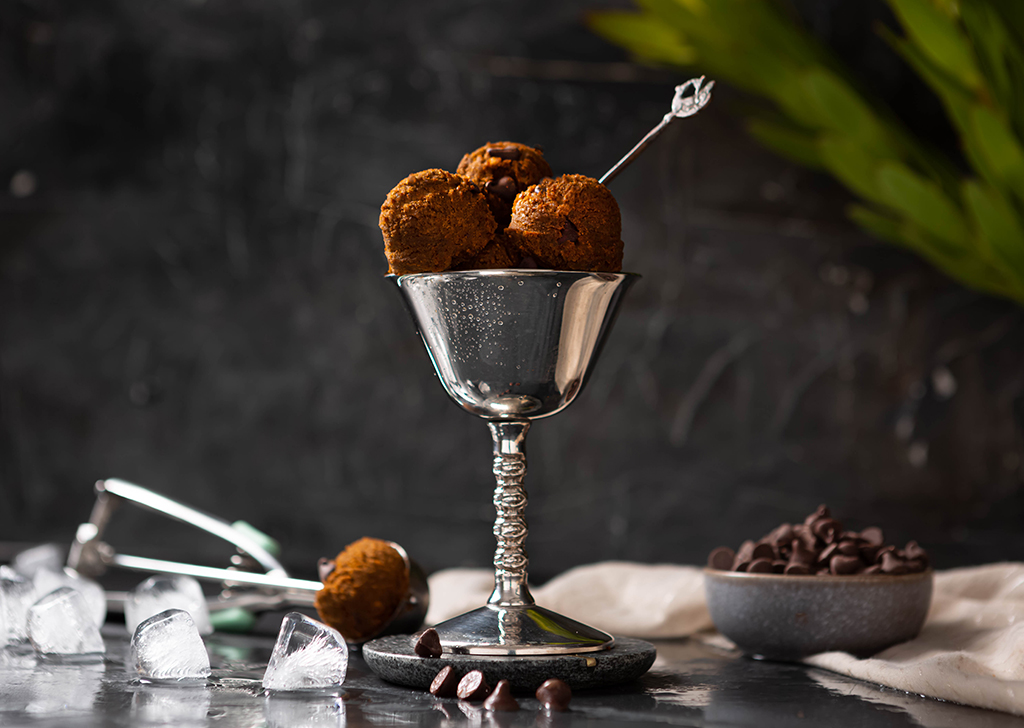
The image we’re attempting

EOS 5D Mark III, EF 24-70mm f/2.8 L USM, f/3.5, ISO 100, 1/30s, 45mm
I have opted to use chocolate-flavoured ice cream against a light background to create that homey and comforting vibe of a bowlful of treats at home. It is always good to have complementary and neutral colours in the frame to balance it out. It’s also important not to overcrowd the scene, allowing enough negative space for the viewers to rest their eyes.
The photography styling was made to be light, which I feel is the perfect scene to present a joyful dessert like ice cream.
I have also used linen fabric to provide additional texture that complements the ice cream. This created an interesting point of view leading to the subject.
Step 1: The setup
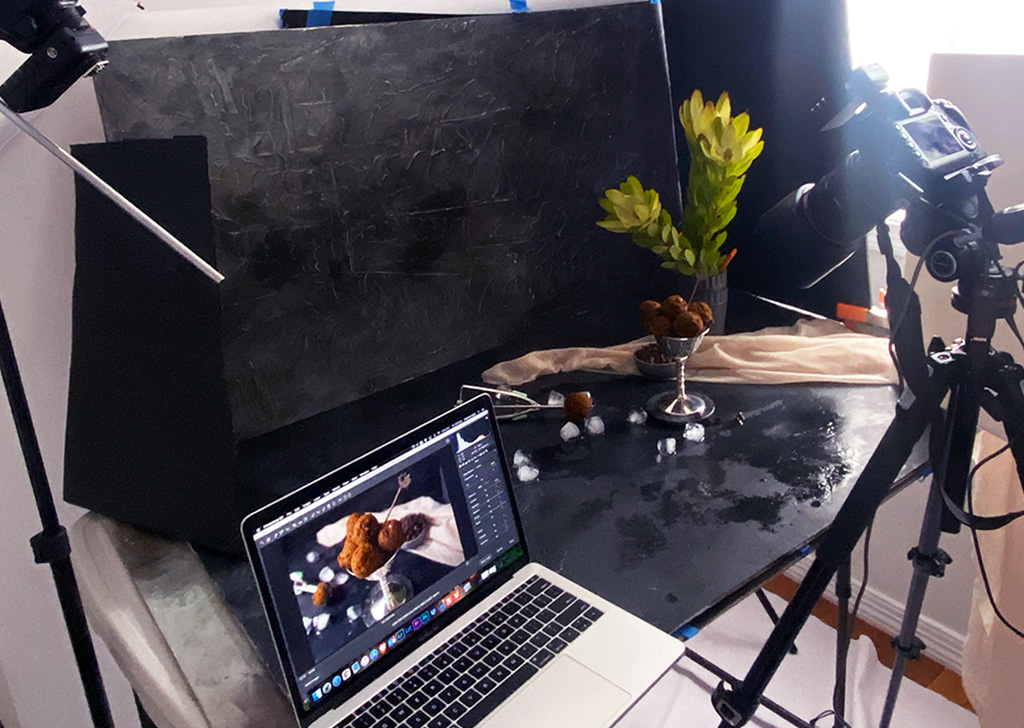
The camera was positioned either directly in front of the subject or slightly left from the midline.
It’s always preferable to have more than one light source to get better fill and highlights. In my scenes for the key light, I have used either natural light through the window or Canon Speedlite flash. For the fill light, I have used a combination of continuous LED light and white bounce cards for additional highlights.
You can also use a combination of speedlite and natural light to get a perfect image. Keep in mind that continuous lighting is usually never as strong as natural or strobe/flashlight, hence limiting its usage in photography, especially as a key light.
I prefer to shoot tethered with the EOS Utility app. It is a great way to capture and see the image on a larger screen to evaluate and adjust the minute details.
Common mistakes to avoid:
Step 2: Creating your ice cream
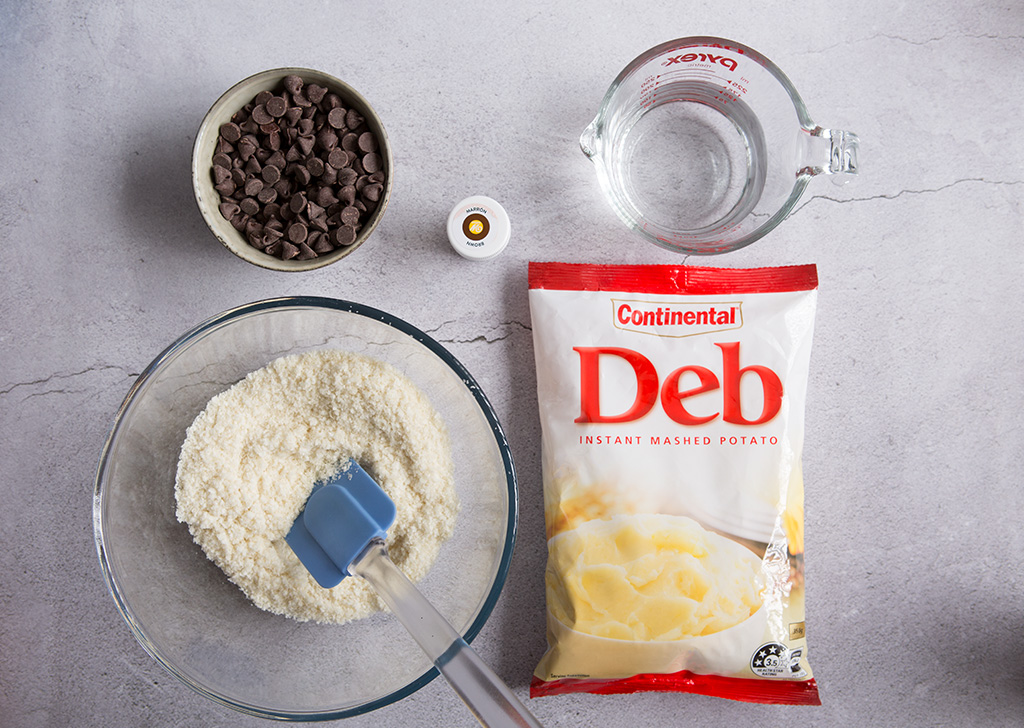
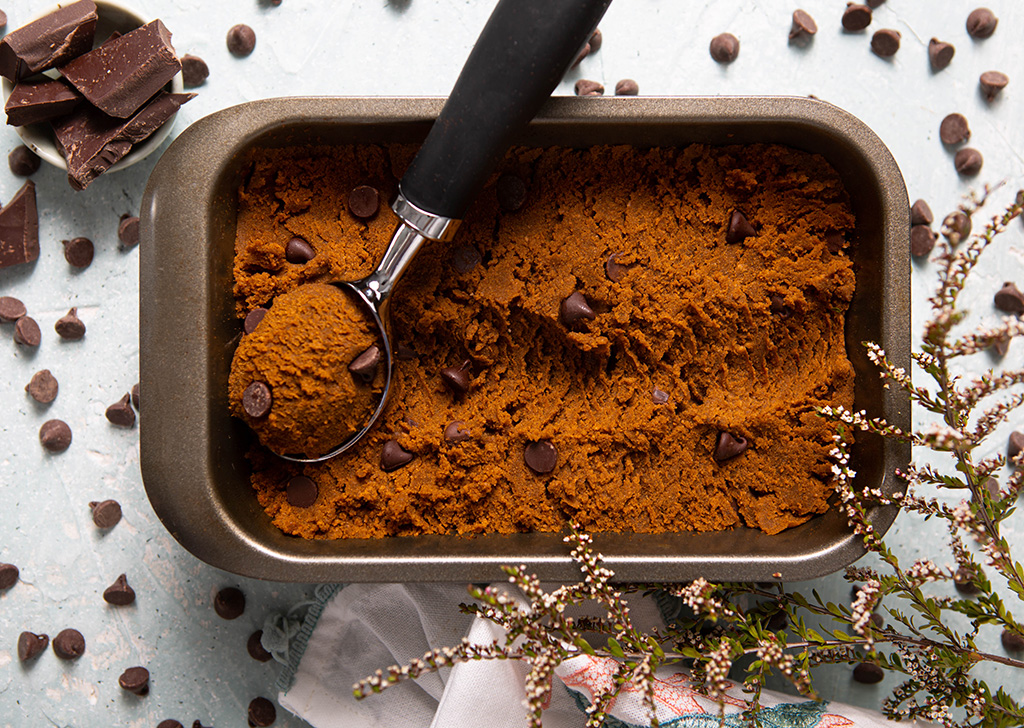
I added food colouring to mashed potato flakes to achieve the right consistency and look.
A benefit of using mashed potato as a substitute for ice cream is it doesn’t melt, allowing you to style it the way you want, giving you ample time to fine-tune the details and get the perfect shot without the fear of ice cream melting.
This is especially important when the shooting environment is warmer as ice cream will start melting almost immediately. Melted ice cream will affect your ability to capture the perfect shot.
To achieve the desired colour, I have used food colouring. I have decided to aim for a rich, milk chocolate brown. For extra magic, I’ve added in a scoop of milk chocolate drops.
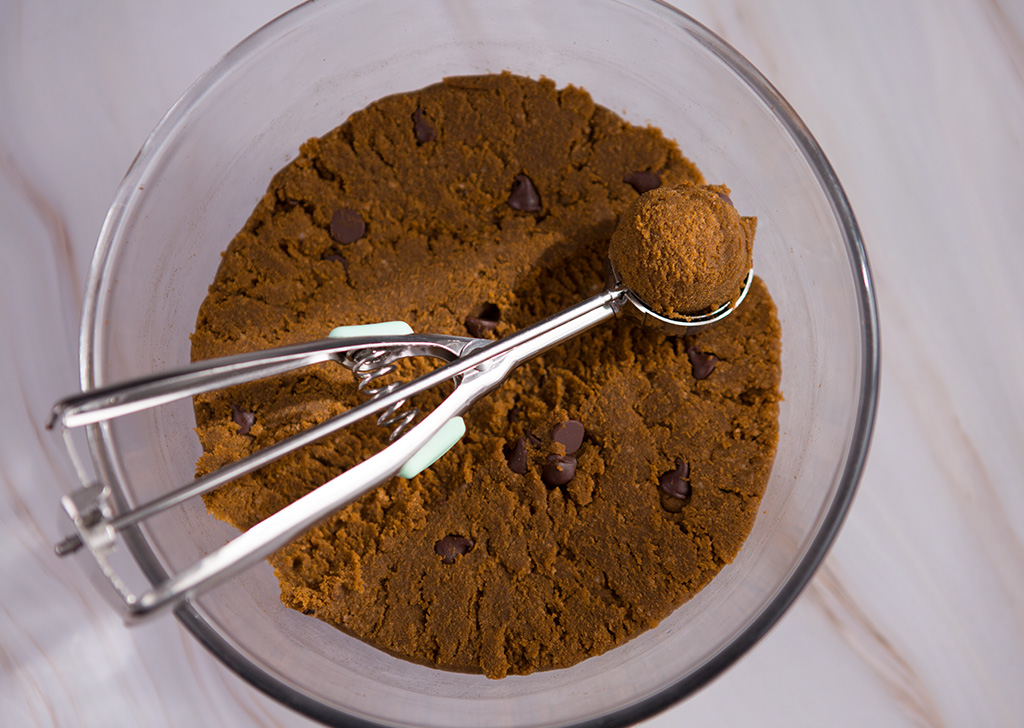
Tip: Get the perfect ice cream consistency by adding just a little bit of water every time to the mixture. A slightly ‘dry look’ will help you achieve the crater effect. Food colouring should also be added in at the beginning as it will be harder to get equal distribution throughout the mixture if it is added later.
I recommend dipping the ice cream scoop into water between scooping the mixture to get a more realistic surface texture. To get the scoops more stable on the cone wafers, I have added toothpicks to support the potato balls (ice cream) from the bottom of the cone.
EOS 5D Mark III, EF 24-70mm f/2.8 L USM, f/5, ISO 100, 1/80s, 46mm
Remember: food photography looks best with accurate colours. Read here to learn how to photograph colours accurately!
For similar articles:


