


Camera FAQ: How Does the Low-Light AF Limit Impact My Shots?
When reading about a new camera you probably have seen references to its low-light focusing limit (or low-light AF limit), often written in terms of exposure value (EV). For example, the EOS R5 has a low-light AF limit of EV-6, and the EOS R6, EV-6.5*. But what do these values really mean, and how should we understand them? We find out in this article. (Reported by: Kazuo Nakahara; Model: Honoka Kawata (Oscar Promotions)).

*when using lenses with maximum aperture f/1.2
What “EV” means when describing low-light focusing capabilities
When you use your camera’s autofocus system under various dim and dark conditions, how did it perform compared to when you shot in the daytime?
A camera’s low-light focusing limit indicates how well the autofocus system (AF system) can detect subjects under dark conditions. Think of it as your camera’s ability to find (not just see!) things in the dark.
There are different degrees of “dark”, and some cameras can autofocus in darker conditions than others. The “EV” (exposure value) tells us how much ambient light there is in the scene, i.e., how dark the scene is. The less light, the lower the EV. Hence, when we say that the EOS R6 has a low-light AF limit of EV-6.5, we mean that under a specific set of conditions, the AF system on the EOS R6 can detect subjects even in situations as dark as EV-6.5.
| Low-light conditions and their approximate EV | |
| Starlight | EV -4 |
| Moonlight (full moon) | EV -2 |
| Indoors at night | EV -1 |
| Residential area at night | EV 0 |
Imagine being outdoors on a moonless night where the stars are the only light source. It’s extremely dark, and even then, it is already EV-4. The AF system on Canon’s recent advanced EOS R system cameras can function in conditions darker than that. For example, EV-6 is so dark that you will have difficulty seeing anything with your bare eyes.

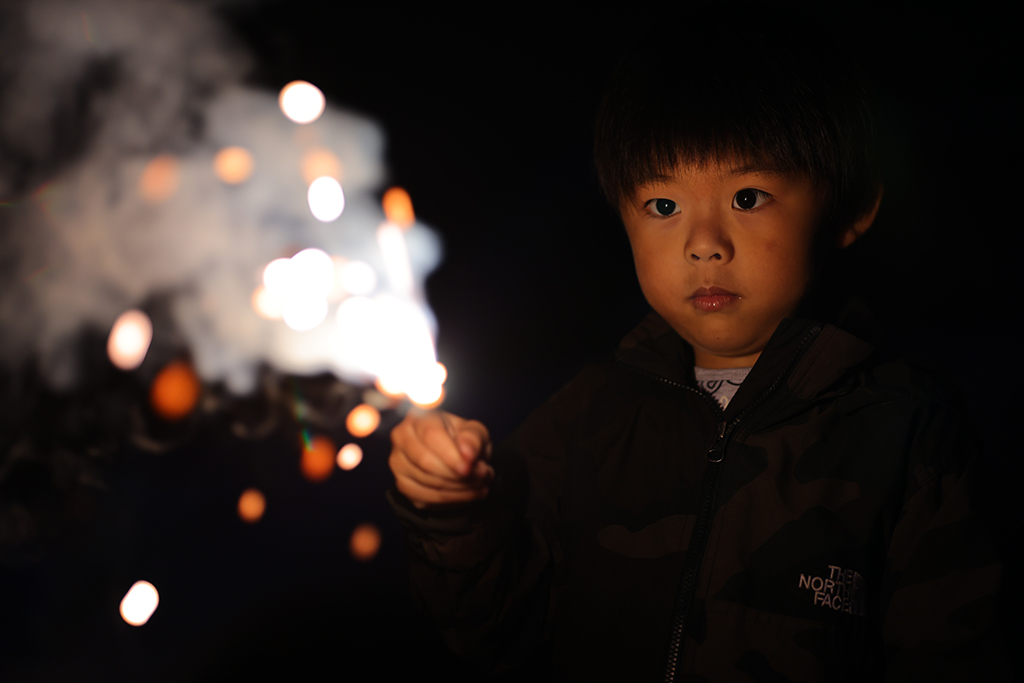
EOS R5/ RF50mm f/1.2L USM/ Aperture-priority AE (f/1.2, 1/60 sec)/ ISO 100
Shooting situation

The EOS R5 has a low-light AF limit of EV-6, which means it can autofocus on subjects even in conditions as dark as the one shown in the image above. If I couldn’t use the AF, I would have had to switch to manual focusing, which is more time consuming. Even better, the Face Detection and Eye Detection AF worked thanks to a significantly improved AF algorithm, making the shoot even smoother.
Know this: Don’t confuse this “EV” with exposure compensation!
Exposure value (EV) is also used to describe the brightness of the exposure achieved with the camera, which depends on the shutter speed and aperture. That’s why exposure compensation is also stated in terms of “EV+3” or “EV-3”. In this case, this refers to the number of stops you are over- or under-exposing the shot from the camera-determined “correct” exposure—a different context altogether!
How do I maximise low-light AF performance?
EOS R5/ RF85mm f/1.2L USM/ Aperture-priority AE (f/1.2, 1/125 sec, EV -1.3)/ ISO 500
- Use a fast lens
- Use the centre AF point
The AF system uses information from light entering the image sensor pixels to acquire focus. When shooting in the dark, you want to maximise the light entering the lens to ensure the best AF performance.
Canon cameras use full-aperture metering, which means that even if you stop down from the maximum aperture setting, the aperture diaphragm is wide open by default and only narrows momentarily when the shutter is released. Hence, the amount of light that enters the image sensor is determined by the maximum aperture of the lens.
Also, the pixels at the centre of the image sensor get the most light. Hence, when shooting in the dark, use your fastest lens and the centre AF point.
Know this: Official conditions for low-light AF limit
Official descriptions usually state the conditions for the low-light AF limit on EOS R system cameras as follows:
- f/1.2 lens
- Centre AF point
- ISO 100
- One Shot AF
In other words, the best low light AF performance is achieved with:
- a fast AF lens;
- the centre AF point;
- a low ISO speed; and
- One Shot AF mode
Factors such as ambient temperature can also affect AF performance.
What if I’m not using a fast lens?
A lower (darker) low-light AF limit should improve overall low-light AF performance, even when you are using a lens with a smaller maximum aperture (such as f/4 to f/11).
Bonus tip: Adjust your EVF/LCD monitor brightness
EOS cameras automatically adjust the brightness of the electronic viewfinder (EVF) and rear LCD monitor to suit the prevailing lighting conditions. That’s why it’s easier to see the scene through them when shooting in dim or dark environments.
However, especially if the environment is very dark, the display might end up being too bright, causing discomfort. Also, while stray light usually doesn’t affect your view during viewfinder shooting, it can slip in through the gaps if you wear glasses. In such situations, manually adjusting the brightness level allows you to shoot more comfortably.
How to adjust the display brightness level?
1. Go to the SET UP tab (yellow menu).
2. Locate the “Disp. brightness” option.
To adjust the viewfinder brightness, look through the viewfinder:

Adjust the slider as necessary.
To adjust the rear LCD monitor brightness, take your eyes off the EVF and look at the LCD screen:

Adjust the slider as necessary.
When to adjust the brightness level?
- Dark shooting environments (late at night, star photography): Make the EVF/rear LCD monitor display darker.
- Outdoors on a sunny day: Make the rear LCD monitor display brighter.
Tip: Reducing the display brightness to a more appropriate level can also help to reduce battery consumption.
Know this: The display brightness affects how you see the images
The display brightness could make the exposure of your shots look brighter or darker than it really is, especially if you adjusted it. To avoid underexposing or overexposing your shots, don't rely on what you see onscreen. Refer to the histogram, which will show the highlight and shadow distribution more accurately.
For more tips on making the best of your camera’s AF system, see:
Touch & Drag AF Customisations for Better EVF Shooting
Birds in Flight: Camera Settings to Increase Your Successful Shots
Camera FAQ: What is Servo AF?
Camera FAQ: Is Composition Easier on a Mirrorless Camera?
Receive the latest update on photography news, tips and tricks.
Be part of the SNAPSHOT Community.
Sign Up Now!About the Author
Born in Hokkaido in 1982, Nakahara turned to photography after working at a chemical manufacturing company. He majored in photography at the Vantan Design Institute and is a lecturer for photography workshops and seminars, in addition to working in commercial photography. He is also a representative of the photography information website studio9.


.jpg "trending tips")

