


Have you ever looked at a photograph, and something about the light quality jumps out at you? You might find the lighting to be too harsh, with clean-cut shadows, or perhaps you’ve looked at a portrait picture and realised how the light quality feels soft, noting how it seems to envelop and wrap around the subject. So, what exactly constitutes hard and soft light, and how can you achieve each?
In this easy-to-understand article, we will examine what hard/soft light is and how we can create each by simply tweaking two parameters: the size of the light source and distance of the light source to your subject.
Understanding hard/soft light
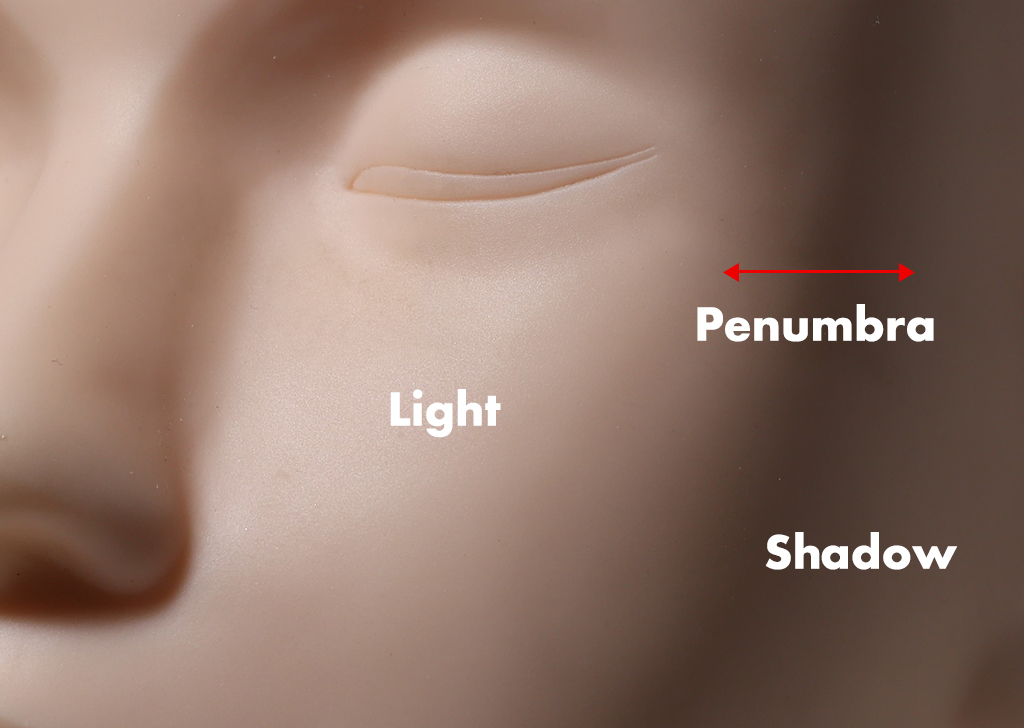
Where there is light, there is shadow. The area that is being lit is called the highlight, while the regions in the dark are the shadow. However, in between is an area we call penumbra. The size of the penumbra is what will define a light source as hard or soft.
In general, the thinner the penumbra, the harder the light source. And vice versa, the thicker or fuzzier the penumbra, the softer the light source.
Size of light source
Now that you understand what makes a light soft or hard, you can try to recreate it.
An initial parameter you can control is the size of the light source. The general rule is:
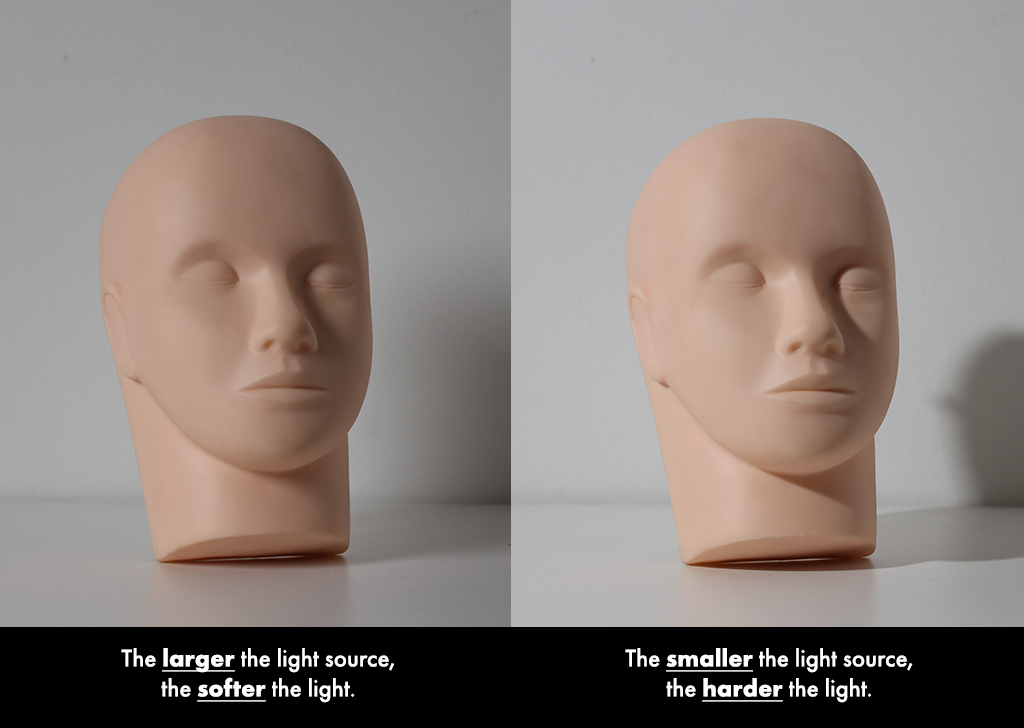
A large 60cm light source creating a soft shadow (left) vs a small light source of 10cm creating a hard shadow (right). The light was fixed at the same position for both shots.
A large light source will wrap the light around the subject, which helps to fill the shadows, creating a softer look. However, a smaller light source will strike the subject, creating harsher looking shadows.
With that in mind, you can always examine the shot you have taken on the rear LCD of your camera and determine if you need to increase the size of your light source. If your Speedlite is used off-camera, you can consider putting a softbox over it. If you are shooting with your Speedlite on camera, you can always bounce the light off the ceiling or a wall to simulate a larger light source.
Distance of light source
The distance of the light source to the subject is also a parameter that you can control to achieve soft or hard light. By simply adjusting the distance, you can change the light quality. This can be explained by the inverse square law, a formula that can be used to calculate light fall off. You can find out more about the inverse square law here.
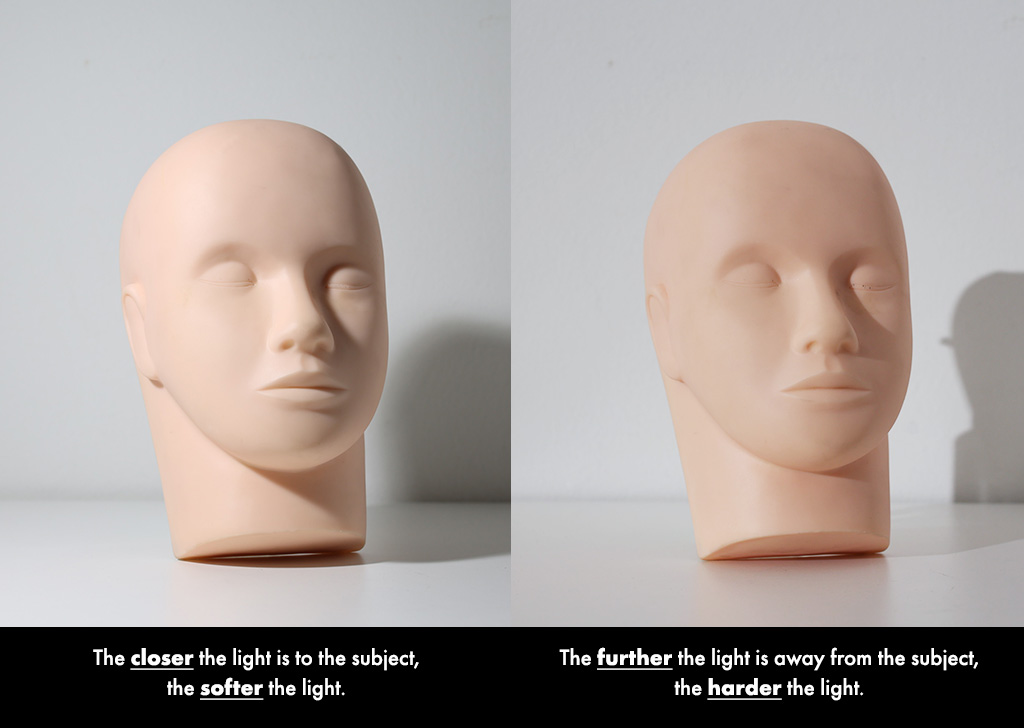
When the light is closer to the subject (left) at 1m, the shadows are softer vs a hard shadow when the light is moved further away at 3m.
If your flash is fixed onto your camera’s hot shoe and you want to move closer or further away from the subject, you will need to consider your lens choice. Using a zoom lens will let you quickly change your framing as you move toward or away from the subject, while changing the light quality at will.
One other aspect to note about adjusting the distance of the light to the subject is that the light intensity will change. If your light is closer, less power is needed. Whereas, if you move the light further away from the subject, you will need to compensate for the distance with more power. This compensation is typically done by adjusting the flash power instead of the shutter speed and aperture.
Using size and distance together
Now that you understand how the size and distance of the light source affect the light quality, you can mix and match these two parameters to your advantage. For example, if space is a constraint and you cannot manoeuvre your lights to control their quality, then you can consider making the size of the light source bigger or smaller to achieve hard or soft light. Similarly, if you cannot change the size of the light source, you would want to consider moving the light source closer or further away from the subject until you achieve the desired light quality.
Now that you have a better idea of what hard and soft light is, you can create it any time. This makes you a better photographer as you are in control of the lighting situation, and as photography is painting with light, you can now harness it to your advantage and create the shots you envision.
For similar articles:

