Cosplay Photography Techniques (2): Fundamentals of Lighting
It is not an exaggeration to say that lighting is an important factor that determines the resulting quality of a photo. In the following, let us learn the basic concepts of lighting. (Reported by: Suna, Model: Yu)

Change your lighting to create the photo you envision
Simply put, lighting is the adjustment of light when taking a photo. It can refer to firing a flash, casting light on the subject, or reflecting light with a white cloth. In fact, its definition can vary so widely if we consider the diverse types of lighting techniques and equipment available as well as the need to take into account the surrounding environment and the intended impression you want to convey. While it is impossible to sum it up in a single phrase, you should at least bear in mind that a photo is greatly affected by the position of the light, number of light sources and the type of lighting used.

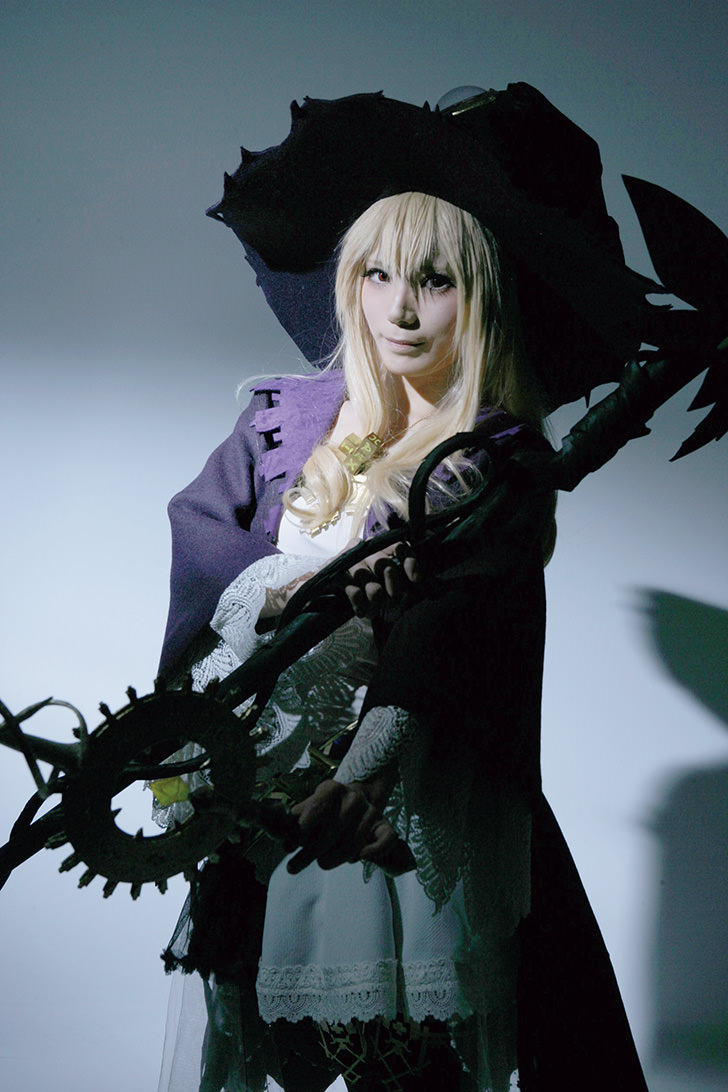
EOS-1Ds Mark II/ EF24-70mm f/2.8L USM/ FL: 70mm/ Manual (f/7.1, 1/160 sec)/ ISO 200/ WB: Manual 5000K
Lighting kit: Monolight, two-light setup (using a shoot-through umbrella and diffusing fabric)
The final image changes with the position of the light and number of light sources!
The position of the light source is one of the crucial elements that form the basis of lighting. The impression conveyed by a photo changes with the area that is illuminated by light. Of equal importance with the position is the number of light sources. A photo will turn out differently when two lighting sources are used compared to when there is only one.
The image below shows an example of a typical shoot that uses a two-light setup. Only through accumulated experience can we learn the effects of the number of light sources and their position on the resulting image. You can refer to the next article of this series for an outline of the different basic lighting patterns.

By accumulating experience through repeated practice, we will be able to find the ideal lighting combination for creating the photo we envision.

A: Monolight
B: Shoot-through Umbrella
C: Diffusing Fabric
D: Monolight
This is a basic lighting setup that uses two lighting sources. Here, a shoot-through umbrella is used for the main lighting source, while another monolight that is attached with a diffusing fabric is placed slightly to the back of the subject to create a shadow.
The lighting equipment used can also change how a photo looks
In addition to the number of lighting sources and their position, the type of lighting equipment used also affects the final look of a photo. The examples below illustrate shots captured using four representative types of lighting equipment in a one-light setup. In each of the photos, the characteristics of the respective lighting equipment can be clearly seen. Among them, the photo captured using a shoot-through umbrella is the most appealing, with light spreading evenly throughout the subject. Strip softboxes are commonly employed in cosplay photography that involves unconventional scenarios.
Direct flash
Light from a flash unit that is cast directly on the subject does not spread well, and only a limited area is illuminated as a result. This principle is often employed to brighten the subject from behind so as to bring out the outline of the body.

EOS-1Ds Mark II/ EF24-70mm f/2.8L USM/ FL: 48mm/ Manual (f/9, 1/160 sec)/ ISO 100/ WB: Manual 5000K

A monolight
Strip Softbox
The strip softbox comes in an elongated shape and is commonly used to cast light on a narrow area. It comes in handy when you want to capture the full body of the subject beautifully.

EOS-1Ds Mark II/ EF24-70mm f/2.8L USM/ FL: 40mm/ Manual (f/5.6, 1/160 sec)/ ISO 200/ WB: Manual 5000K

A strip softbox
Shoot-through umbrella
Light from a shoot-through umbrella spreads more widely than that from a strip softbox and is able to reach the background. It also produces the softest light among the four types of equipment.

EOS-1Ds Mark II/ EF24-70mm f/2.8L USM/ FL: 42mm/ Manual (f/5.6/ 1/160 sec)/ ISO 200/ WB: Manual 5000K

A shoot-through umbrella
Beauty dish
Use a beauty dish to cast light on a limited area. This area can be further narrowed by attaching a honeycomb grid. A beauty dish is useful when you want to convey the impression of a dimly-lit location such as inside a cave.

EOS-1Ds Mark II/ EF24-70mm f/2.8L USM/ FL: 45mm/ Manual (f/5.6, 1/160 sec)/ ISO 400/ WB: Manual 5000K

A beauty dish
In the next article, we will go more in-depth into one-light and two-light setups. Stay tuned!
You could also go back to the previous article to learn more about lighting gear:
Cosplay Photography Techniques (1): Lighting Gear
Receive the latest update on photography news, tips and tricks.
Be part of the SNAPSHOT Community.
Sign Up Now!
About the Author
Working as a photographer mostly on weekdays, Suna always incorporates new photography techniques and provides very well-organised and easy-to-understand explanations on social media such as Twitter.
Cosplayer who is currently involved in cosplay projects such as Fate, Danganronpa and Hatsune Miku. She has won a very good reputation for her scenario-specific photos.
Kanata is a cosplayer as well as a modern artist who specialises in plastic arts. He is famous for the detailed texture of his weapons and protective gear. Kanata is also the official cosplayer for “Kabaneri of the Iron Fortress”.
A publisher that specializes in books and magazines about video, photography and illustrations.


