


EOS 5D Mark IV, EF70-200mm f/2.8L IS II USM, f/9, ISO 100, 1.3s, 200mm
Vance Boo is a Singaporean photographer who specialises in commercial photography. While products and still life photography are right up his alley, he doesn’t shy away when tasked with creating portraits. What might set Vance apart from most other photographers is that he takes the lighting sensibility from product photography and instils them in his portrait setups. Currently, Vance is a photographer with one of Asia’s largest production outfits, Shooting Gallery Asia.
In this article, you will see a series of images Vance has created, and also learn about his thought and shooting processes behind getting the shot.
.jpg )
EOS 5D Mark IV, EF70-200mm f/2.8L IS II USM, f/9, ISO 100, 1.3s, 135mm
What was the idea and concept behind the shoot?
I wanted to try light painting, which is commonly used to create fancy patterns in the shot by dragging the shutter, to allow the light trails to be “imprinted”.
However, I am someone who likes to be non-conventional and often tries to think out of the box. That will lead to more original works.
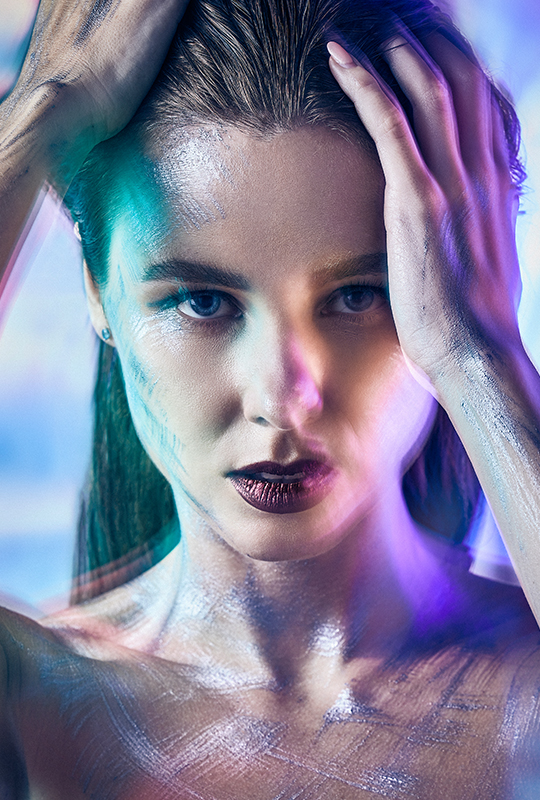
As such, I decided to go with the fundamentals of light painting, but chose a different medium: a highly reflective surface, and moved the reflected light on the surface instead to create the light trails.
For such a non-conventional medium, I decided to give it my all and make the image look more avant-garde to suit the lighting concept.
What were some pre-shoot challenges you faced, and how did you overcome them?
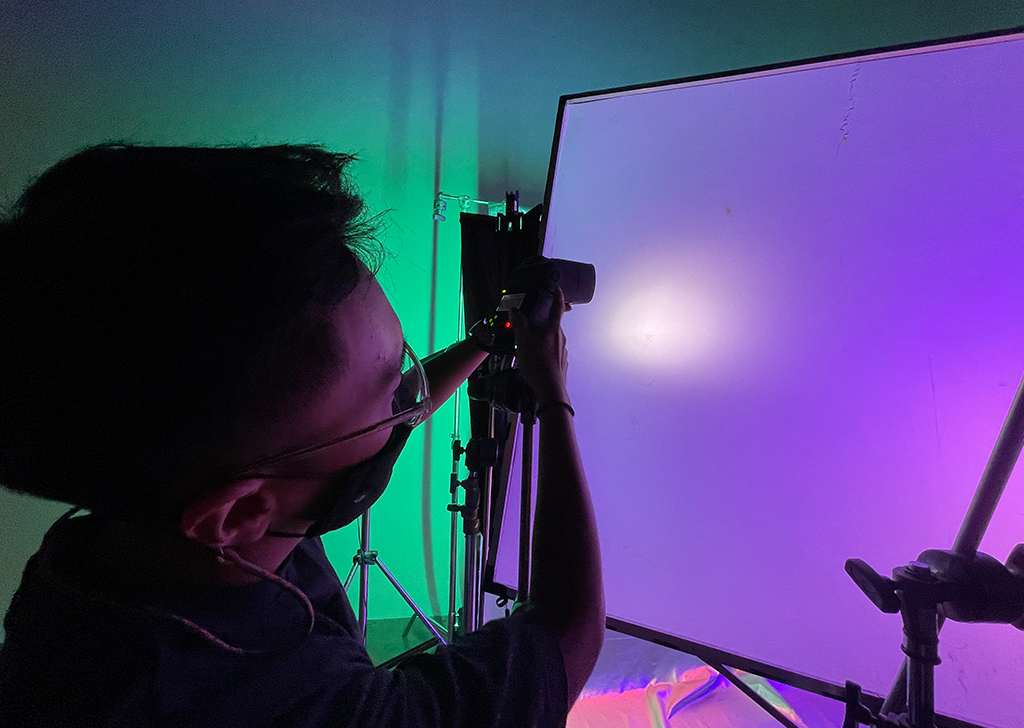
I had the chance to try the Canon Speedlite EL-1 and wanted to find out its capabilities. However, most photographers would know that you need to modify the light quality slightly to avoid the typically harsh lighting that on-camera flashes are known for. While the EL-1's output is strong, I needed to strike a good balance to use it for this shoot.
To overcome this challenge, I decided to modify the light by making it a bigger light source, hence making the light quality softer. To do this, I went with a diffusion frame (a LEE Filter diffusion gel installed on a 4x4 frame). The placement of light was also important in light shaping. By having the Speedlite off-camera, I could control the direction of the light source in relation to the camera to create more contrast and shadows. This will help to create depth and add a three-dimensional feel to the image.
The second challenge I faced was light output - I had to choose the right diffusion gel. I went with a LEE Filter 251, which cuts 1/4-stop of light to minimise loss of light output.
.jpg )
Tell us more about your gear and set up for the shoot.
Gear used: Canon EOS 5D Mark IV, EF70-200mm f/2.8 IS II USM, Canon Speedlite EL-1, Canon RT Transmitter, Nanlite Pavotubes (4ft and 2ft) and LEE Filter 251.
I used a shimmery, highly reflective backdrop to minimise the loss of light that I needed to paint with. It must be flexible enough to be moved and create patterns with the light trailing off it. Therefore, the silver fabric was an ideal choice.
As this whole shot is fully dependent on the long exposure, my model is my medium for light paint as well. As such, she must be able to hold certain body parts very still and move in a very specific direction and timeframe to produce the right effects in-camera. On top of that, she must also work on her pose and expression. As the photographer, I have to direct her by giving her bite-sized information so it doesn't overwhelm her. At the same time, I had to keep her in the right "mood" for the right expressions and emotions.
Why the conscious use of shutter drag?
Light painting is very similar to shutter drag, except in the latter, you introduce movement by either moving the camera or asking the subject to move. By combining both shutter drag on the model and light painting on the background, I was able to create a more avant-garde look to the photo.
.jpg )
EOS 5D Mark IV, EF70-200mm f/2.8L IS II USM, f/9, ISO 100, 1.3s, 96mm
What were you looking out for in the picture?
After the light was set, the main challenge was to direct the model and rehearse the movements with her so that I could get the effects I wanted. I also had to coordinate with my assistant to create movements in the backdrop to get the right light paint patterns. At the same time, I introduced movements in my camera by tapping it, and also in my lens by zooming in/out. All of that had to be within the 1.3-second exposure time frame.
In the final images, I am looking out for the obvious shutter drag/light painting effects, the quality of light on the model's face and body from the EL-1, and also most importantly, her expressions and movement.
What software tools were used for post-processing?
I used CaptureOne 21 for tethering and colour grading, while retouching was done on Adobe Photoshop 2021.
There wasn’t any major retouching required since 95% of the image was already done in-camera, effects and all. All I did for the post-production work was some colour tweaks, white balancing and cleaning up of skin and hair.
What would you have wanted to try to do better?
Overall, I felt like the light painting could be further improved by introducing more RGB lights to create a larger colour spectrum/palette. I could also afford to be bolder in the silver paint makeup, perhaps choosing a more reflective option, to create even more light trails on the skin of the model itself!
For similar articles:


