


Anyone can get great photos from amazing scenery, but it takes a different eye to capture compelling images of scenes where no compelling subject stands out—like if you’re in a forest, surrounded by nothing but trees! Level up your photographic eye and skills with these techniques to try the next time you’re in the forest. (Reported by: Takashi Karaki, Digital Camera Magazine)
EOS R5/ RF15-35mm f/2.8L IS USM/ FL: 15mm/ Manual exposure (f/5.6/ 1/250 sec)/ ISO 800/ WB: Auto
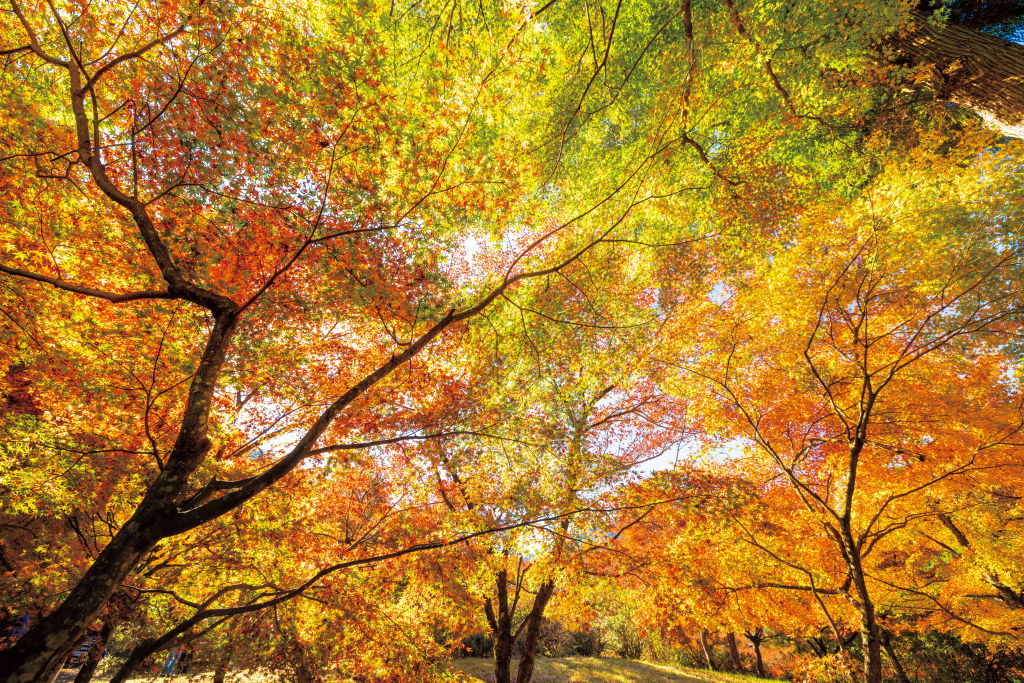
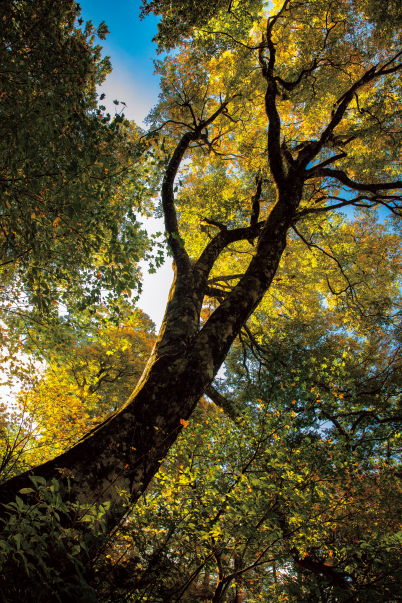
1. Bottom-up shots: Find the convergence point and create a kaleidoscopic composition
EOS R5/ RF24-105mm f/4L IS USM @ FL: 37mm/ f/5.6, 1/40 sec, ISO 800
Have you ever looked through a kaleidoscope? That’s exactly what tall trees clustered together look like when photographed from directly below, especially with their colourful leaves in autumn.
For better visual harmony, borrow from the concept of radial balance: find the convergence point and put it in the centre of the frame.
- Step 1: Look for a group of trees with crowns that overlap nicely.
- Step 2: Put the overlap in the centre of your frame. You’re not done yet.
- Step 3: Turn your attention to the trunks and branches in the frame. Imagine they are lines radiating out from a visual centre. Where is it?
- Step 4: Adjust your shooting position so that you’re shooting directly under this visual centre.
Ultimately, you want to create a clear convergence point, which will create a sense of depth in the image. This convergence point should be where the tree crowns overlap, and it should also coincide with the visual centre of the branches and trunks.
Convergence point not in the centre
The crowns of the trees overlap in different areas, so there isn’t a clear convergence point. The visual centre of the branches is also not in the centre of the frame. These result in a mediocre image.
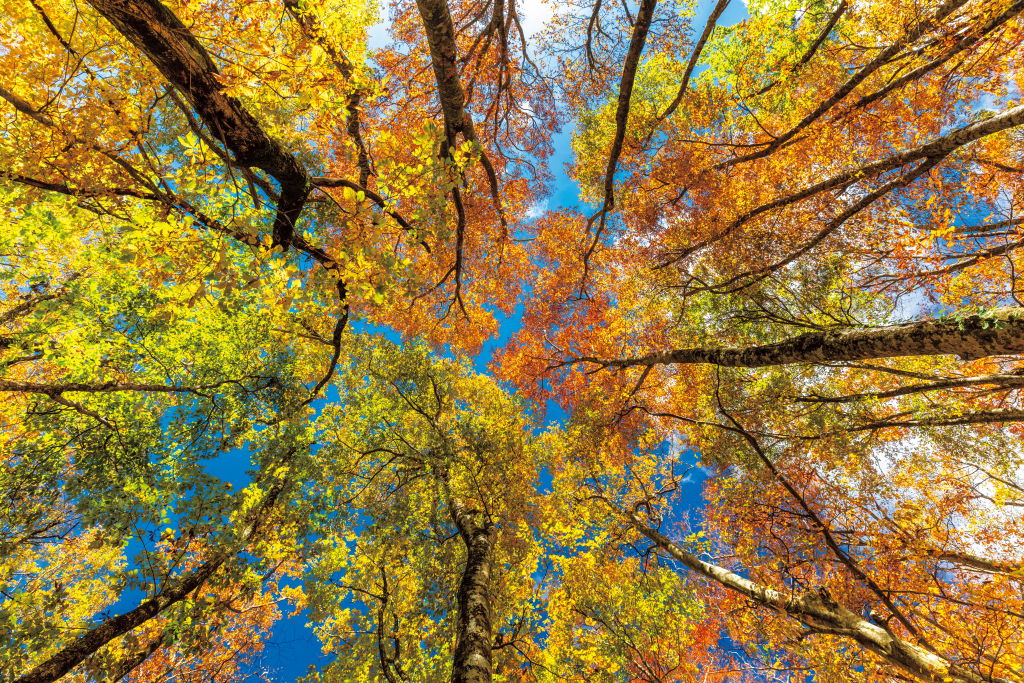
Convergence point in the centre

Here, I have adjusted my shooting position to place the convergence point in the centre of the frame. Like symmetrical compositions, being even the slightest bit off-axis can disrupt the balance, so be prepared to make fine adjustments.
Pro tip: Be prepared to go low
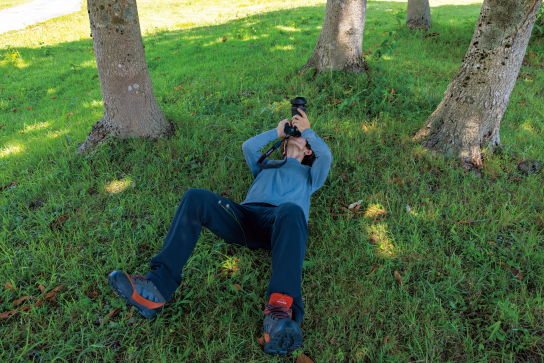
I shot the main image at 37mm as I didn’t want strong perspective distortion at the edges. This also meant having to go lower—I was lying on the ground! If that’s difficult, make use of your camera’s Vari-angle LCD monitor. Put it on a tripod if necessary.
2. Shoot low angle close to a tree to convey its majesty
EOS R/ RF15-35mm f/2.8L IS USM @ FL: 24mm/ f/7.1, 1/125 sec, ISO 250
Some trees have a unique shape that you want to bring out in your photo, like the Japanese beech tree in the photo above with its characteristic tall and straight trunk. To give the tree trunk sufficient visual weight while complementing it with the vibrant autumn leaves, I used an ultra-wide-angle lens (in this case, the RF15-35mm f/2.8L IS USM) and took a low-angle shot from close to the base of the tree, applying diagonal composition.
I placed the tree trunk and branches in the corners of the frame where ultra-wide-angle perspective exaggeration is more prominent. This makes the tree look taller and bigger.
Also see:
Exploring Wide Angle Lenses Part 2: Composition Techniques for Wide-Angle Lenses
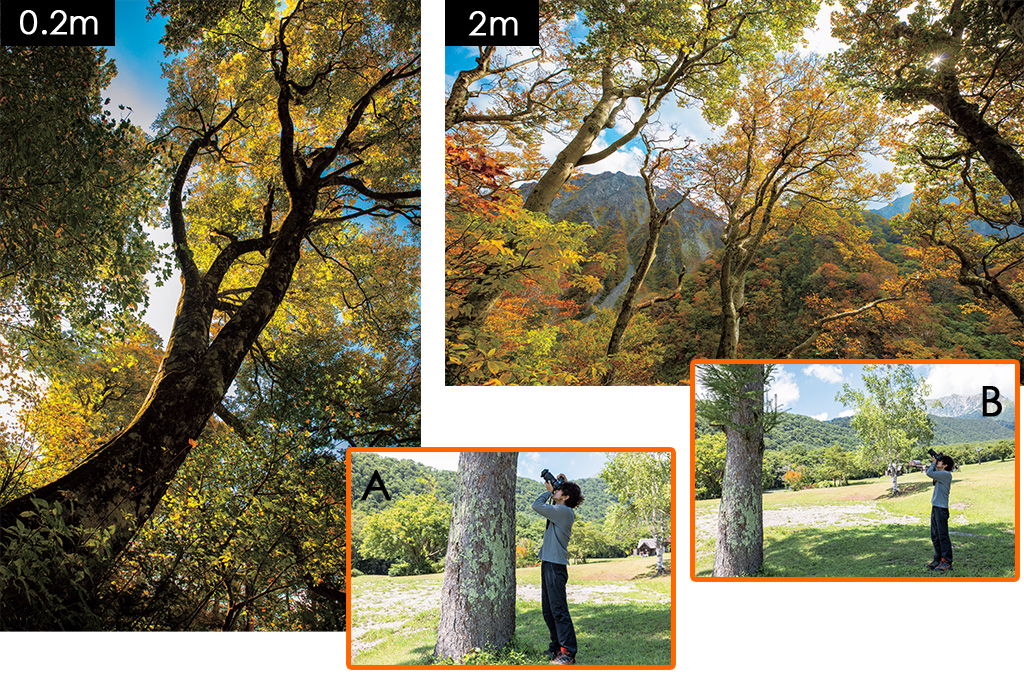
A: Shot as close to the tree as possible at the lens’ closest focusing distance, looking upward.
B: Shot from 2m away. The tree doesn’t look as grand, and its branches don’t seem to spread as far.
3. Bring out the rhythm in the tree trunks
There’s something alluring about an army of tree trunks rising vertically, each one standing in quiet rhythm with the next. Taking a photo that does them justice is the tricky part: it’s so easy to end up with something that looks cluttered!
The key is to remember what makes the scene attractive: the rhythm of the tree trunks. Here’s what you can try:
- Step 1: Look for straight tree trunks.
- Step 2: Use a longer focal length to frame them tightly so that unwanted objects like fallen leaves are out of the frame.
- Step 3: Adjust your shooting angle and composition so that the trunks in the background look neat.
Cluttered composition
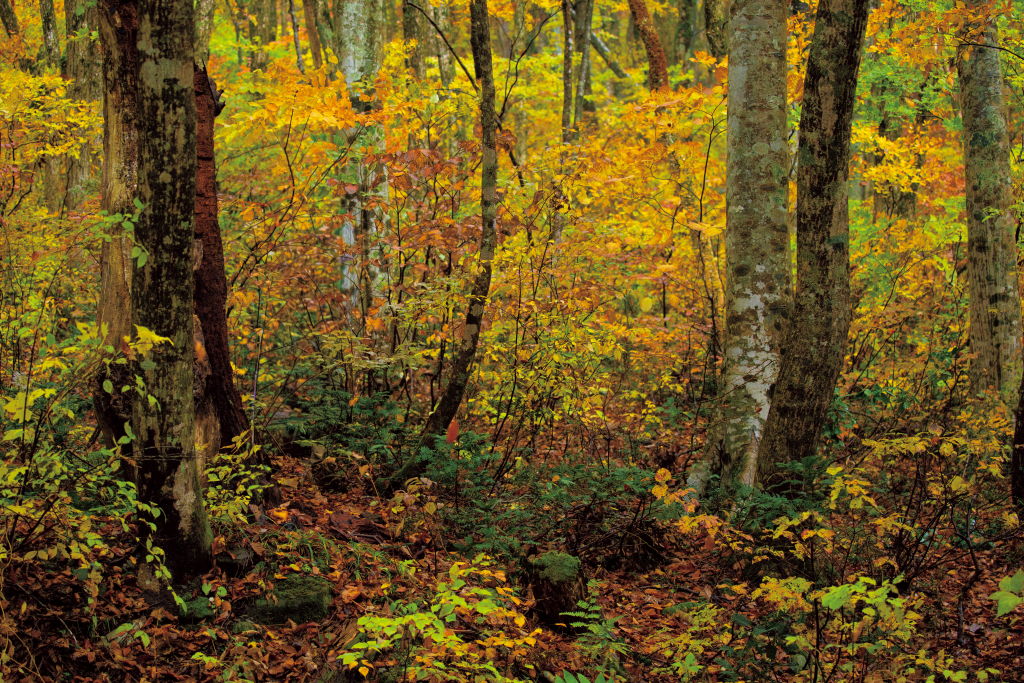
The unappealing shapes of the trunks and the fallen leaves on the ground result in a cluttered composition.
Harmonious composition (has rhythm)
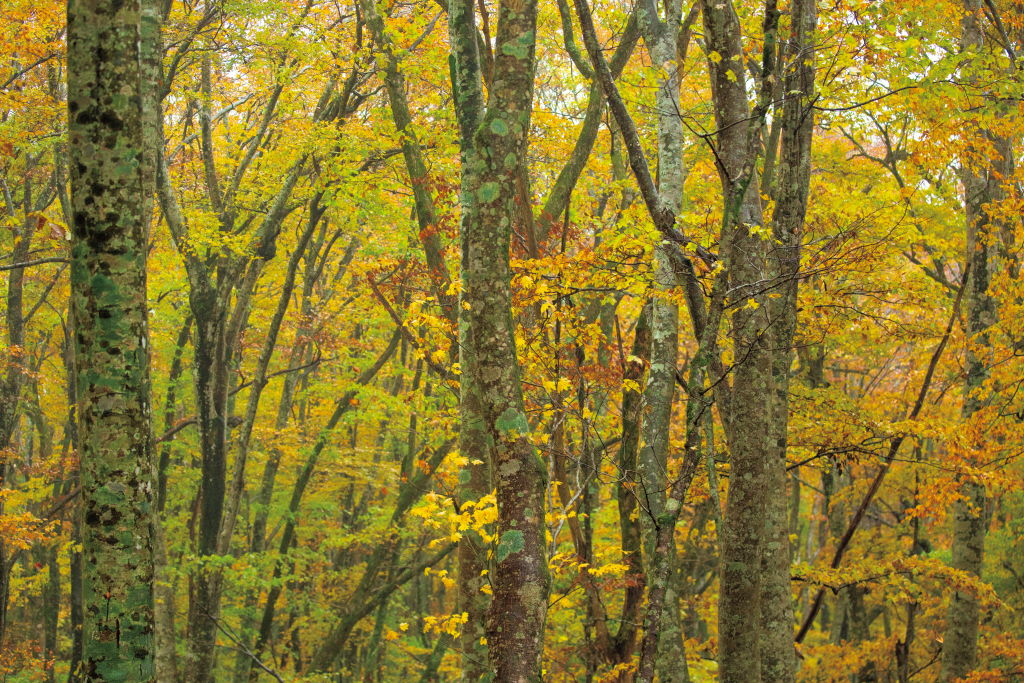
FL: 100mm/ f/4.5, 1/400 sec, ISO 1600
For this shot, I looked for trees with straighter trunks. The lines they create form a natural rhythm against the busy autumn leaves, giving a better sense of harmony.
Know this: Telephoto lenses are good for landscape photography, too!
Most people associate landscape photography with ultra-wide-angle lenses, but a telephoto zoom lens can be useful for zooming into distant scenes across valleys or rivers, or just getting closer to details like leaves and flowers. A super telephoto zoom lens like the RF100-400mm f/5.6-8 IS USM or RF100-500mm f/5-7.1L IS USM will equip you for chance encounters with wildlife, too!
Also see:
Getting Started in Landscape Photography: 5 Things to Know
5 Things to Try with a Telephoto Lens
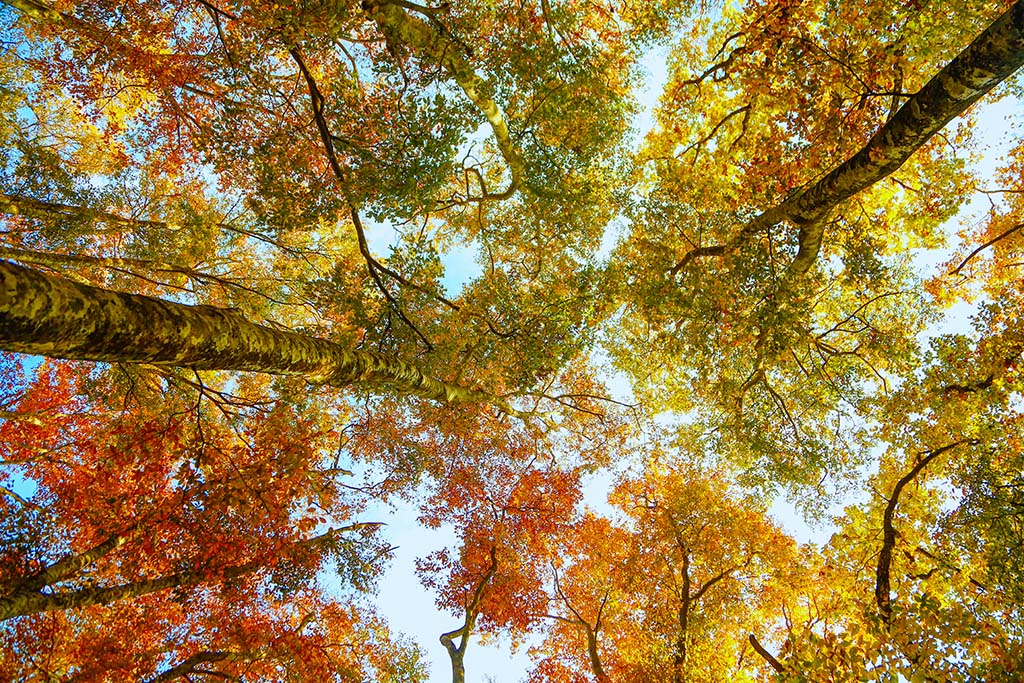
4. Backlit shots: Preserve the blue sky for more vibrant colours
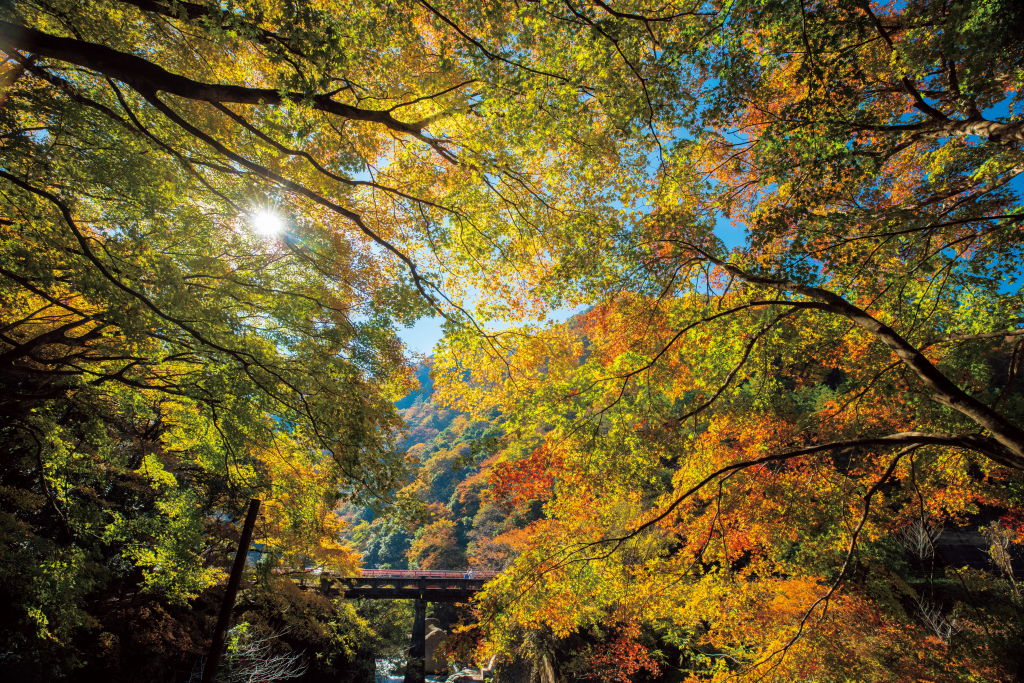
Underexposed to preserve the sky
EOS R/ Ultra-wide-angle zoom lens @ FL: 16mm/ f/7.1, 1/160 sec, ISO 400
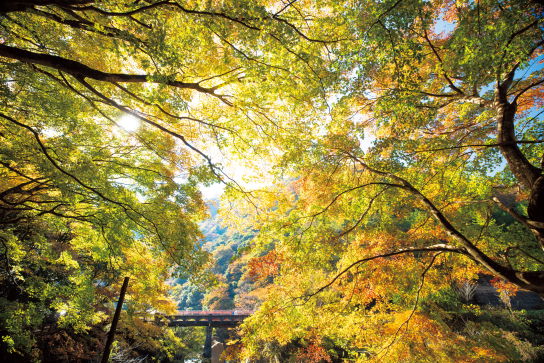
Exposed for the leaves: Sky is blown out; some parts look washed out
Backlight passing through leaves can make their colours look more vibrant. But if you expose for the leaves and blow out the sky, you might end up losing colours instead. In the example above, only the warm tones stand out, making the image look more washed out.
Prevent that by underexposing the shot to preserve the colours in the sky. Having the blue sky in the image complements the autumn leaves and makes the colours look richer.
Post-production: Watch out for red colour cast on tree trunks
To enhance the colours of autumn foliage, many photographers add warmth to their shot or enhance the reds and oranges. This can add an unnatural red colour cast to tree trunks. Neutralise it by applying a radial mask to the affected area and adjusting the colour temperature.
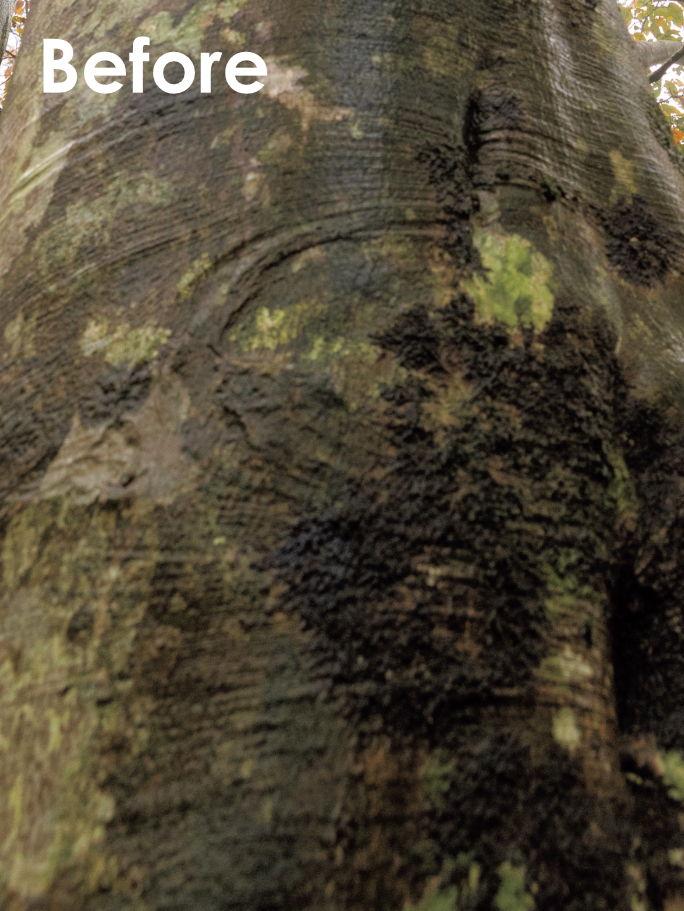
Setting a warmer white balance resulted in a red colour cast on the bark.
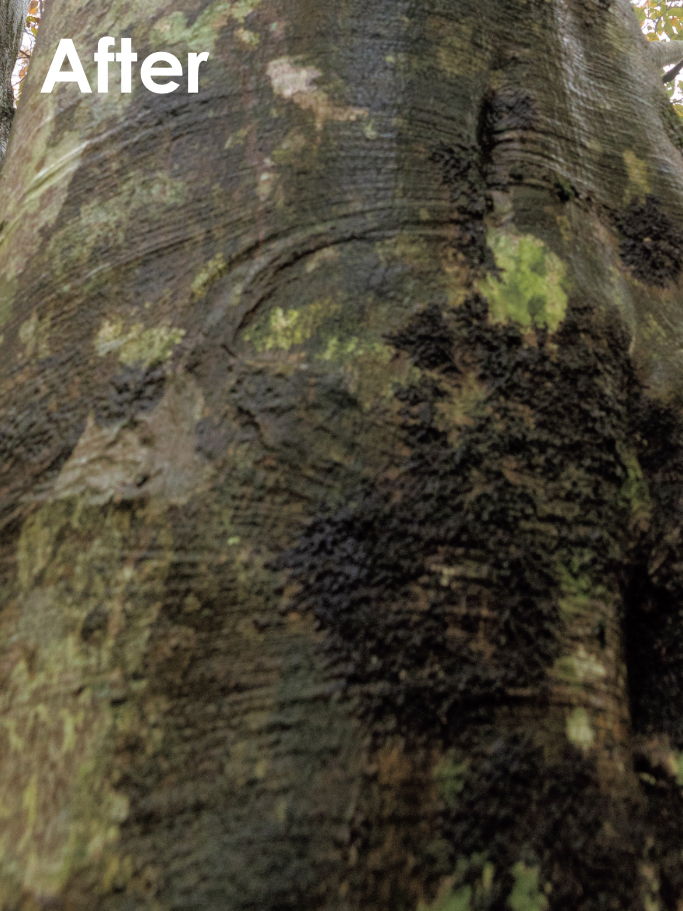
I neutralised the red cast by applying a radial mask on the affected area and making the colour temperature cooler.
Here's a video that might help you see the difference better. It's one of those subtle details that can affect the overall impact of the picture!
About the Author
A monthly magazine that believes that enjoyment of photography will increase the more one learns about camera functions. It delivers news on the latest cameras and features and regularly introduces various photography techniques.
Published by Impress Corporation
After some experience as a sports instructor followed by 10 years in magazine production and editing, Karaki moved to Yonago City in Tottori Prefecture, where he became known for his landscapes of the San’in region of Japan. His works have been published in Amazing Village, a booklet of beautiful Japanese villages produced through a CANON × Discover Japan collaboration in 2017, and his shot of the sea of clouds at Akechi Pass in Tottori Prefecture was among 12 images selected by the Japan National Tourism Organization (JNTO) to represent Japan.
Instagram: @karakky0918


.jpg "trending tips")


.jpg "trending tips")
.jpg "trending tips")

