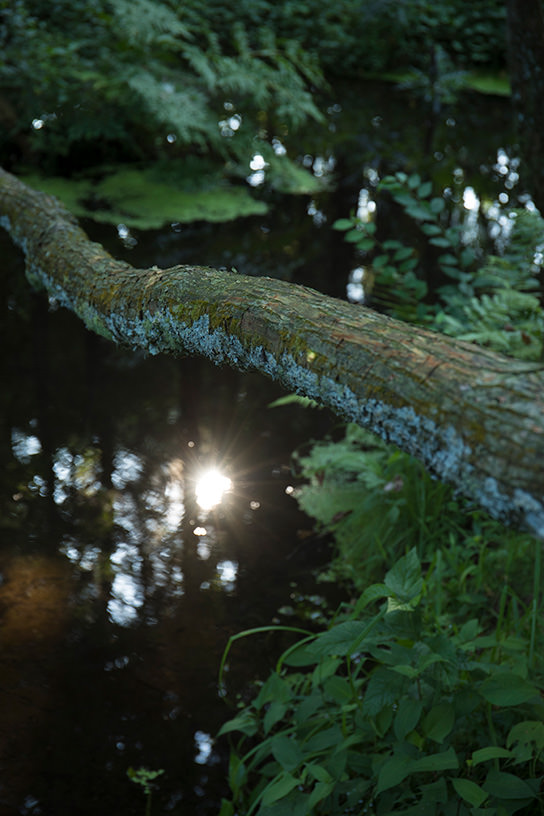
Decisions in Landscape Photography: Front Light or Backlight?
In landscape photography, the direction of light is one of the decisions photographers have to make. Personal preference often plays a part, and influences a photographer’s photographic style. In this article, we learn from two photographers their respective reasons for preferring front lighting and backlighting. (Reported by: Takashi Nishikawa, GOTO AKI)

Front light: Brings out the colours in landscapes

EOS 5D Mark III/ EF24-105mm f/4L IS USM/ FL: 24mm/ Aperture-priority AE (f/16, 1/30 sec, EV+1.0)/ ISO 200/ WB: Daylight
Location: Okitama Cherry Blossom Corridor, Yamagata Prefecture, Japan
Photo by Takashi Nishikawa
This article assumes basic understanding of lighting directions. If you're not familiar with them, you may want to check out:
[Lesson 14] Knowing Your Light Rays
In landscape photography, although not everyone aims to create such an effect, the most classic way of photographing clear blue skies is to depict the colours such that the scene appears to be straight out of a painting.
This photo, taken one morning in early spring, is of a cherry blossom tree along the Dai no Sakura boulevard in the Okitama Cherry Blosson Corridor in Yamagata Prefecture, Japan. The blossoms are of a species called “Beniyutaka”, i.e., “abundant red” and, true to this name, are known for their deep colour. The mountain peaks in the background still bear the last vestiges of snow, which makes quite a marvelous scene.
Shooting with front light in clear weather conditions is the best way to portray the colours of landscapes like this at their loveliest. Photographer Takashi Nishikawa makes it a point to photograph his front-lit landscape images right after the rain, or on a clear, fine day.
Tip: To hide uneven colour tones in the sky, position your subject strategically

EOS 5D Mark III/ EF8-15mm f/4L Fisheye USM/ FL: 15mm/ Aperture-priority AE (f/11, 1/250 sec, EV+0.7)/ ISO 200/ WB: Manual
Photo by Takashi Nishikawa
When you photograph with front lighting, uneven colours in the sky tend to become more obvious the wider the angle you shoot with, even if you don’t use a polarizing (PL) filter. But if you position your subject at exactly where the colour of the sky is at its deepest, just like in the photo above, not only will the sky look more even, the cherry blossoms will appear to have a deeper colour tone too. That is an ingenious way to kill two birds with one stone.
Backlight: Draws viewers’ attention to the light, and leaves them with a lasting impression of it

EOS 5D Mark III/ EF16-35mm f/4L IS USM/ FL: 16mm/ Aperture-priority AE (f/8, 1/250 sec, EV±0) / ISO 400/ WB: Daylight
Photo by GOTO AKI
Front light ensures that light falls onto the entire scene, therefore making visible a rich abundance of details on the photographic subject. Backlight, on the other hand, creates areas of light and shadow, with detail lacking in the latter. The resulting contrast tends to have a dramatic effect.
In places such as forests, the back lighting becomes highly diffused by the trees and foliage, surrounding them with a glow that transforms them from mundane objects into compelling subjects that leave an impression. Subjects with interesting shapes can be depicted as silhouettes by photographing them in back lighting and using negative exposure compensation. Therefore, when you shoot in backlit conditions, it is a good idea to be mindful of light and shadow when you compose your picture and set your exposure settings.
Tip: To draw emphasis to light, manipulate the appearance of shadow areas with exposure compensation

EV-0.3
EOS 5DS R/ EF100-400mm f/4.5-5.6L IS II USM/ FL: 255mm/ Shutter-priority AE (f/18, 1/800 sec, EV-0.3)/ ISO 200/ WB: Manual
Photo by GOTO AKI

EV-1.3
EOS 5D Mark IV/ EF24-70mm f/4L IS USM/ FL: 70mm/ Aperture-priority AE (f/5.6, 1/60 sec, EV-1.3)/ ISO 400/ WB: Manual
Photo by GOTO AKI
Shadows draw attention to light. To control the visual appearance of shadows in your image, use exposure compensation. If creating silhouettes is your goal, carrying out negative exposure compensation up to around EV-2.0 where an adequate portion of the image is black will be enough to draw emphasis to light.
For an example on how to create silhouettes, check out this tutorial:
Super Telephoto Lens Techniques - Wildlife Silhouettes Against the Sun
For another cool effect you can use to draw attention to light, go to our Guide to Creating a Starburst Effect with the Sun.
Receive the latest updates on photography news, tips and tricks by signing up with us!
About the Author
Born in 1972 in Kanagawa Prefecture and graduated from Sophia University and Tokyo College of Photography. Goto published a photo collection work titled "LAND ESCAPES" and is also actively engaged in works such as “water silence” an installation that merges photographs with videos.
A monthly magazine that believes that enjoyment of photography will increase the more one learns about camera functions. It delivers news on the latest cameras and features and regularly introduces various photography techniques.
Published by Impress Corporation
Born in Nara Prefecture in 1965, Nishikawa graduated from the Broadcasting & Movie Department of Visual Arts Osaka Professional Total Creative School. He self-studied photography, and worked at a commercial video production company and a professional photo printing lab before finally becoming a freelance photographer. A member of the Japan Nature Scenery Photograph Association (JNP).


