


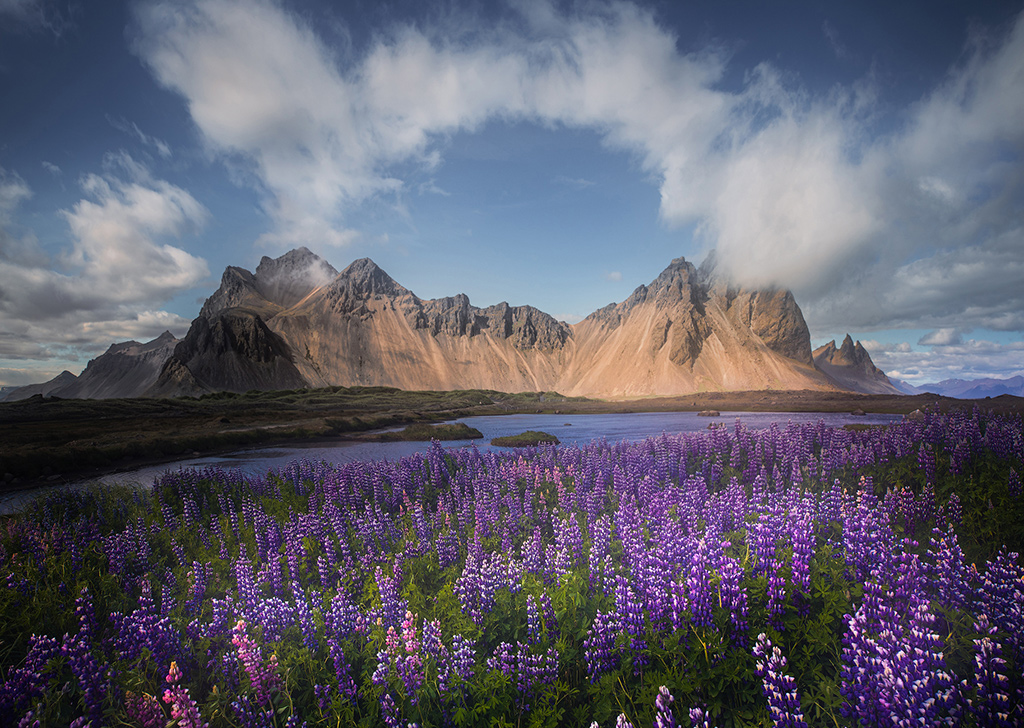
EOS R, EF16-35mm f/2.8L III USM, f/11, ISO 100, 1/100s, 16mm
Ever encountered the issue of taking a landscape photo and you can’t get both the foreground and background in focus? Perhaps the lighting condition wasn’t ideal and you had to shoot at the widest aperture, creating a narrow depth of field which limited the area in focus. Or perhaps the foreground element may have been too near to you and appeared out of focus.
If you have faced this challenge and wish to solve it, then this article is for you!
In digital photography, there is a method called focus stacking. Focus stacking allows you to blend multiple images taken from the same angle but different focusing point, and combine into one photo, creating a picture that’s razor-sharp from the foreground to the background.
Now that you have a better understanding of what a stacked image is and how focus stacking achieves it, let’s look at the process.
Focus stacking the right scene
EOS 5D Mark III, EF16-35mm f/2.8L II USM, f/16, ISO 100, 1/50s, 16mm
If you’re out shooting and have interesting foreground elements that are close to you and the background much further away, you can consider making a focus stacked image. Once you have decided how you want to frame the shot, set your camera up on a tripod for the best result. This is because stacked images work best when the framing is exactly the same between shots.
Camera settings when shooting
Once your camera is set and you have chosen the best composition for the shot, select the optimal aperture on your lens. This is typically between f/5.6 to f/11, depending on the lens you are using. However, if you are constrained by lighting conditions, you may need to capture on the widest aperture. Due to the narrow depth of field, you may need to take more shots.
One important thing to remember is to keep your shutter speed, aperture and ISO constant between shots. This is to prevent differences in exposure between shots, which may affect the blending in post processing.
Set your lens on manual focus, and use Focus Peaking on the rear LCD to help you determine which areas are in focus. Take the first shot and then adjust the focus such that the next element is sharp before taking the next shot. Keep doing so until the furthest subject is in focus and that can be your final capture.
Below are examples of the shots where the focus is on different areas in the photo. From left to right: the focus is boxed in red for foreground, middle ground and background.

Tip: Take a photo of the ground or your hand so you know that’s where the series of images have ended.
For photographers using the R system, you can also activate Focus Bracketing. When this function is turned on, set your lens to autofocus. The camera will increase its focus distance proportionately to the number of shots you’ve set. It will capture the closest subject first and then a series at different focusing distances within the frame. Once all the shots are captured, Focus Bracketing will automatically switch off.
Stacking the shots
After you have loaded the images into your computer, you can use image editing software such as Canon Digital Photo Professional or Adobe Photoshop to stack and blend them.
Step 1: In Adobe Photoshop, load the files into a stack


Tip: Make sure to align the images for a smoother blend!
Step 2: Auto-Blend Layers function
As the individual images will appear as layers on the image, select all the image layers and use the Auto-Blend Layers function. The software will stack the shots and mask out the out of focus regions in each image.


Step 3: Final look
The result is a photo that is sharp from foreground to background.

Here are more examples of focus stacked images:

EOS 5DS, EF16-35mm f/4L IS USM, f/11, ISO 100, 1/20s, 16mm

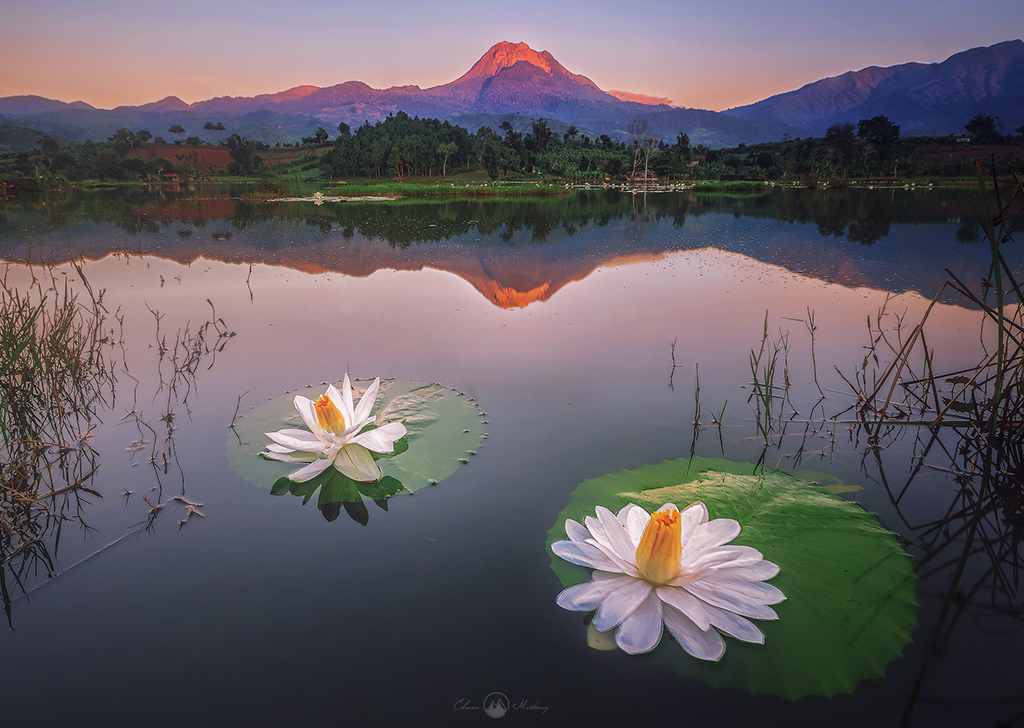
EOS 5D Mark IV, EF24-70mm f/2.8L II USM, f/11, ISO 200, 1/30s, 31mm
Seeing the first rendered result of a stacked image on your computer can be immensely rewarding. But as with any photography techniques, making a great focus stacked image will require some practice, so keep shooting and experiment with various settings to find out what works best for you!
Props to Edwin Martinez, who contributed the beautiful images used in this article.
For similar articles:
2 Landscape Photography Tricks to Transform Your Images On The Spot
Why The EOS R5 is My Ideal Camera for Landscape Photography
3 Camera Features for Fine-tuning Your Landscape Shots to Perfection
About the Author
Travel and Nature Photographer
When one speaks of travel and landscape photography at its apex, his name quickly comes to mind. Well known locally and gaining recognition abroad for his ethereal landscape images, his works exemplify landscape photography as a fine art.
A former medical and corporate professional, Edwin has found his niche and true calling in landscape photography. Still imbibed with the commitment and dedication for always achieving his best, these qualities are now his staples, whether he is shooting for clients or himself, mentoring photographers that join him in the tours that he guides in Iceland, Norway, Canada, the American west and other parts of the world or teaching in workshops under Wide Horizon Photo Adventure (https://www.facebook.com/WideHorizonPhotoAdventure)
Edwin’s excellence has been recognized by brands that support his projects. By virtue of his acknowledged skill and influence, he has been tapped to field test and help in the launch of a number of new photography gear. His works have graced both local and overseas publications and websites. Edwin’s images surely speak the language that draws attention and leaves an indelible mark of excellence.
To connect with or learn from Edwin, visit his social media accounts:
Introductory video: https://youtu.be/EvZrbGv4ENc
Facebook: www.facebook.com/EdwinMartinezPhotography/
Instagram page: https://www.instagram.com/edwinmartinez/
500px: https://500px.com/edwinmartinez
Youtube: https://www.youtube.com/edwinmartinezphotography
Website: https://edwinmartinezphotography.wpcomstaging.com/info/
https://500px.com/EdwinMartinez
http://edwinmartinezphoto.com/

