Need to sell your handmade trinkets or accessories online, but don’t have the time or resources for fancy styling and set-ups? Here’s how you can make them shine with just natural light and one or two everyday items. (Photos by: Takeshi Akaogi, Edited by: Etica)

Accessory photography 101
When photographing small accessories, the key is to make sure that even the tiniest details are well-captured. To do so, try exercising some creativity in how you use light.
Here are two looks you can use to photograph your accessories, each broken down into 4 simple aspects:
Step 1: Intended look
Step 2: Styling
Step 3: Camera and lenses
Step 4: The setup
Look #1: Take inspiration from the feel of the subject

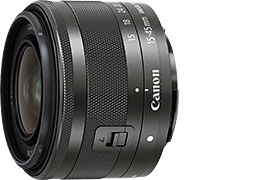
EOS M10/ EF-M15-45mm f/3.5-6.3 IS STM/ FL: 36mm (56mm equivalent)/ Aperture-priority AE (f/5.6/ 1/60 sec., EV±0)/ ISO 1250/ WB: Auto
1. Intended look: Something that conveys a natural, earthy feel, as inspired by the feel exuded by the subject.
2. Styling: Place your accessory on a light-coloured wooden plate.
3. Camera & lens: Any camera + a standard zoom lens.
Tip: You might want to use a macro lens if your object is very small. (Try: EF-M28mm f/3.5 Macro IS STM, EF-S35mm f/2.8 Macro IS STM)
4. The setup

Tripod: Using a tripod allows you to fix the camera position while you make small adjustments to your accessory, such as by adjusting the orientation.
White reflector board: Prevents the tripod and other objects from casting a shadow on your subject, while also letting you adjust the subject’s brightness.
DIY alternatives: A white sheet, or a large piece of white cardboard or paper.
Lighting: Use light from a window as side lighting. The shadow cast will make the subject look three-dimensional and natural. Side lighting also brings out colours better than direct lighting, which can cause colours to look faded!
Tip: You can get better results by diffusing the natural light from your window with lace curtains or blinds.

A: Gentle natural lighting from the window
B: Use a white reflector board to direct light toward the subject from the front to brighten up the subject
Focal length: 36mm (35mm-film equivalent: approx. 56mm)
Aperture setting: f/5.6 (Captures the details of your subject, but also blurs the background slightly for a softer look)
Shooting angle: From a slight angle above the subject, ensuring a good view of the subject.
Look #2: Chic and stylish

EOS M10/ EF-M15-45mm f/3.5-6.3 IS STM/ FL: 45mm (72mm equivalent)/ Aperture-priority AE (f/8.0/ 1/60 sec., EV±0)/ ISO 800/ WB: Auto
1. Intended look: Chic and stylish
2. Styling: On a darker-coloured wooden stool
3. Camera & lens: Any camera + a standard zoom lens. You might want to use a macro lens if your object is very small.
4. The setup

For this shoot, I placed the accessory on a wooden stool. The most ordinary things around you can make great textured backgrounds!
Lighting: Shoot in bright, natural light. Open or close the curtains to adjust the intensity of the light entering through the window, until the lustre of the pearls is just right.

A: Natural light from the window
Focal length: 45mm (35mm-film equivalent: approx. 72mm)
Aperture setting: f/8 (Focuses on the entire subject to properly capture the details)
Shooting angle: From a slight angle above the subject, ensuring a good view of the subject.
Tip: Preventing camera shake
Even if you are using a tripod, the force that you apply when you press the shutter button can cause camera shake or even shift your composition slightly. To avoid this, you could either:
i) Use the self-timer, or
ii) Enable the Touch Shutter, which lets you take the shot with a simple light tap on the LCD touchscreen.

To use the self-timer, press SET, select the timer icon, and then select the number of seconds from the items at the bottom of the screen. For this shoot, I set the self-timer to 2 seconds.
Tip: For more complex setups and awkward spaces where it’s not so convenient for you to be right behind the camera, also consider remote Live View shooting with either the Camera Connect app (smartphone) or EOS Utility software (PC).
For another cool idea on photographing small accessories and trinkets, check out:
How to Create a Sparkly Background with Bokeh Circles for Pretty Trinket Pictures
Need to take product photos that are in focus all the way from the front to the back? You might need to focus stack. Find out more in:
Focus Stacking: A Pro Technique Made Simpler with Focus Bracketing
About the Author
Etica Co., Ltd. not only run photography classes under the name “Tanoshii Camera School", but also edit publications and plan media and events related to cameras and photography, with a focus on themes related to child care, animals and food. Their motto is "Photos make people happy!" and they are engaged in communicating the charm of cameras and photography.
As a photographer, Akaogi works mainly for magazines and writes books introducing photography and practical tips. He also teaches at photography workshops.


.jpg)


