


Digital Lens Optimizer: Taking Image Quality to Greater Heights
The Digital Lens Optimizer (DLO) feature corrects various optical aberrations, distortions, and other causes of image quality deterioration such as the low-pass filter effect. In doing so, it plays a significant role in ensuring that images are of utmost quality. How does it work, and when should we use it? Read on and find out. (Reported by: Kazuo Nakahara, Digital Camera Magazine)

How does the Digital Lens Optimizer work?
There are lots of factors that cause image resolution to deteriorate—lens aberrations, diffraction, the low-pass filter effect, and so on, which Canon holds data on. The Digital Lens Optimizer (DLO) is a software that analyses deficiencies in the image and uses this correction data to restore the image file to ideal quality. Previously available only during post-processing on Canon’s Digital Photo Professional software, it has been in-camera feature since the EOS-1D X Mark II.
On RF lenses and newer EF lenses, the correction data is stored within the lens body and automatically transmitted to the camera body when the lens is attached to the camera. Correction data for most older EF lenses is pre-installed on the bodies of newer Canon EOS cameras including those in the EOS R system.
How does the RF mount benefit DLO? Find out more here.
‘Standard’ and ‘High’ settings to achieve the necessary level of correction
Starting from the EOS R5 and EOS R6, a new ‘High’ setting was included on the DLO, allowing professional users to apply the level of correction that they desired.

The DLO effect level (‘Standard’ or ‘High’) can be selected in the ‘Lens aberration correction’ menu in the SHOOT tab.
When should I use DLO?
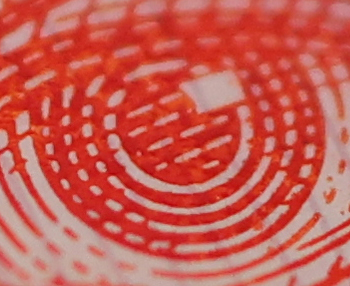
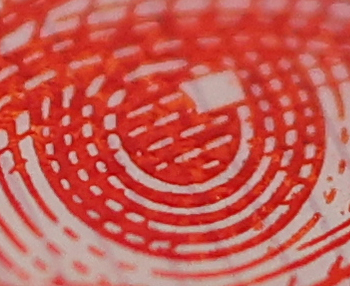
Scene 1: To correct softness at maximum aperture

EOS R5/ RF35mm f/1.8 Macro IS STM @ f/1.8, 1/125 sec, ISO 800, EV +0.7
Off

Many lenses tend to give softer images when wide open, which is why photographers seeking better sharpness tend to stop down slightly from maximum aperture. DLO helps to correct this softness.
Standard
The DLO ‘Standard’ setting not only improved resolution in the details, but also removes the slight residual chromatic aberration.
High
The ‘High’ setting makes the details look markedly sharper and crisper.
Scene 2: To reduce softness in the image edges

EOS R5/ RF24-105mm f/4L IS USM @105mm, f/4, 1/1250 sec, ISO 100
Off

Lens aberrations are more likely to occur at the edges of the image than the centre. Resolution loss and colour bleeding and fringing are particularly obvious.
The colour bleeding and fringing occurs due to transverse chromatic aberration, which happens because different wavelengths of light are focused at different positions among the same focal plane. It cannot be corrected by using a narrower aperture.
Standard

When DLO is set to ‘Standard’, the colour fringing is corrected.
High

The ‘High’ setting improves resolution: notice how the text looks sharper.
Scene 3: To correct the effects of diffraction at narrow apertures

EOS R5/ RF24-105mm f/4L IS USM @61mm, f/22, 1/125 sec, ISO 500, EV +0.7
Off
On high-megapixel cameras like the EOS R5, the softness caused by diffraction can become significant enough to cause concern from about f/11 onwards.
The trade-off relationship between depth of field and diffraction can discourage photographers from deep focusing, especially when maintaining maximum visual resolution is a priority.
Standard

However, resolution is recovered when DLO is set to ‘Standard’…
High

…and recovered even further with DLO set to ‘High’. The results are more natural than if you were to increase the sharpness level during post-processing.

EOS R5/ RF24-105mm f/4L IS USM @24mm, f/22, 45 sec, ISO 100
Off

When taking slow shutter or long exposure shots, the longer the exposure, the narrower the aperture required. This also exposes the image to the diffraction effect, causing details and fine edges to appear soft and muddy.
Standard
DLO restores the detail lost due to diffraction despite the strong urban lights which can intensify the effects of diffraction.
High
The ‘High’ setting improves the resolution even further, allowing you to capture light trails and motion blur without compromising too much on resolution—even if you don’t have an ND filter.
Know this
(1) Effects are only applied to the JPEG file
The in-camera DLO function makes corrections in real time, but its effects are applied only onto JPEG files at the time of recording. To apply DLO to RAW files, you can either;
- Post-process your RAW files in-camera. You can apply DLO (if it wasn’t already enabled) or change the effect level, and the effects will be visible in the exported JPEG image.
- Use Canon’s free Digital Photo Professional (DPP) software to post-process your RAW files on the computer.

The Digital Lens Optimizer slider in DPP allows you to apply DLO effects with varying strengths ranging from effect level 0 to 100.
(2) Use the ‘High’ effect level when image resolution is priority over speed
When using the ‘High’ effect level, the time taken to process the image and record to card is longer, and the maximum continuous shooting speed is lower, hence, it is recommended only when higher image resolution is a priority. For all other times, the ‘Standard’ setting is recommended.
(3) You can correct some lens aberrations separately
If using DLO is not an option during shooting, you can enable the in-camera lens aberration correction functions separately to perform targeted correction of diffraction, chromatic aberration, distortion, and dark image corners (vignetting).
---
Have you enabled DLO? As you check, why not also check for these seven settings that could make your shoot smoother?
Receive the latest update on photography news, tips and tricks.
Be part of the SNAPSHOT Community.
Sign Up Now!About the Author
A monthly magazine that believes that enjoyment of photography will increase the more one learns about camera functions. It delivers news on the latest cameras and features and regularly introduces various photography techniques.
Published by Impress Corporation
Born in Hokkaido in 1982, Nakahara turned to photography after working at a chemical manufacturing company. He majored in photography at the Vantan Design Institute and is a lecturer for photography workshops and seminars, in addition to working in commercial photography. He is also a representative of the photography information website studio9.
.jpg "trending tips")


