


The EOS M5 is the first camera in Canon’s EOS M series of mirrorless cameras to feature a built-in electronic viewfinder (EVF), therefore providing users with the option of shooting DSLR-style. In this article, we learn about the merits of viewfinder shooting, and explore the viewfinder functions and display options available. (Reported by: Kazuo Nakahara)

What can you do with an EVF?
The addition of an electronic viewfinder (EVF) is probably the most significant design change on the EOS M5 (Check out the review here). With this new feature, users now have one more means of previewing and composing their images. It makes the camera body slightly larger, but the delight of having a more direct, intuitive view as you shoot may be well worth it especially if hands-on and traditional is your preferred shooting style.
The EVF on the EOS M5 has a 2.36 million-dot OLED display, providing extremely fine dots of vivid colour. The viewfinder lens is manufactured in-house by Canon based on EOS technology, and boasts of corner-to-corner coverage—the entire image is clear all the way to the edges. At 22mm, the eyepoint is as high as that on DSLR camera. If you wear spectacles just as I do, you will still have a clear view of all four corners of the viewfinder image. You can also adjust the diopter if you need to. It is also worth noting that the EVF is positioned vertically above the optical axis, allowing images to be framed the same way as on a DSLR camera.
Using an EVF to shoot not only allows you to concentrate on photography, but also ensures that shooting is still possible in backlit and bright outdoor scenes which tend to affect the visibility of an LCD panel display. Menu screens and the captured image can be displayed in addition to the preview image, and it is entirely possible to configure settings and playback images without taking your eye off the viewfinder at all.

Compose images effortlessly with the EVF
EOS M5/ EF-M15-45mm f/3.5-6.3 IS STM/ FL: 37mm (59mm equivalent)/ Manual exposure (f/7.1, 1/640 sec)/ ISO 100/ WB: Auto
Pedestrians crossing the road in backlight, depicted as silhouettes. Scenes like this are almost effortless to compose with the use of an EVF.
2 different display formats to choose from
The EVF on the EOS M5 has approximately 2.36 million dots. This capacity to convey an abundance of information is put to good use through the 2 different viewfinder display formats you can choose from.
[Display 1] shows the Live View image across the entire viewfinder screen. This allows you to fully maximize use of the EVF display, but shooting icons such as those indicating white balance settings and the Auto Lighting Optimizer will be overlaid on the sides of the viewfinder image. If you do not fancy that, you may prefer [Display 2], which features a smaller Live View image, with the shooting icons in the borders surrounding the image.
The icons displayed are customisable to some extent, and rotate accordingly when you switch to portrait orientation.
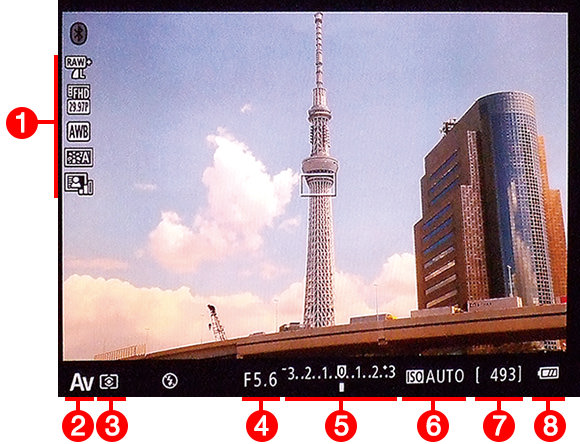
Landscape orientation – [Display 1]
Landscape orientation – [Display 2]

(1) Shooting information/ (2) Shooting mode/ (3) Metering mode/ (4) Aperture setting/ (5) Exposure compensation/ (6) ISO speed setting/ (7) No. of shots remaining/ (8) Battery level
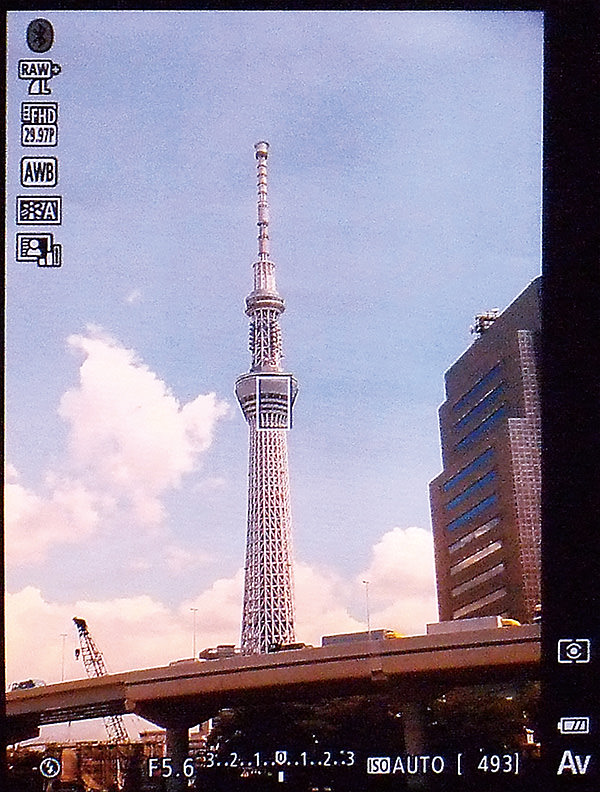
Portrait orientation – [Display 1]
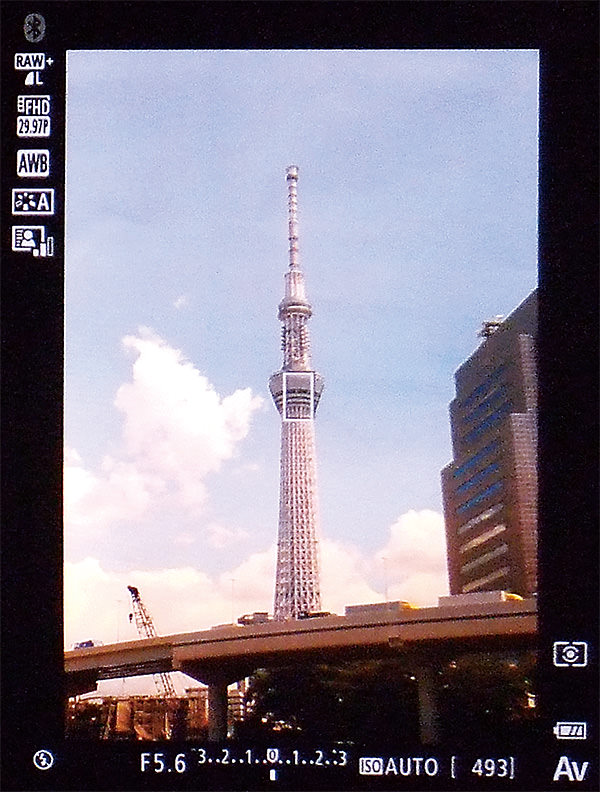
Portrait orientation – [Display 2]
Configuring the viewfinder display format

1. On the [SHOOT2] menu tab, select [VF display format] and press the [SET] button.

2. Select either [Display 1] or [Display 2], and then press the [SET] button.
Customising the information shown in the viewfinder display
Pressing the [INFO.] button allows you to show or hide shooting information displayed in the EVF. To customise what information is displayed, go to [Shooting information display] on the [SHOOT1] menu tab, and then select [VF info/toggle settings].
There are 3 items available on the [VF info/toggle settings] screen, with a tick mark indicating their display status. The first option, [No info display], disables all information display so only the Live View image will be shown in the EVF. The other 2 items, [Custom display 1] and [Custom display 2], are slots for customised displays. For each, you can opt to display “Shooting info”, “Histogram”, “Grid display” and “Electronic level”. Note that if you choose to display both the grid and the histogram, these will also be displayed on the LCD monitor.
Customising the information displayed in the viewfinder

1. On the [SHOOT1] menu tab, select [Shooting information display]. Press the [SET] button.

2. Select [VF info/toggle settings] and then press the [SET] button.

3. A tick next to an item indicates that it will be displayed on the viewfinder. For items 2 and 3 (Custom display 1 and 2), press the [INFO.] button to further configure them.

4. Select the item you want to display and press the [SET] button to put a check mark next to it. Press the [MENU] button to return to the previous screen.
Tip: Recommendations for setting the custom display
Take [Custom display 1] as the display you will most often use. Selecting both “Shooting info” and “Grid display” for this allows you to confirm all sorts of shooting information as well as check your composition as you shoot. Set [Custom display 2] as the display to use for shooting in backlight and similar scenes where obtaining the ideal exposure is a challenging task—make sure that you select the histogram as one of the displayed items.


Receive the latest updates on photography news, tips and tricks by signing up with us!
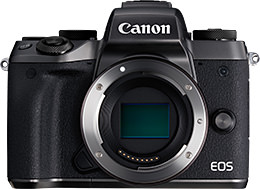
EOS M5 (Body)
EF-M15-45mm f/3.5-6.3 IS STM

Born in Hokkaido in 1982, Nakahara turned to photography after working at a chemical manufacturing company. He majored in photography at the Vantan Design Institute and is a lecturer for photography workshops and seminars, in addition to working in commercial photography. He is also a representative of the photography information website studio9.

A monthly magazine that believes that enjoyment of photography will increase the more one learns about camera functions. It delivers news on the latest cameras and features and regularly introduces various photography techniques.
Published by Impress Corporation


