Food Photography with EOS M10: 2 Ideas for Photographing Jelly Desserts
How can you capture beautiful shots of crystal clear jellies using the EOS M10? Find out more about two different ways to capture appealing photos that are both social media-worthy, and able to draw potential customers on e-commerce sites. (Photos by: Takeshi Akaogi, Edited by: Etica)

Jelly photography 101
When photographing clear objects such as jellies and glass, the key is to show how transparent they are. To do so, take note of the direction of the light, and shoot using side lighting or backlight.
Here are two looks you can use to photograph your jellies, each broken down into 4 simple aspects:
1: Intended look
2: Styling
3: Camera and lenses required
4: Shooting location & settings
Look #1: Pure, dainty elegance

EOS M10/ EF-M15-45mm f/3.5-6.3 IS STM/ FL: 34mm (54.4mm equivalent)/ Aperture-priority AE (f/8.0/ 1/60sec., EV+1.3)/ ISO 200/ WB: Auto
1. Intended look: Emphasis on the daintiness
2. Styling: Keep the overall look simple with lots of white to emphasise the translucence and make the dessert look more dainty
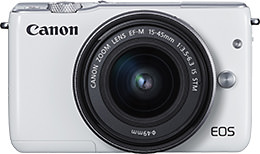
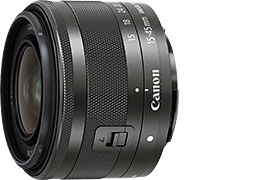
3. Camera & lens: EOS M10 + EF-M15-45mm f/3.5-6.3 IS STM

4. Shooting location & settings

Lighting: Use soft, natural light from the window as backlight to make the jelly glisten. You can also use a white reflector board to reflect light onto the subject from an oblique angle, so that more details can be captured. If it’s a sunny day and the natural light is too strong, you can diffuse it with lace curtains or blinds to create softer lighting.

A: Diffused, soft-looking natural light from the window (backlight)
B: Place a white reflector board across from the subject to reflect light onto it from an oblique angle, so that more details can be captured.
Focal length: 34mm (35mm-film equivalent: approx. 54.4mm)
Aperture setting: f/8 (Focus on the entire subject to properly capture the details)
Shooting angle: From a slight angle above the subject, ensuring a good view of the entire subject.
Look #2: Delightfully colours

EOS M10/ EF-M22mm f/2 STM/ FL: 22mm (35.2mm equivalent)/ Aperture-priority AE (f/2.8/ 1/125sec., EV+0.3)/ ISO 100/ WB: Auto
1. Intended look: Highlight the delightful colours of the jelly.
2. Styling: Choose a cloth with a lively design that matches the colours of the jelly.
3. Camera & lens: EOS M10 + EF-M22mm f/2 STM

4. Shooting location & settings

Lighting: Using side lighting from the window , it will cause the subject to cast a shadow, which makes the subject appear three-dimensional—great for a natural-looking finish. Furthermore, the use of gentle, natural lighting also brings out the colours of your subject in a lovely manner. You can diffuse the natural light from your window with lace curtains or blinds.

A: Diffused, soft-looking natural light from the window.
Focal length: 35mm-film equivalent: approx. 35.2mm
Aperture setting: f/2.8 (Captures the details of the subject that you want to showcase, but also creates a creamy background bokeh for a soft feel)
Shooting angle: From a slight angle above the subject, ensuring a good view of the entire subject.
Tip: Reflector board
A reflector board is used to reflect light on to the subject. By reflecting light, you can eliminate shadows cast by the subject and produce stronger or weaker light. Reflector boards come with either white or silver surfaces. In this case, we used a white reflector board, which is great for producing gentle light. If you do not have the kind of reflector board that is sold commercially, you can use white paper as a substitute.

For more food photography tips and ideas, read:
Take Mouth-watering, Juicy-looking Pastry Pictures With These Light Control Techniques
Food Photography and Styling Hacks
For more tips on product photography, check out:
Basic Techniques for Product Photography
Product Photography with EOS M10: Flowers & Confectionery
Receive the latest updates on photography news, tips and tricks by signing up with us!
About the Author
Etica Co., Ltd. not only run photography classes under the name “Tanoshii Camera School", but also edit publications and plan media and events related to cameras and photography, with a focus on themes related to child care, animals and food. Their motto is "Photos make people happy!" and they are engaged in communicating the charm of cameras and photography.
As a photographer, Akaogi works mainly for magazines and writes books introducing photography and practical tips. He also teaches at photography workshops.


