Landscape Colours: Composing a Romantic Pink & Purple Seascape
There’s something tender about the sight of this sole flower, braving the tide to wait patiently in a sea of romantic pink like a symbol of devoted love. Photographer Minefuyu Yamashita shares about how he composed and captured this shot to make the most of the scene’s colours. (Reported by: Minefuyu Yamashita, Digital Camera Magazine)
This is part of a series of articles where landscape photographers share how they approached a scene and composed, shot and post-processed their images to bring out the beauty of the scene’s colours.

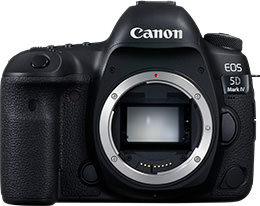
EOS 5D Mark IV/ EF100-400mm f/4.5-5.6L IS II USM/ FL: 153mm/ Aperture-priority AE (f/6.3, 1/100 sec, EV-0.7)/ ISO 400/ WB: Daylight
Location: Nagura Bay, Ishigaki Islands, Okinawa Prefecture, Japan
The inspiration behind the shot
Nagura Bay opens out towards the west, which gives it a great sunset view. On days where there is no wind nor waves, the water surface becomes like a mirror, creating a beautiful reflection of evening colours.
For this image, I aimed to shoot after the sun set below the horizon, at a timing when the sky turned pink and there was hardly any contrast with the water surface. The lack of contrast allowed me to fill almost the entire frame with the same tones, surrounding the silhouette of the tiny mangrove flower in the centre.
Step 1: Use a telephoto lens
Shooting this scene with a wide angle would have included many non-pink elements in the frame, so I used a telephoto lens to crop them out and frame in only the pink parts of the scenery.
Eye level at 50mm
The pink doesn’t look as impactful here.
Step 2: Shoot from a low position to increase the density
The low position achieved two things when combined with the long focal length (153mm):
1. It allowed the shallower depth of field from the long focal length to put the details of the sea surface in the foreground out of focus. This foreground is rendered as pastel coloured bokeh, creating a softer look.
Learn about how else you can use the naturally shallow depth of field of a telephoto lens in:
How Do I Effectively Use Foreground Bokeh on a Telephoto Lens?
2. The low position captures more depth in the scene, which enables a stronger telephoto compression effect on the sea surface. This increases the density of the pinks in the frame.

A mini tripod like this one is useful for low position shoots.
You can use a similar technique to make a scene more immersive. See:
Creating a Captivating Scene with Telephoto Leading Lines
Step 3: Set WB to ‘Daylight’ to reproduce the pinks without an orange cast
You may have learned to change the white balance to ‘Cloudy’ or even ‘Shade’ when shooting sunsets. In normal circumstances, the ‘Cloudy’ setting is indeed ideal for capturing the amber tones of sunset. However, here, adding those amber tones on top of the natural pink would cause the overall image to look orange—not what we want.
When WB is set to ‘Cloudy’

Notice how the ‘Cloudy’ setting intensifies the amber tones.
I changed the white balance setting to ‘Daylight’ to preserve the pink tones as they were. Some light maroon tones were also captured, and they add a sense of calm and balance to the picture.
Learn more about controlling colour tones with White Balance Correction here:
How to Render Colours with the White Balance Correction Function
Learn more about composing with colours in mind in:
How Do I Use Colour Accents to Draw Attention to a Subject?
Understanding Colour Theories: A Photographer-Friendly Guide
How to Create Dreamy, Colourful Portraits with Foreground Bokeh
Landscape Colours: The Subtle Beauty of a Waterfall in Blue & White
One location can have countless photographic possibilities, even if we just aim for the sunsets! Here are more images of the same place and the stories behind them:
Reflections: An Endless Seascape at Sunset
A Dazzling Golden-Blue Sky at Sunset: In-Camera and Post-Processing
Receive the latest update on photography news, tips and tricks.
Be part of the SNAPSHOT Community.
Sign Up Now!About the Author
A monthly magazine that believes that enjoyment of photography will increase the more one learns about camera functions. It delivers news on the latest cameras and features and regularly introduces various photography techniques.
Published by Impress Corporation
Born in 1979 in Aichi. After gaining experience in jobs such as interior and graphic designing, Yamashita became an independent photographer in 2011. His works have been used in many calendars.


