


Camera Functions that Transform Your Photos Instantly (1): The Basics
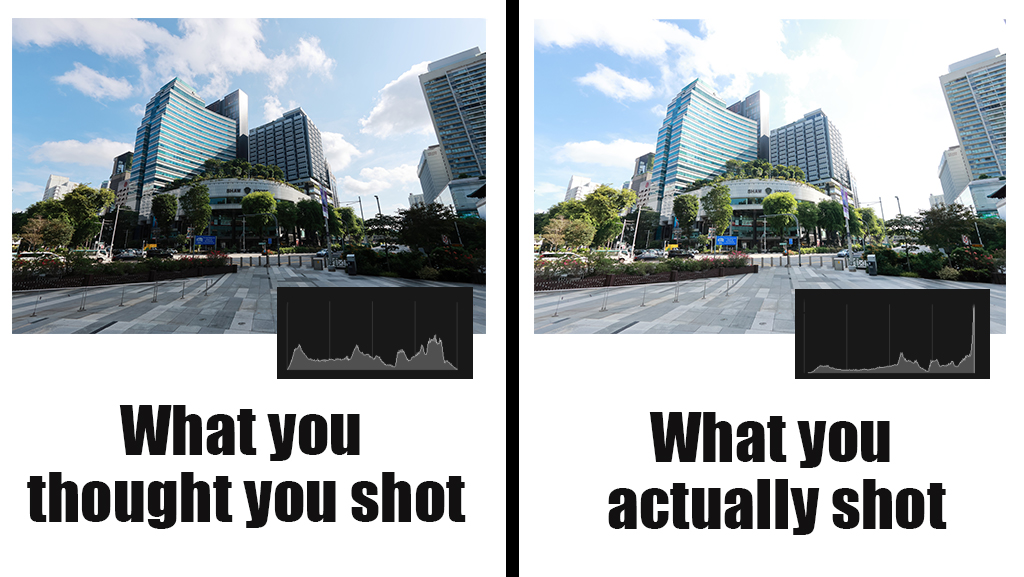
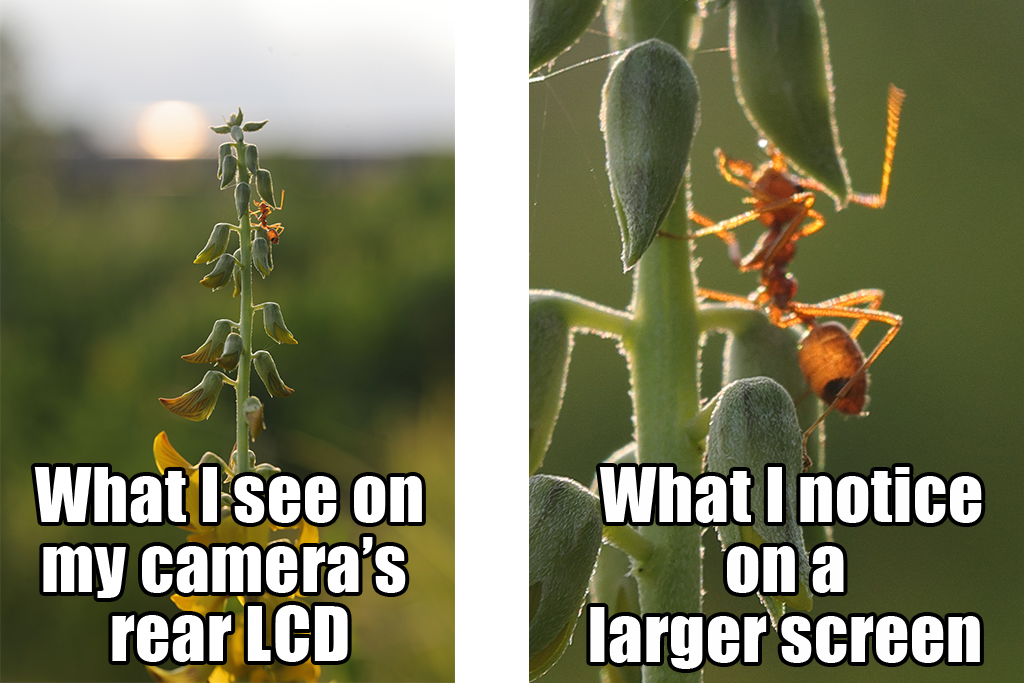
There’s something immensely satisfying about nailing a shot in-camera—the kind that looks good enough to share even with minimal to no post-editing. And yet, sometimes, when we port the images in and look at them on a bigger screen, we’re awakened to the crushing gap between what we thought we got, and what we actually got.
Here in Part 1 of a 2-part series, we share some useful camera features that will help minimise exposure and composition mistakes (and up your level of satisfaction). In Part 2, we will explore the fun, creative features that will spice up your images and inspire your artistry.
1. Grid display and electronic level

Use them to:
- Maintain horizontality and verticality
- Help with composition
Unlike the “Dutch angle”, which is a creative composition technique, our tilted shots are mostly unintended. However, both have the same effect: making viewers feel disoriented or uneasy!
While tilt can be corrected in post-processing, it will crop your image. This can change the composition significantly if the tilt was severe, and wide-angle shots lose impact.
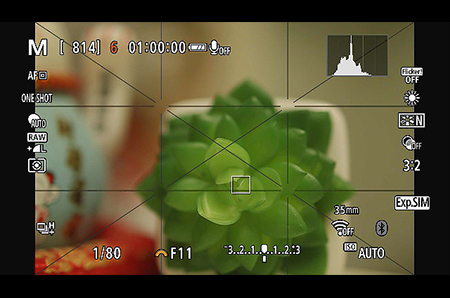
You can avoid that by using the grid display and electronic level when you shoot. They will help you keep horizontal and vertical lines straight and the right and left side of the camera level.

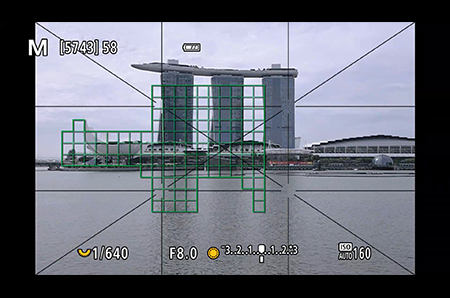
The grid is a useful composition aid, and not just for the rule of thirds or diagonal compositions! Here, we’ve used it to check symmetry and ensure a level horizon.
How to enable the grid
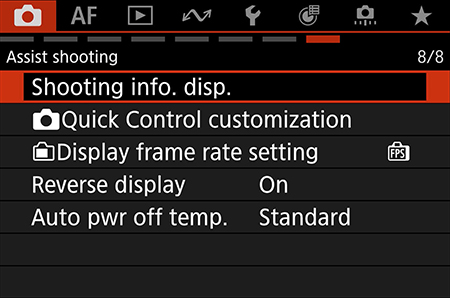
Step 1:
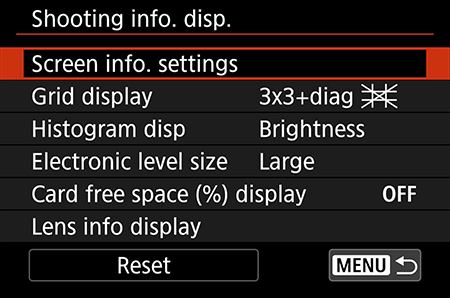
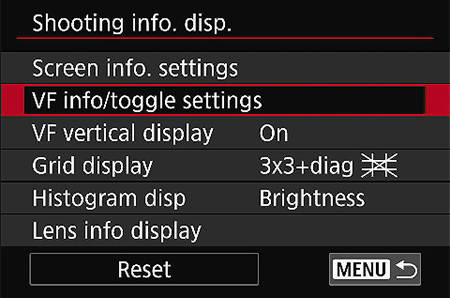
Go to the red menu. Look for and select “Shooting info. disp.”
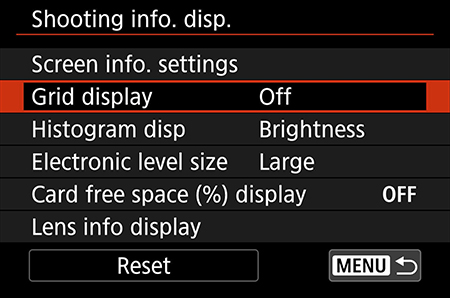
Step 2:
Select “Grid display”.
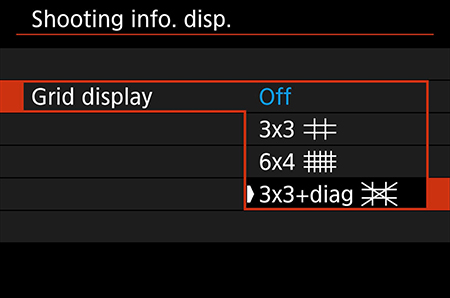
Step 3:
Select your desired grid display. Press SET.
Done!
How to enable the electronic level
Step 1:
Go to the red menu. Select “Shooting info. disp.”
Step 2:
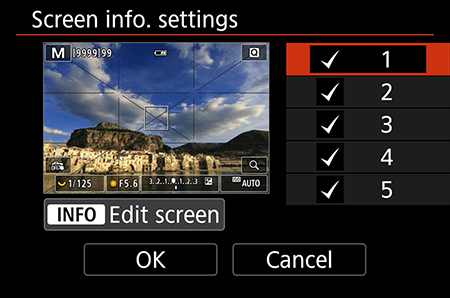
Select “Screen info. settings
Step 3:
Select the display screen(s) you want the electronic level to be displayed on. Press the INFO button to edit it.
Pro tip: When you’re shooting, you can use the INFO button to toggle between different overlays.
Step 4:
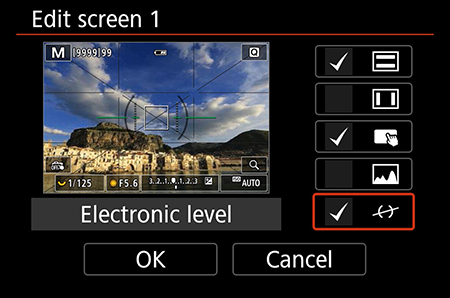
Tap or press the “Set” button to check the box next to the electronic level icon.
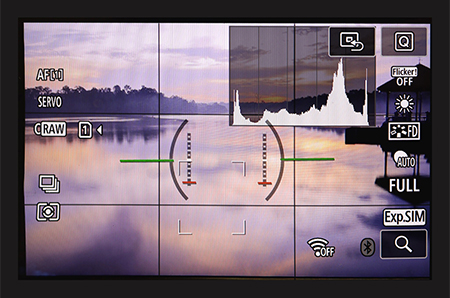
Complete! The lines in the middle will turn green when the right and left sides of the camera are level.
To see the electronic level in your EVF display,
choose “VF info/toggle settings” and repeat Step 3 and Step 4. Note: The first VF screen cannot be edited.
Also check: Are you pressing the shutter button too hard?
There are different reasons why we keep shooting tilted images. Sometimes, it’s the way we hold the camera: the grid and electronic level should help you check for that. If your images still keep ending up tilted despite careful composition, check if you’re pressing the shutter button so hard the camera moves!
2. Histogram
Use it to:
- Get a more accurate idea of image brightness
- Ensure you don’t clip shadows or highlights
Mirrorless cameras are cool because they let you preview your exposure settings (exposure simulation) even when shooting through the viewfinder. However, what you see can be affected by your display brightness settings and other environmental factors, such as shooting under strong sunlight. The undesired outcome: clipped highlights or shadows that can’t be recovered even if you shot in RAW.
For the most accurate idea of image brightness, turn on the histogram display and learn to understand it. That will help you expose the shot better, whether you intend to edit it further or share it straight out of the camera.
Know this: Your Picture Style and white balance settings affect the histogram
Picture Styles and white balance change the contrast and saturation, etc., which are reflected on the histogram. This is so even when you’re recording only RAW, not RAW+JPEG, because the camera derives a JPEG file for the LCD/EVF preview.
To see a histogram closer to your RAW file, use a flatter Picture Style such as Neutral.
With RAW, you’ll probably have slightly more allowance to recover details than the histogram suggests. That’s better than losing them forever!
How to enable the histogram

Step 1:
Go to the red menu. Select “Shooting info. disp.”
Step 2:
Select “Screen info. settings
Step 3:
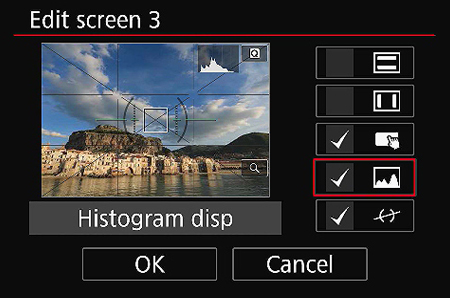
Select the display screen(s) you want the histogram to be displayed on. Press the INFO button to edit it.
Pro tip: When you’re shooting, you can use the INFO button to toggle between different overlays.
Step 4:
Tap or press the “Set” button to check the box next to the histogram icon.

Complete!

To see the histogram in your EVF display, choose “VF info/toggle settings” and repeat Step 3 and Step 4. Note: The first VF screen cannot be edited.
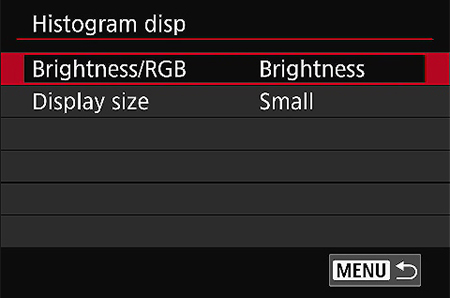
The “Histogram disp.” Menu lets you change the histogram size and display an RGB histogram instead.
The smaller histogram display looks like this.
Also see:
Understanding Dynamic Range: How to Avoid Unnecessary Blown Highlights
#Hellofrom Hong Kong: Breathtaking Views from Hong Kong’s Highest Peak
3. Highlight tone priority
Use it to: Preserve highlight details in high contrast or bright high-key scenes.
With digital photography, it's generally more difficult to recover details from overexposed highlights compared to underexposed areas.
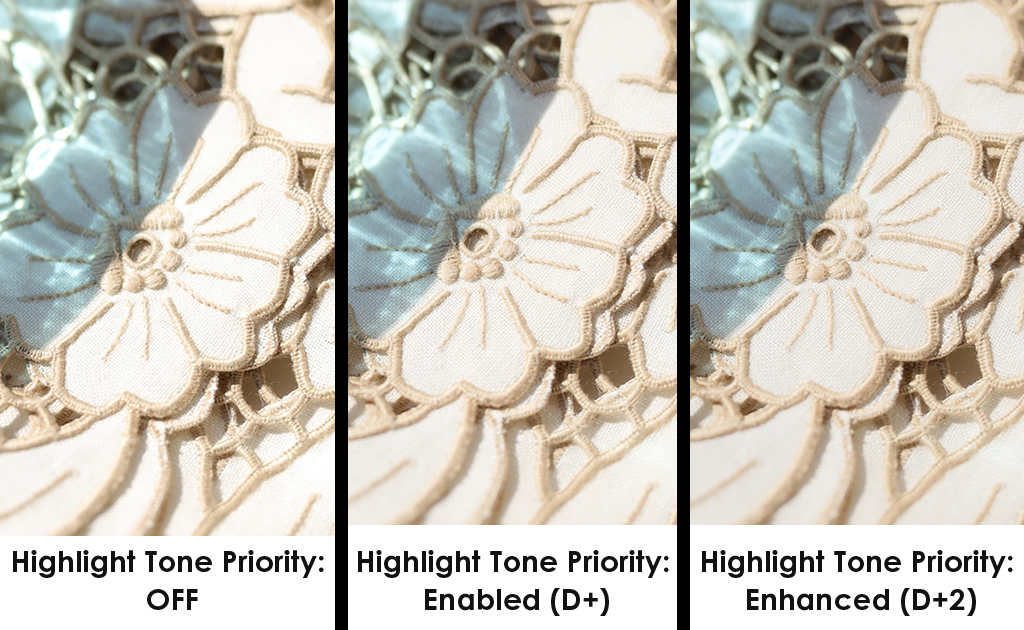
As its name suggests, Highlight Tone Priority preserves highlight details in bright areas to ensure smoother, more natural-looking tonal transitions. It does so by mapping the image data in a way that slightly expands the dynamic range of highlights, and affects RAW files as well as JPEG images. This makes it different from the Auto Lighting Optimizer, which has similar effects but only affects JPEG files.
The following video gives a clearer idea of the difference Highlight Tone Priority makes:
How is Highlight Tone Priority different from Auto Lighting Optimizer?
| Highlight Tone Priority | Auto Lighting Optimizer | |
| What it does | Protects highlight details | Selectively adjusts very bright/dark areas of high contrast images. This achieves more evenly lit results so you lose less shadow/highlight detail |
| Recording mode | Works with both RAW and JPEG shooting | Works only with JPEG shooting, but can be applied to RAW files processed in Canon’s Digital Photo Professional (DPP) software |
| Limits on settings? |
|
|
| Face recognition? | Cannot recognise faces | Can recognise faces and optimise brightness accordingly |
| Other things to note | Might cause increased noise in the shadows |
|
How do I enable Highlight Tone Priority?
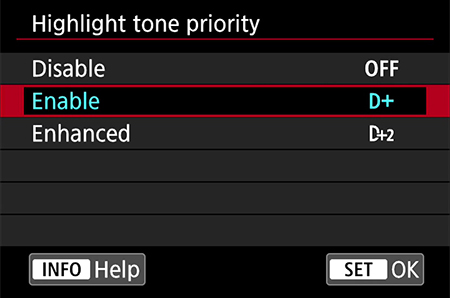
It’s usually somewhere in the red SHOOT menu. You have two effect levels to choose from.
Also see:
3 Camera Features for Handling Highlight and Mid-tone Details
4. Magnify
Use it to: Check focus and ensure precise focusing
Our small camera LCD screens can be rather forgiving on blurred and off-focus images, especially when the subject is small in the frame. It will be too late for second chances if you only notice when you’re home, so use the Magnify function to ensure you nail focus before you leave the scene!
You'll probably have noticed the magnify button that, on most cameras, lets you zoom into details in image playback mode. But did you know that you can magnify the image before you take the shot, too?
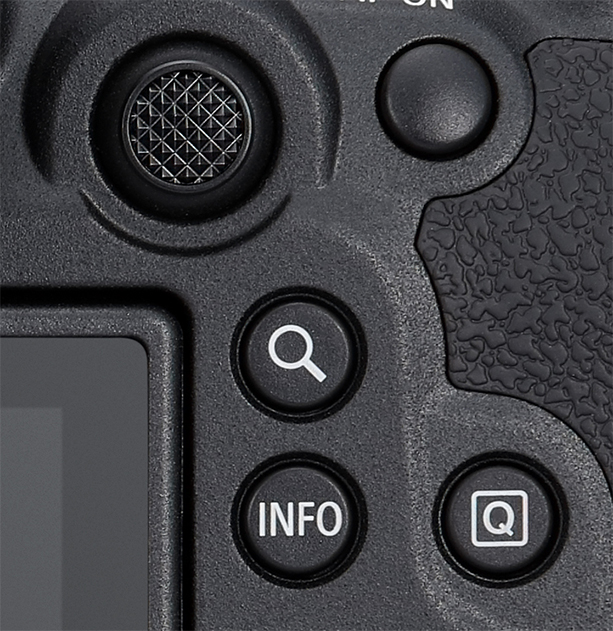
Some cameras like the EOS R6 Mark II have a dedicated Magnify button that works during both playback and preview.
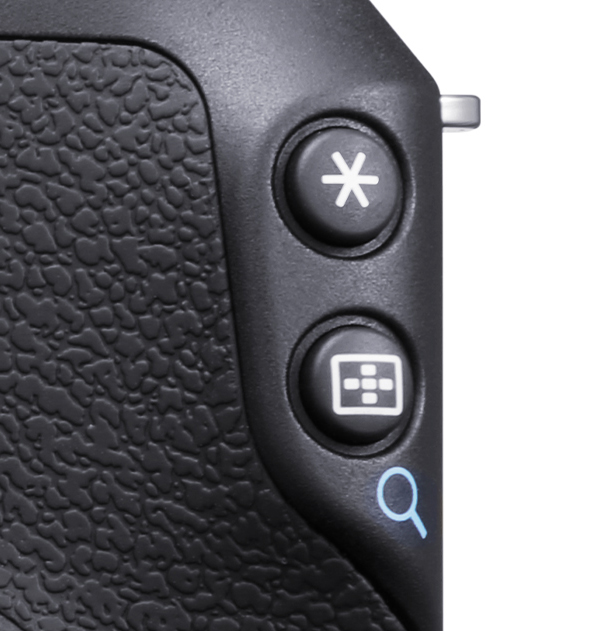
A magnifying glass icon below a button indicates that it functions as a Magnify button only in Playback mode. But don’t fret: you can customise a button to magnify details in Live View mode, too.
Pressing the (assigned) Magnify button in preview mode zooms into the area you have placed the AF frame on. You can toggle between 5x zoom, 10x zoom, and no zoom.
How to assign a button to magnify in Live View?
Step 1:
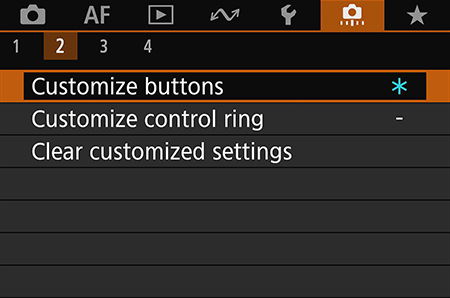
Look for “Customize buttons” in the orange menu.
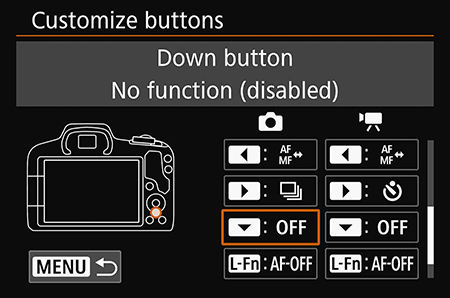
Step 2:
Choose a button to assign the function to and press SET.
For purposes of this article, we chose the down button, which has no other function in Live View shooting on the EOS R50.
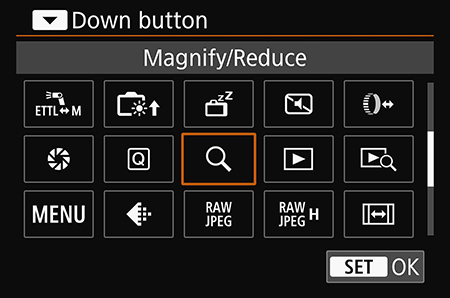
Step 3:
Find and select the magnifying glass icon. Press SET.
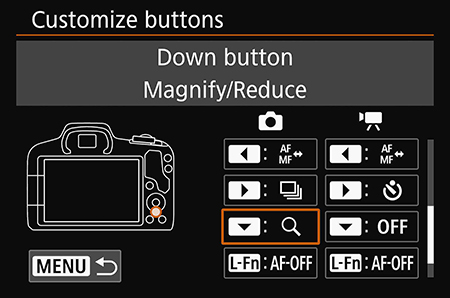
Step 4:
We have successfully assigned the down button to the magnify/reduce function.
Pro tips: What else to do to get better focus
- Are you using the best AF area mode for the scene?
For more precise autofocus control, choose Spot AF or 1-point AF. For even more control, consider manual focusing. Also see: 5 Tips for Better Subject Detection and Tracking
- Use a higher f-stop for macro and close-up shooting
The depth of field becomes much shallower during close-up shooting, making it hard to ensure the subject is sufficiently in focus. Try f/11 or f/16 for a start. Use depth of field preview to check the actual depth of field. We also recommend using a flash, which helps to freeze movement as well as ensure sufficient lighting.
- Use manual focus
Manual focusing gives you maximum control over your focus—give it a try especially for static subjects. Use focus peaking, the Focus Guide, and the Magnify function to help.
More useful focusing tips in:
Touch & Drag AF Customisations for Better EVF Shooting
7 Photographers Share: AF & Drive Settings I Switch Based on the Scene

